The OrcaSlicer setup wizard is a short sequence that runs the first time you open the program and picks your printer and filament profiles. It takes about two minutes. This lesson walks through every screen in OrcaSlicer 2.4.2, with a fresh install on macOS, so you know what each choice does.
What does the OrcaSlicer setup wizard ask you?
It asks six things in a fixed order: a login region, your printer, your filaments, whether to turn on Stealth Mode, and whether to install the Bambu Network plug-in, followed by a Finish button. After Get Started on the welcome screen, each page has Next and Back buttons, so you can step back and change an earlier answer before finishing.
If you have not yet installed the program, start with OrcaSlicer for beginners, which covers a safe download. If you are new to the idea of a slicer, read what a slicer is first.
1. Choose your login region
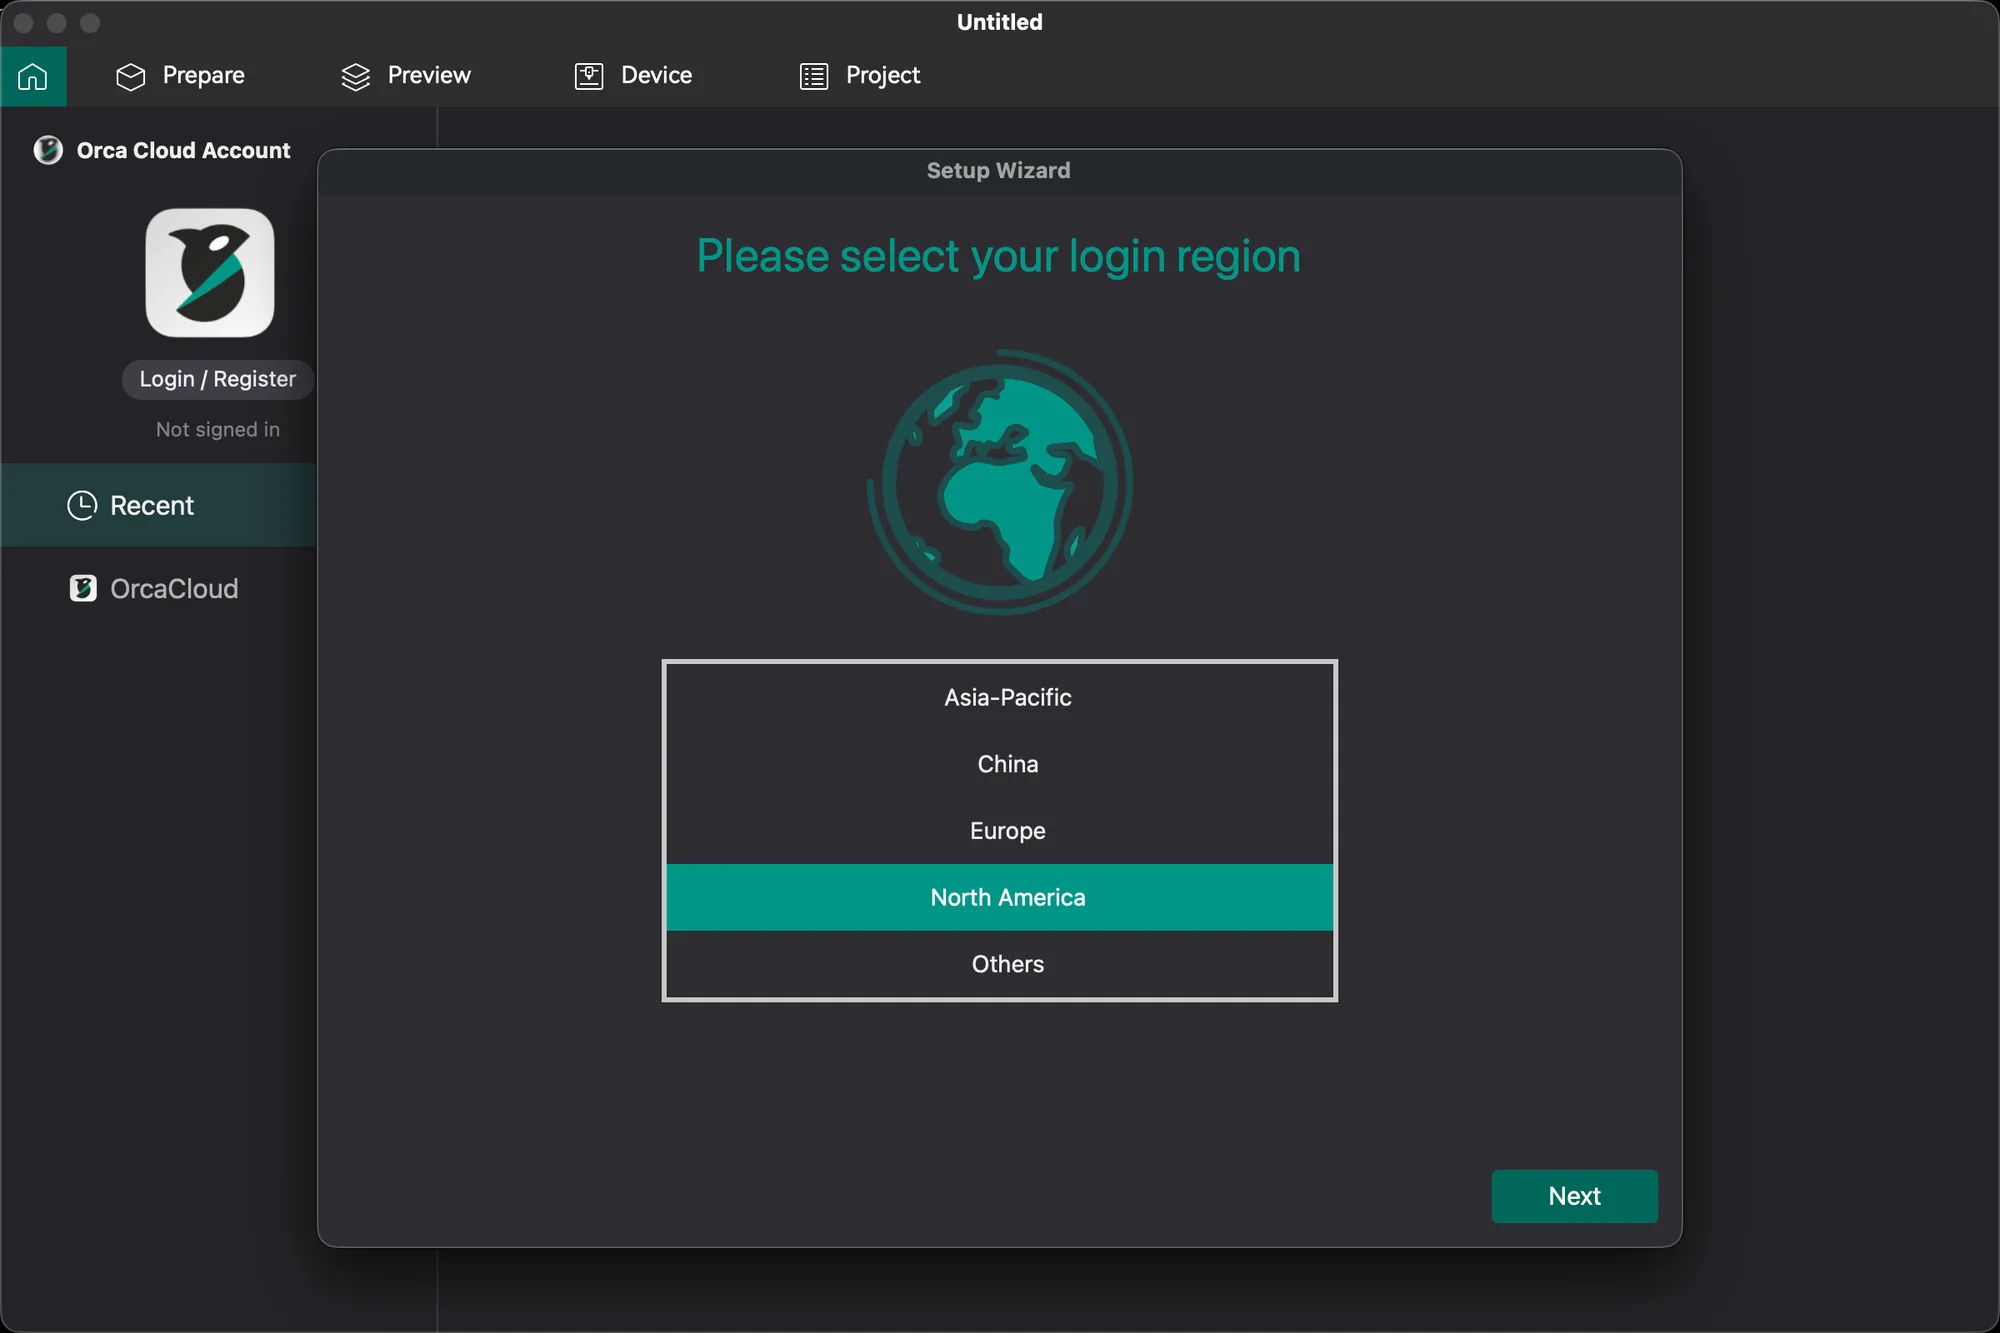
The first real question is Please select your login region, with five options: Asia-Pacific, China, Europe, North America and Others. This relates to the optional Orca Cloud account (the home screen shows a Login / Register button and "Not signed in"), not to your printer or language. We chose North America and pressed Next. You do not need an account to slice.
2. Pick your printer
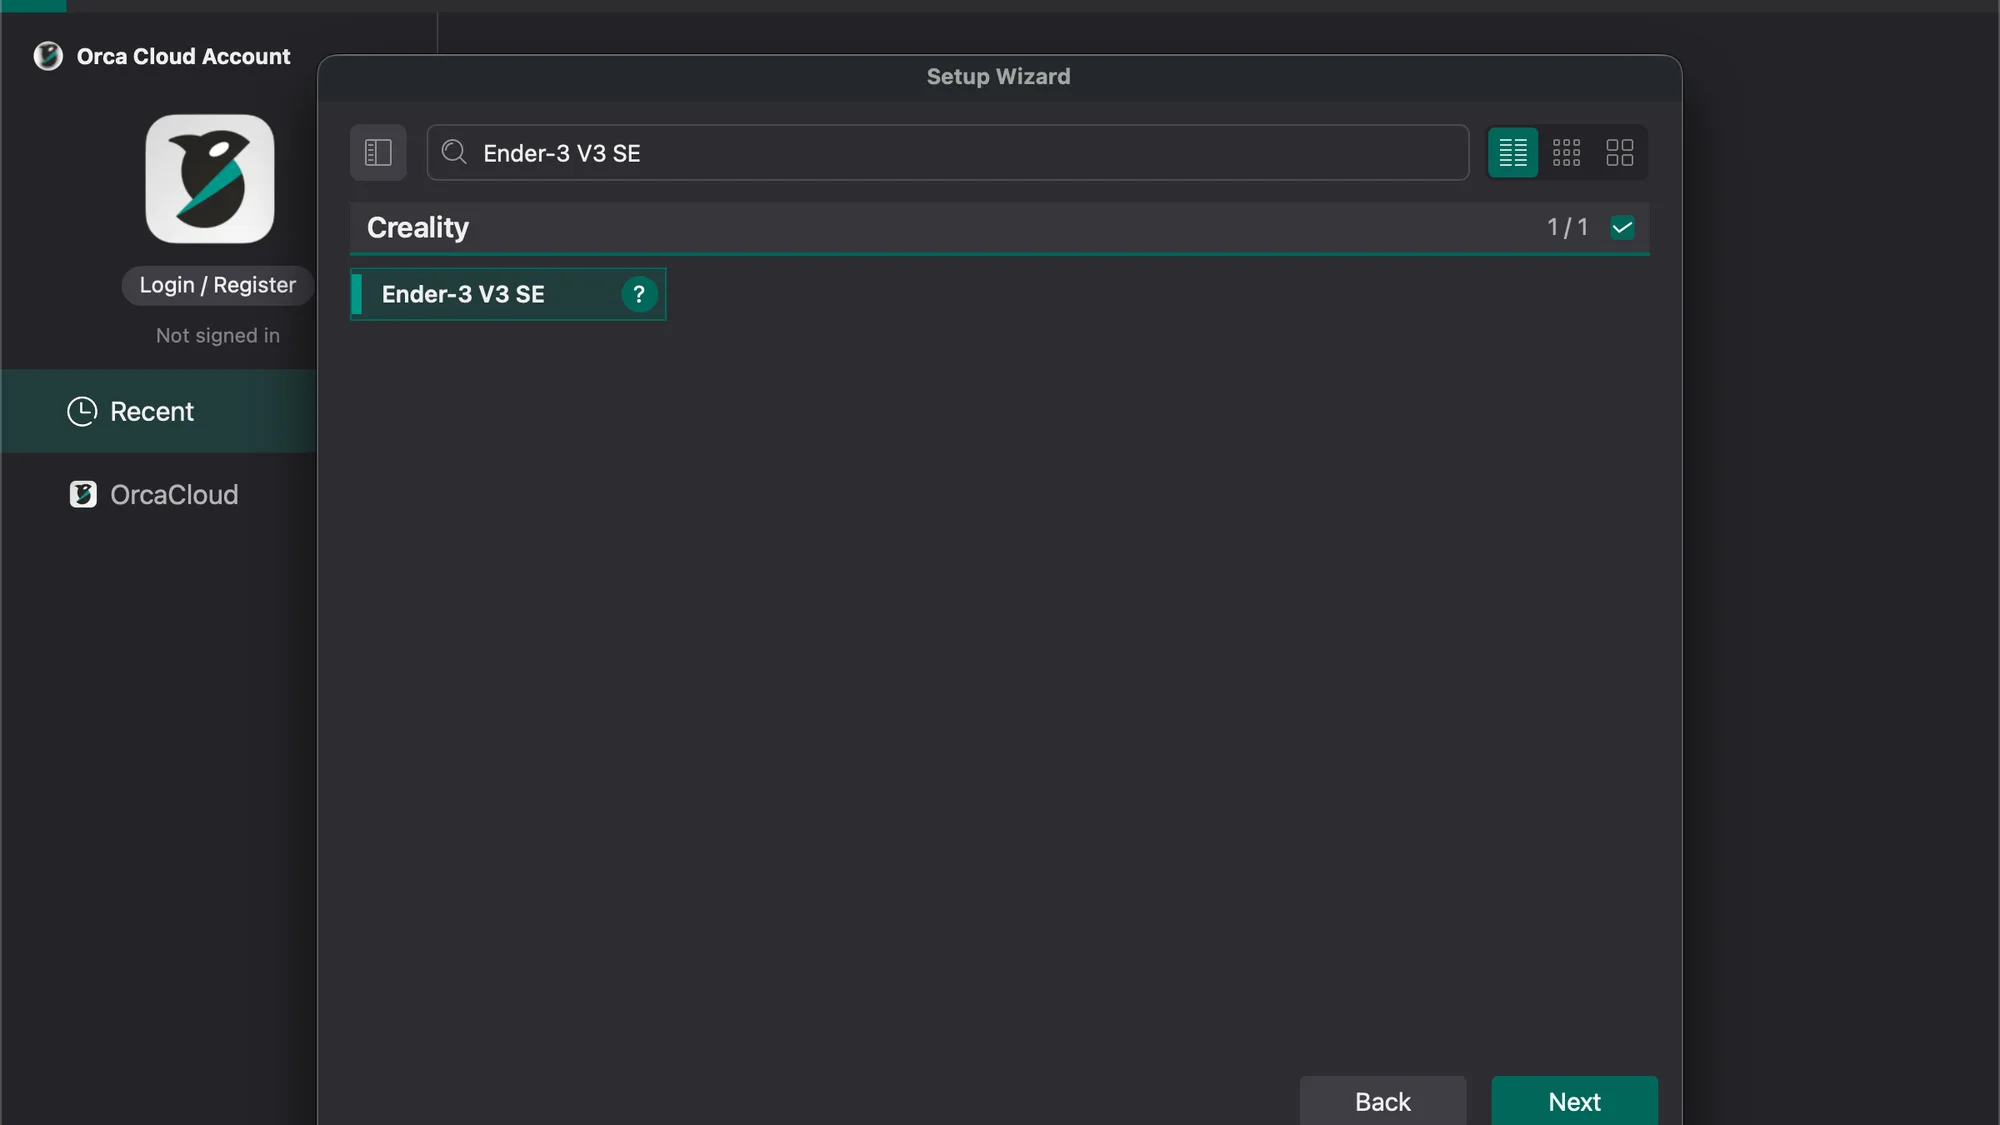
The Printer Selection page lists every vendor profile that ships with the program, alphabetically, with a group of Custom Printer options at the top (Klipper, Marlin, RRF, Repetier and ToolChanger) for machines that are not in the list. Three view buttons at the top right switch between a list and two sizes of grid, and the search box at the top filters by name.
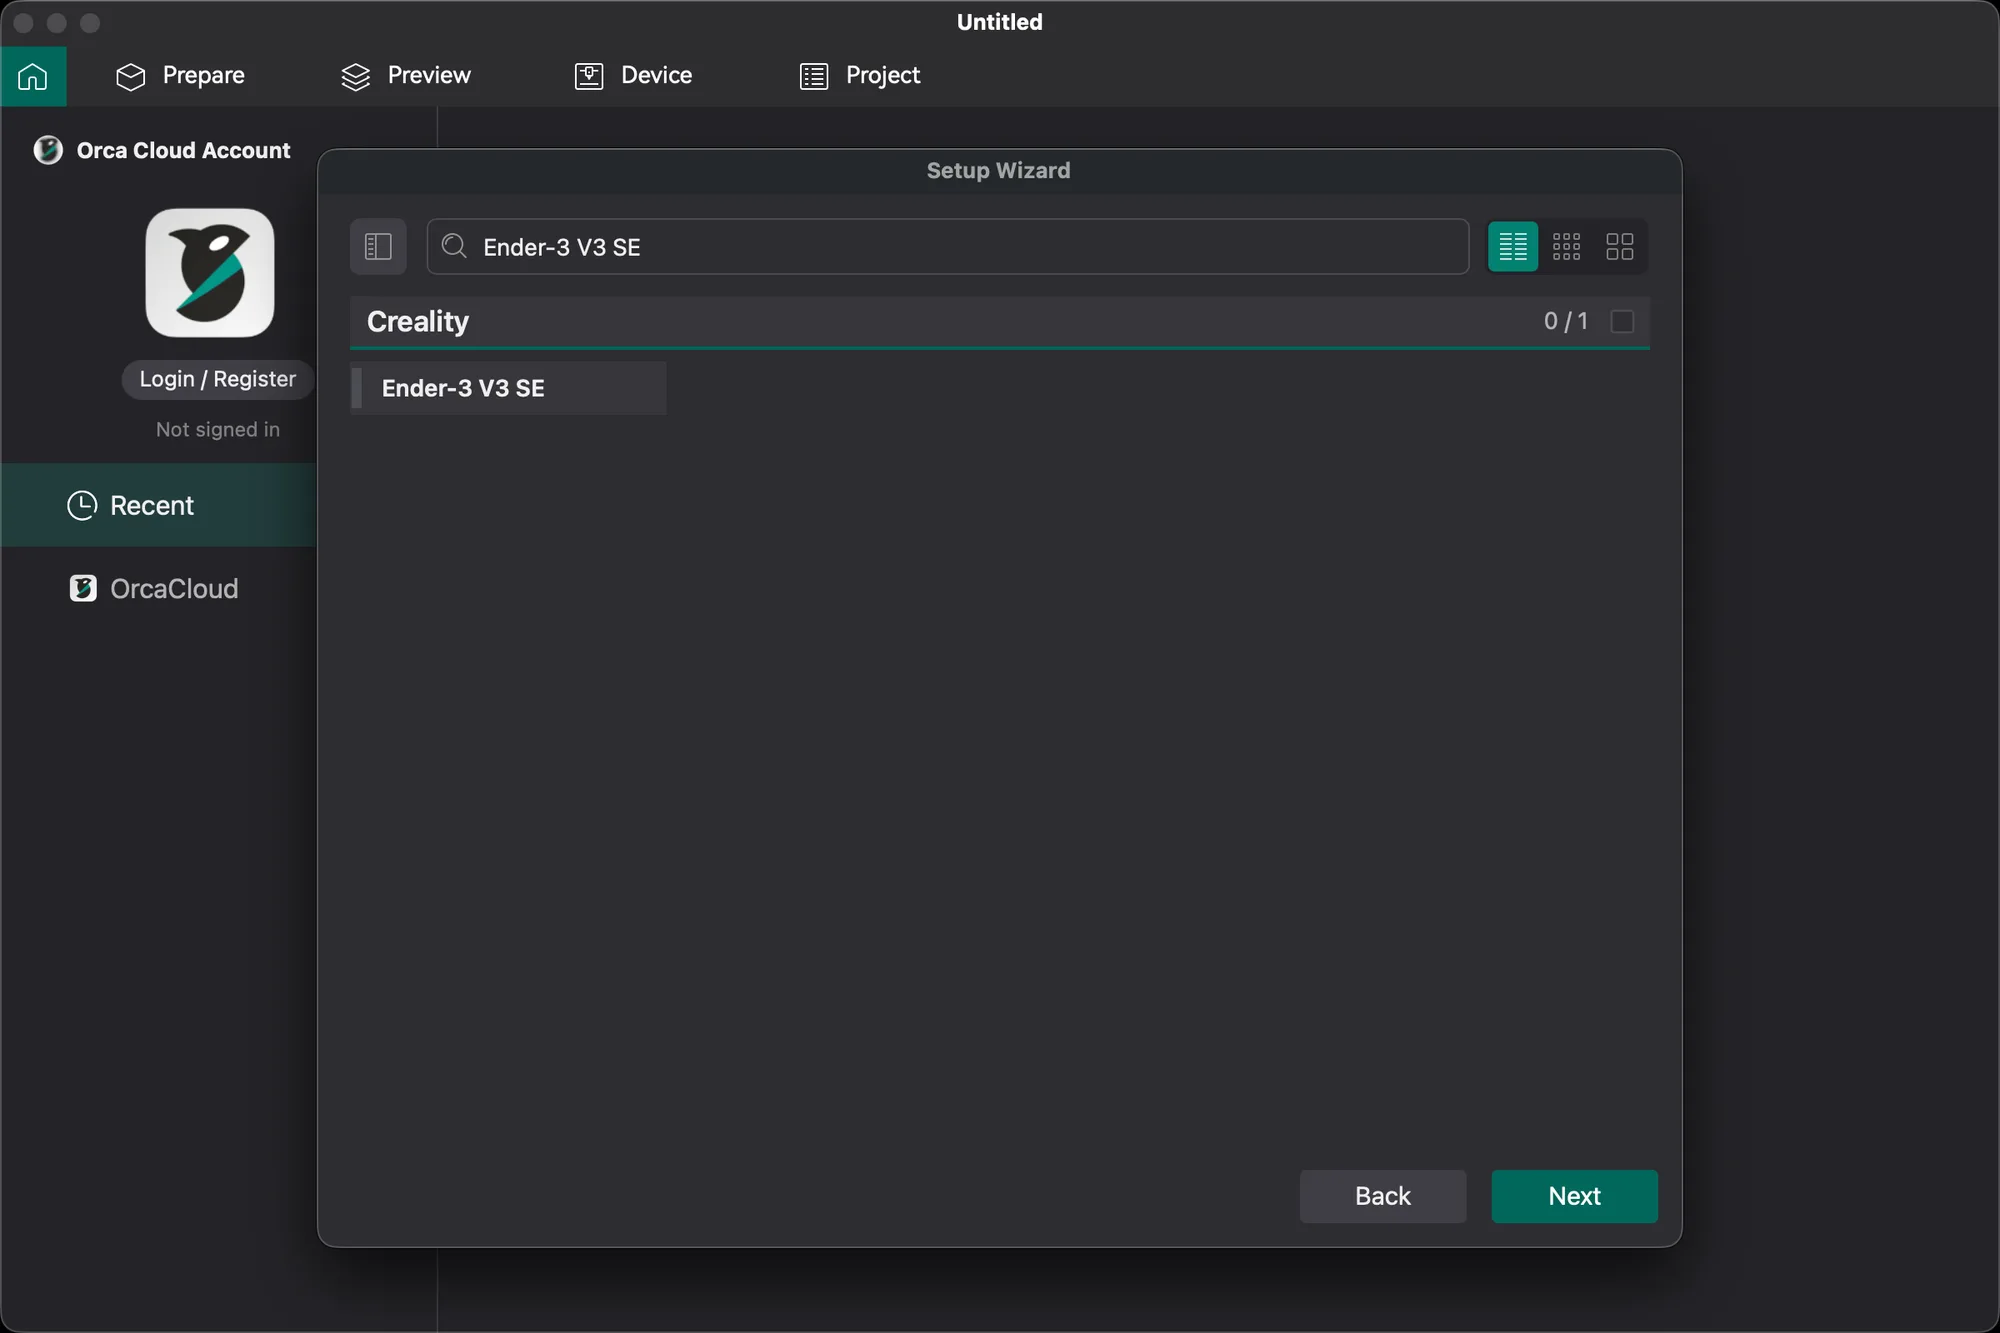
The quickest route is to switch to list view, click the search box and type your printer name. We typed Ender-3 V3 SE, which left a single row under the Creality group, and clicked it to select it. Pick the exact model: the profile carries the bed size, start G-code and speed limits for that machine.
3. Select filaments
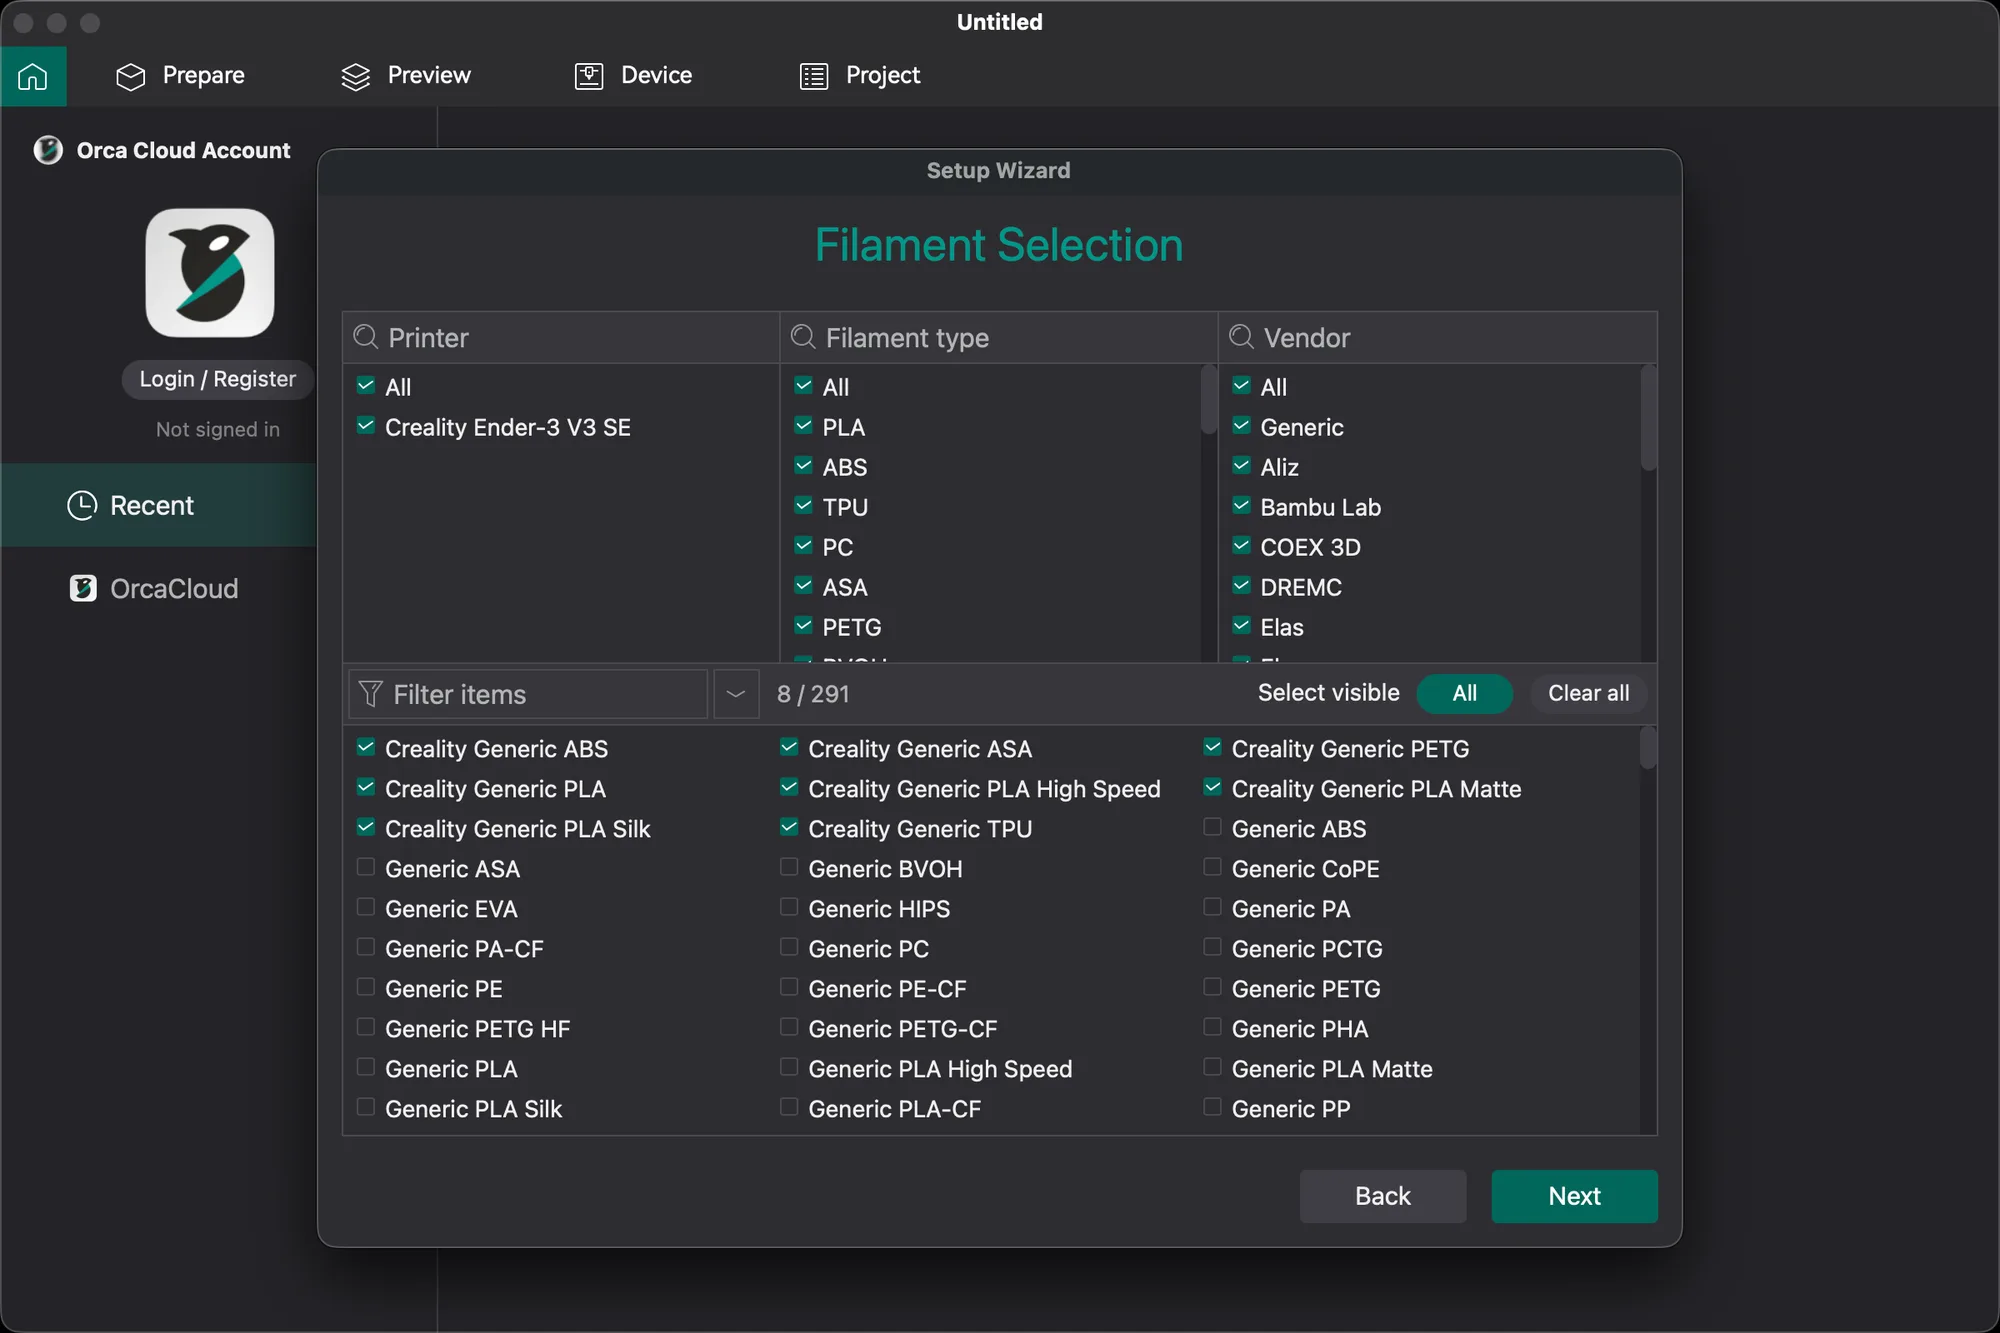
The Filament Selection page opens with that printer's vendor profiles already ticked. In our run the page showed 8 / 291: eight filaments selected out of 291 available, all of them Creality generic profiles (ABS, ASA, PETG, PLA, PLA High Speed, PLA Matte, PLA Silk and TPU). Three filter columns at the top (Printer, Filament type and Vendor) narrow the long list underneath, and the All and Clear all buttons tick or untick everything currently visible.
Keep this list short: tick the handful of materials you actually use, and leave the rest of the 291 alone. You can come back and add more later.
Should you turn on Stealth Mode?
Only if you want OrcaSlicer to work entirely offline. The next page, Stealth Mode, says it disables all cloud features including Orca Cloud profile syncing, and notes that with it on your user profiles are not backed up to Orca Cloud. The box is unticked by default. If you do not plan to sign in to an account, either choice works; leaving it off keeps the cloud options available later.
Do you need the Bambu Network plug-in?
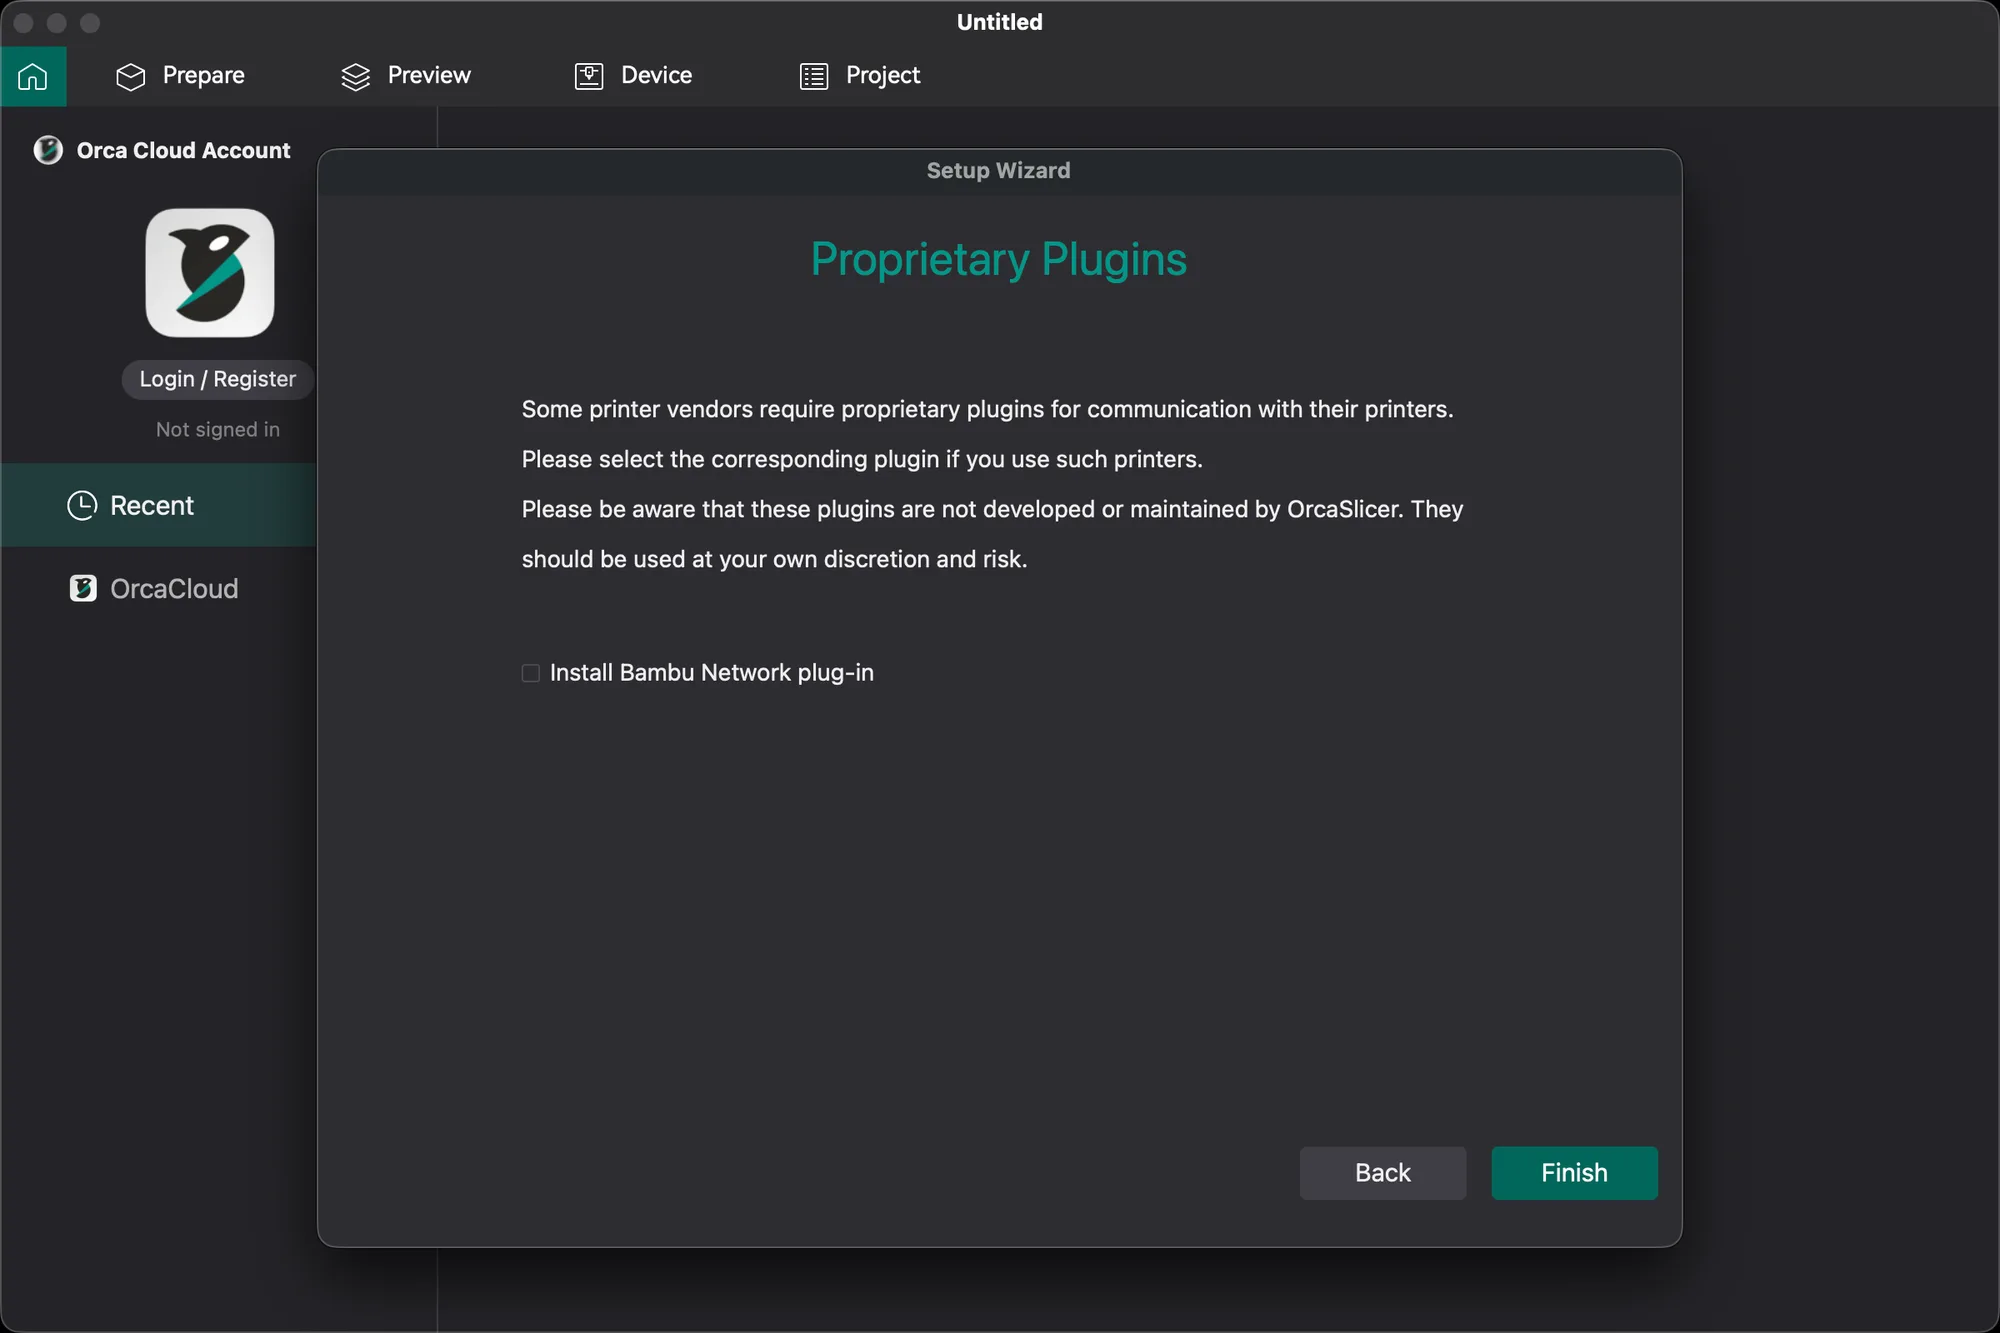
Only if you plan to send jobs to a Bambu Lab printer over the network from OrcaSlicer. The final page, Proprietary Plugins, explains that some vendors require plug-ins to talk to their printers, that these are not developed or maintained by OrcaSlicer, and that they are used at your own discretion and risk. It offers one tick box, Install Bambu Network plug-in, unticked by default. For any other printer, leave it unticked and press Finish.
4. Handle the update prompt and check the result
When the wizard closed on our test machine, OrcaSlicer 2.4.2 showed a "New version of Orca Slicer" window offering a 2.5.0 alpha, with Download, Skip this Version and Cancel buttons and a Check for stable updates only tick box. The release notes in that window describe the alpha as a testing build whose new features are experimental, so we ticked the stable-only box and chose Cancel. Whether a newer release is offered will depend on when you install.
In short, the whole wizard is:
- Press Get Started on the welcome page.
- Choose a login region and press Next.
- Search for and select your printer, then press Next.
- Tick the filaments you use, then press Next.
- Leave Stealth Mode as you prefer, press Next, then leave the plug-in box unticked unless you own a Bambu Lab printer, and press Finish.
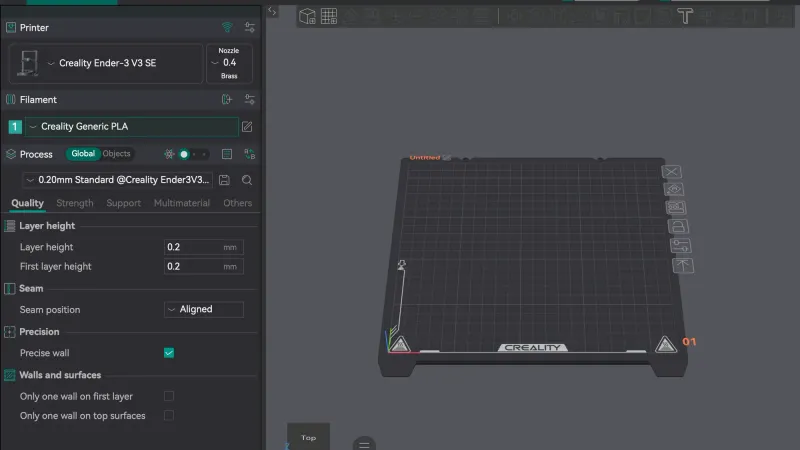
Now open the Prepare tab. The left panel should show your printer name and a 0.4 nozzle (or whichever nozzle your profile defaults to), your first filament, and a process preset such as 0.20mm Standard. If those three match your hardware, setup is finished. The next lesson tours the rest of the window, and when you want to compare slicers, see Cura vs OrcaSlicer vs PrusaSlicer.
Next lesson: Orca Slicer Interface Tour: Tabs, Toolbar, Panels.