The Cura first launch setup is a short wizard that appears the first time you open UltiMaker Cura and ends with your printer ready on the build plate. This lesson walks through every screen in Cura 5.13.0 on a fresh macOS install, with the exact button names, so you know what each choice does.
What screens does the Cura first launch setup show?
It shows nine pages in a fixed order: Welcome, User Agreement, a data sharing page, a sign in page, two Add printer pages, Machine Settings, What's New and Release Notes, after which Finish drops you on the main window. A blue progress bar along the top of the window grows as you move forward. Our test machine had never run Cura, so everything below is the true first-run state.
If you have not chosen a slicer yet, read what a slicer is first, and see Cura for beginners for the download and the overall workflow. This lesson only covers the first launch. The next lesson in the course is the interface tour (Cura interface tour), which is not published yet.
1. Welcome and User Agreement
On macOS, a system window may appear first asking whether UltiMaker Cura may find devices on local networks. That prompt comes from macOS rather than Cura, and the options are Don't Allow and Allow. It relates to finding networked printers; we chose Don't Allow because our printer is not networked, and you can change it later in System Settings.
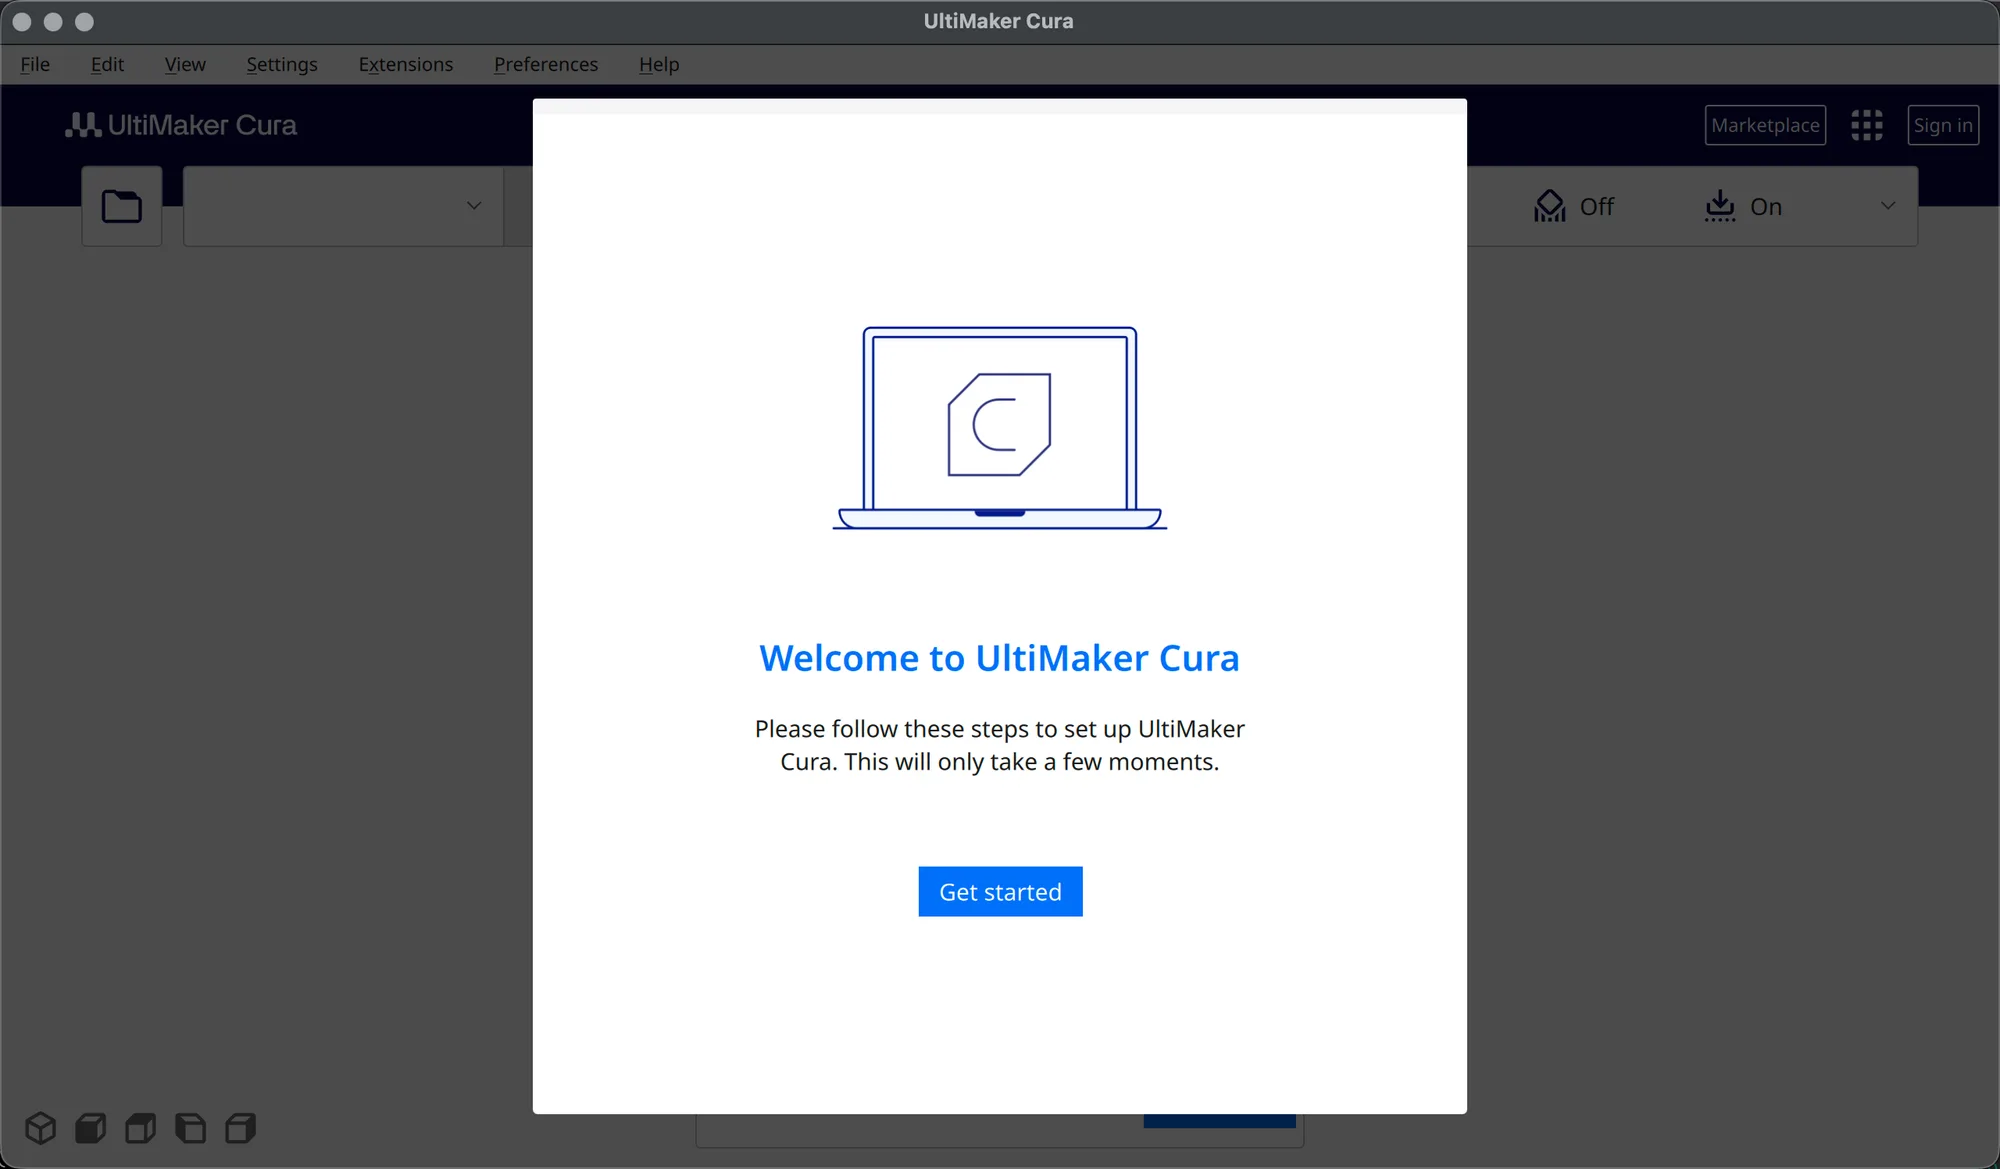
The first Cura screen is titled Welcome to UltiMaker Cura and says the setup will only take a few moments. Press Get started.
Next comes the User Agreement, headed "Disclaimer by UltiMaker". It is a short warranty and liability disclaimer, and it has two buttons: Decline and close and Agree. You need to press Agree to carry on; we did, and the wizard moved forward.
2. Data sharing and the optional sign in
The third page is titled Help us to improve UltiMaker Cura. It states that Cura collects anonymous data to improve print quality and user experience, and lists four kinds: machine types, material usage, number of slices and print settings. It adds that the data will not contain any personal information and has a More information link. There was no tick box on this page in our run, only a Next button.
The fourth page is Sign in to the UltiMaker platform. It lists three benefits: add material settings and plugins from the Marketplace, back up and sync your material settings and plugins, and get help from the UltiMaker Community. The buttons are Skip, Create a free UltiMaker Account and Sign in. Slicing and exporting G-code do not need an account, so we pressed Skip. The main window still shows a Sign in button at the top right if you change your mind.
3. How do you add a printer in Cura?
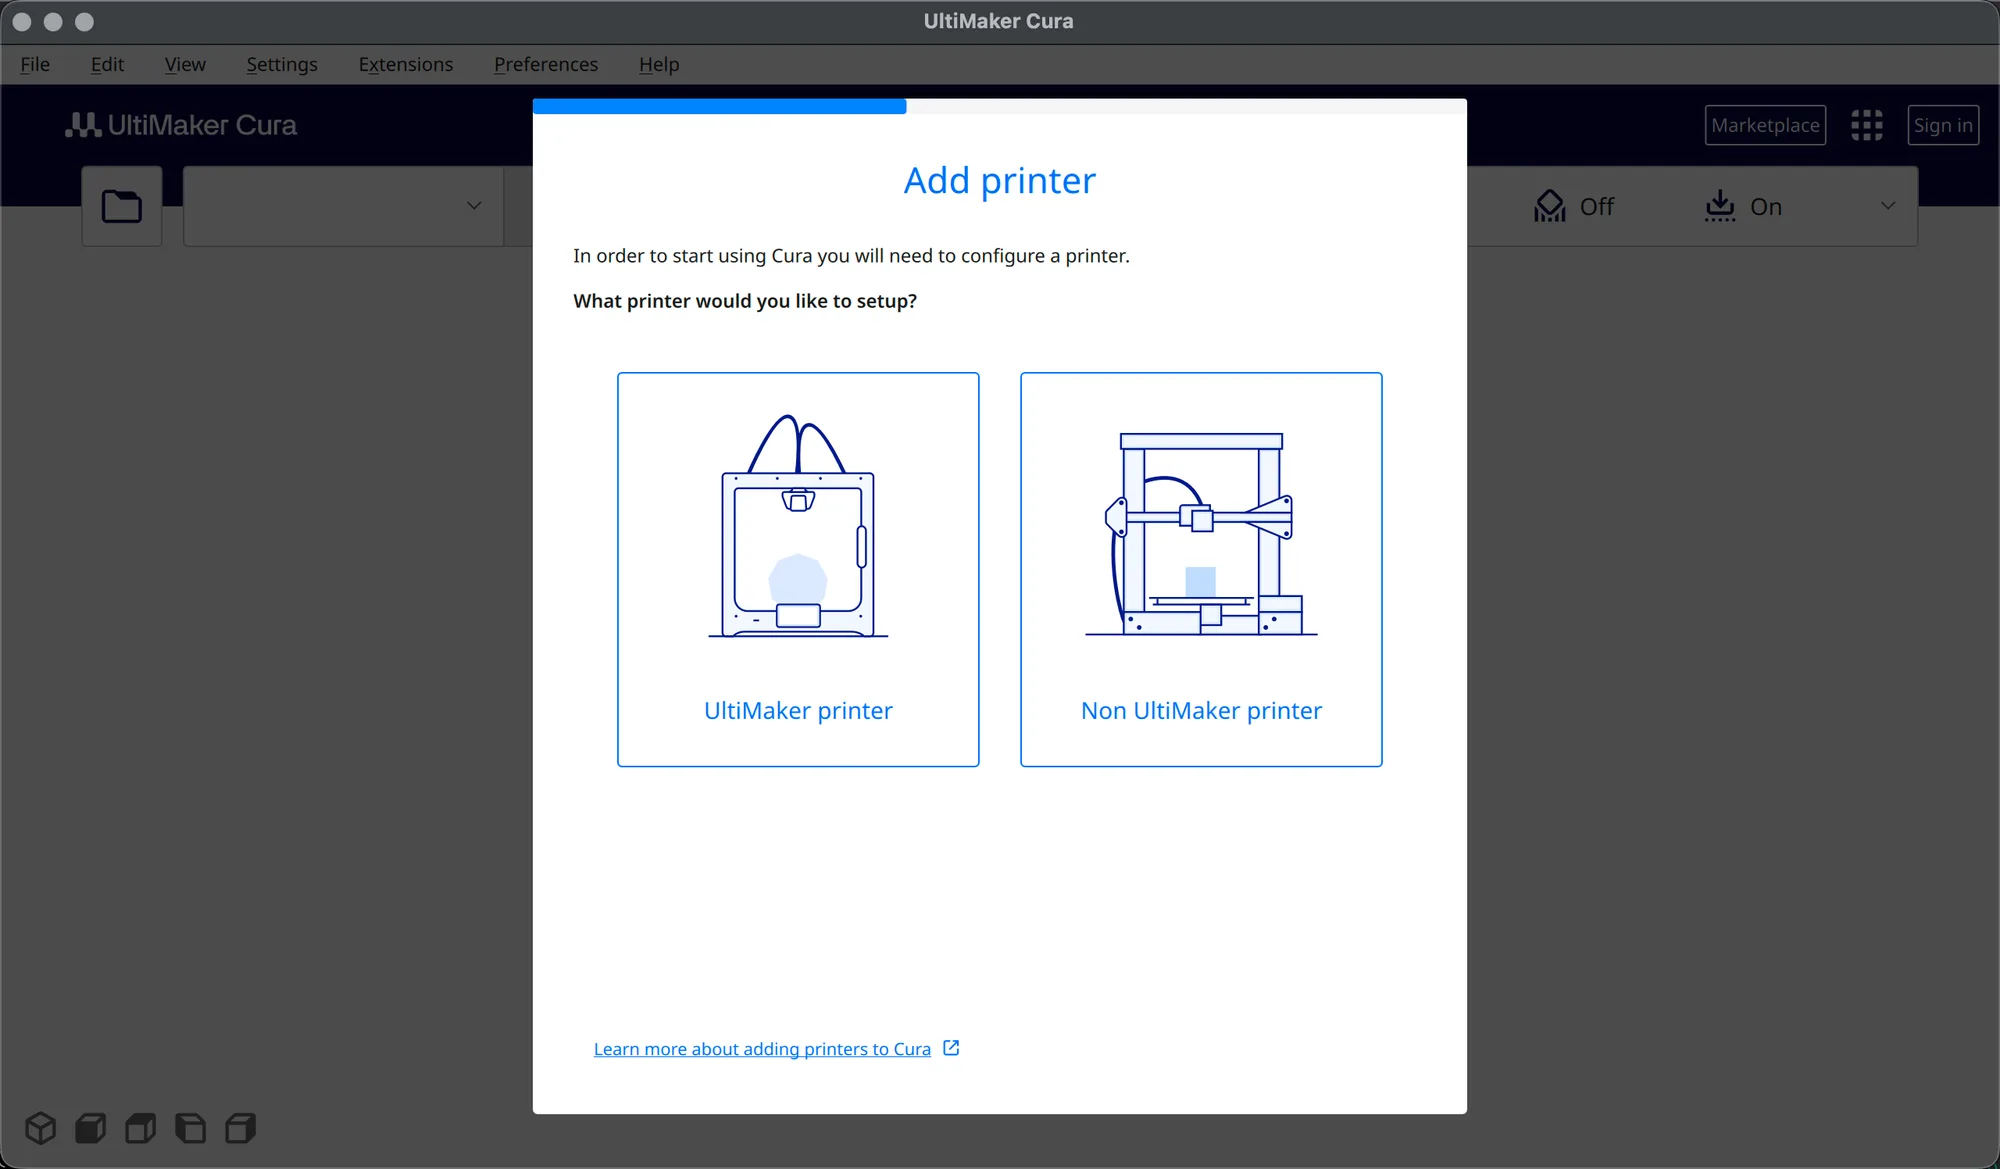
Pick Non UltiMaker printer on the Add printer screen unless you own an UltiMaker machine. The page says that to start using Cura you need to configure a printer and asks "What printer would you like to setup?", with two large choices: UltiMaker printer and Non UltiMaker printer. There is also a Learn more about adding printers to Cura link.
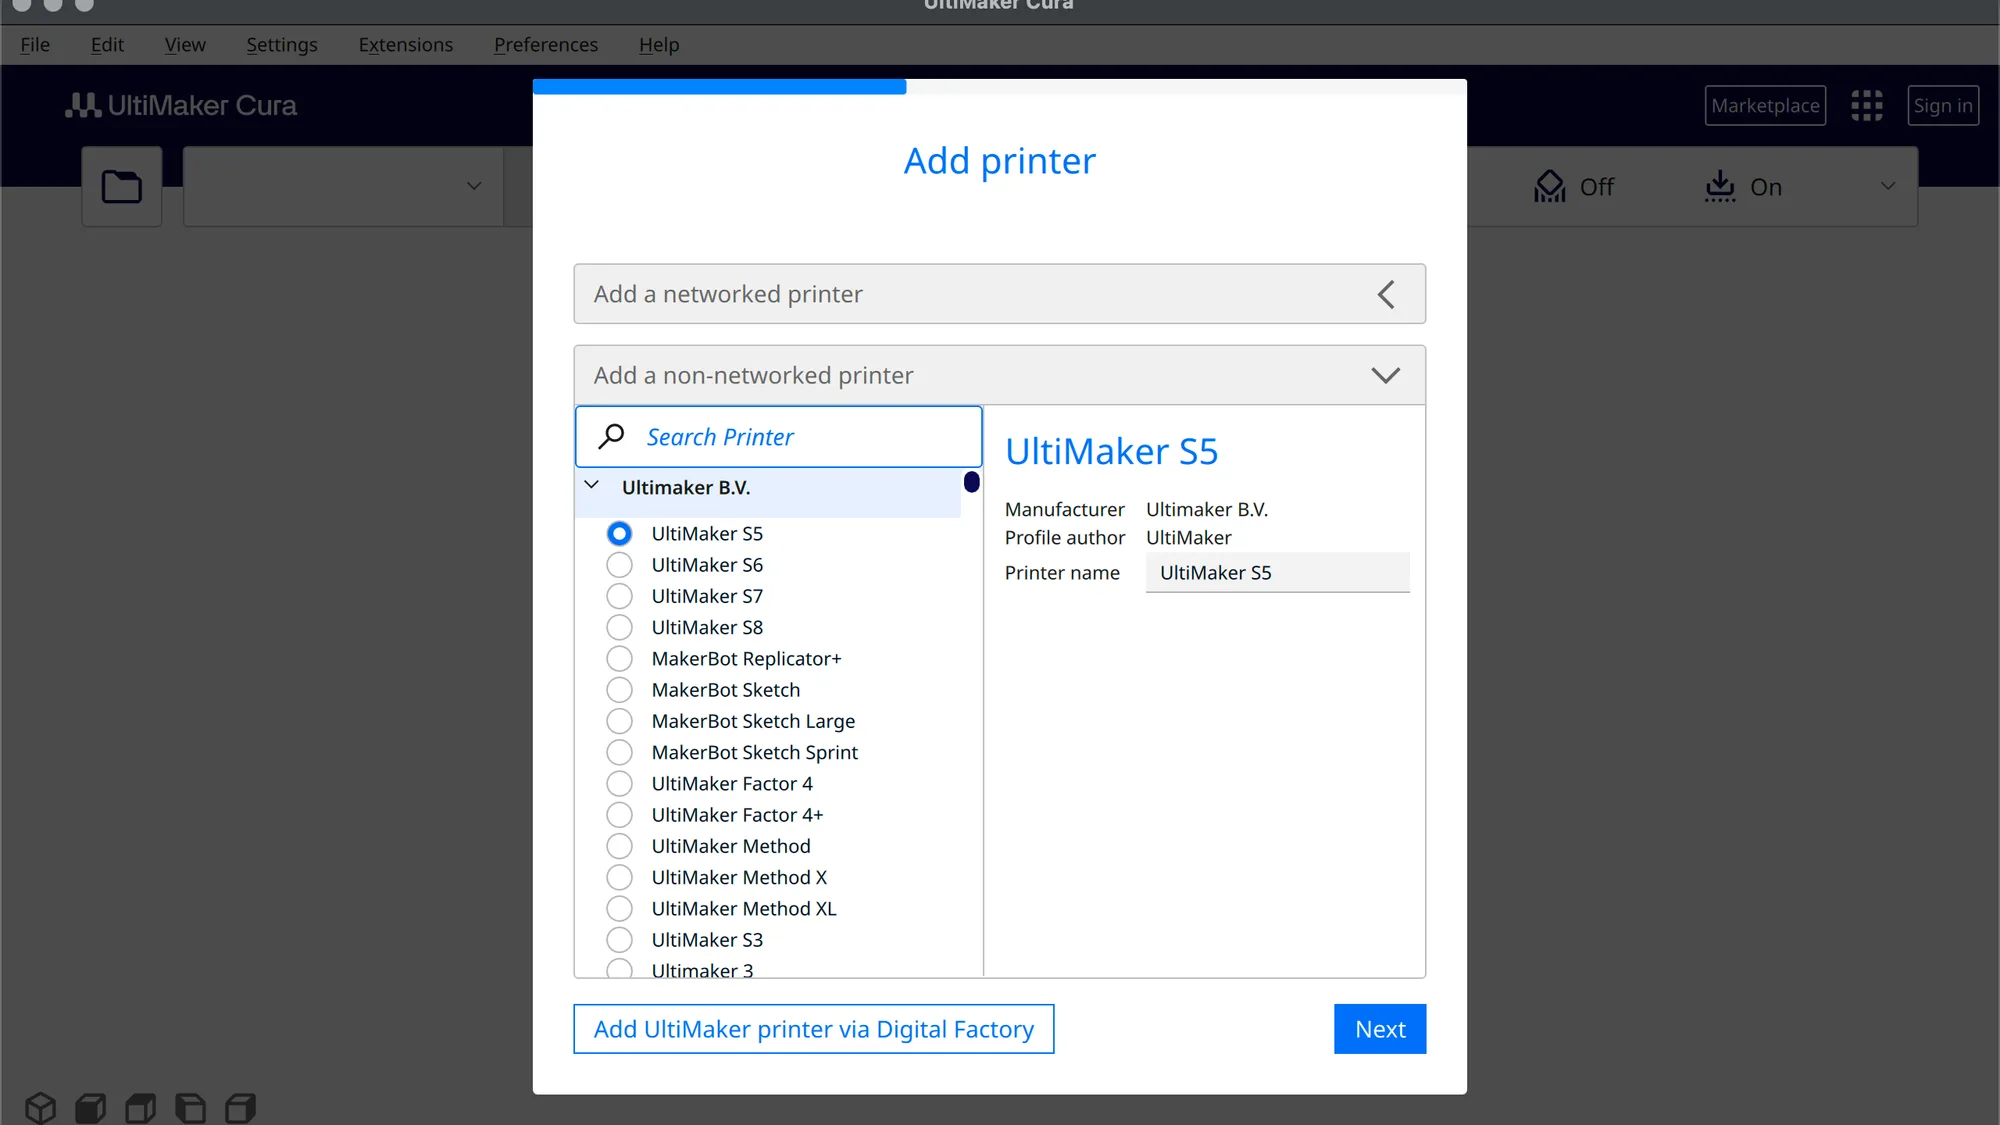
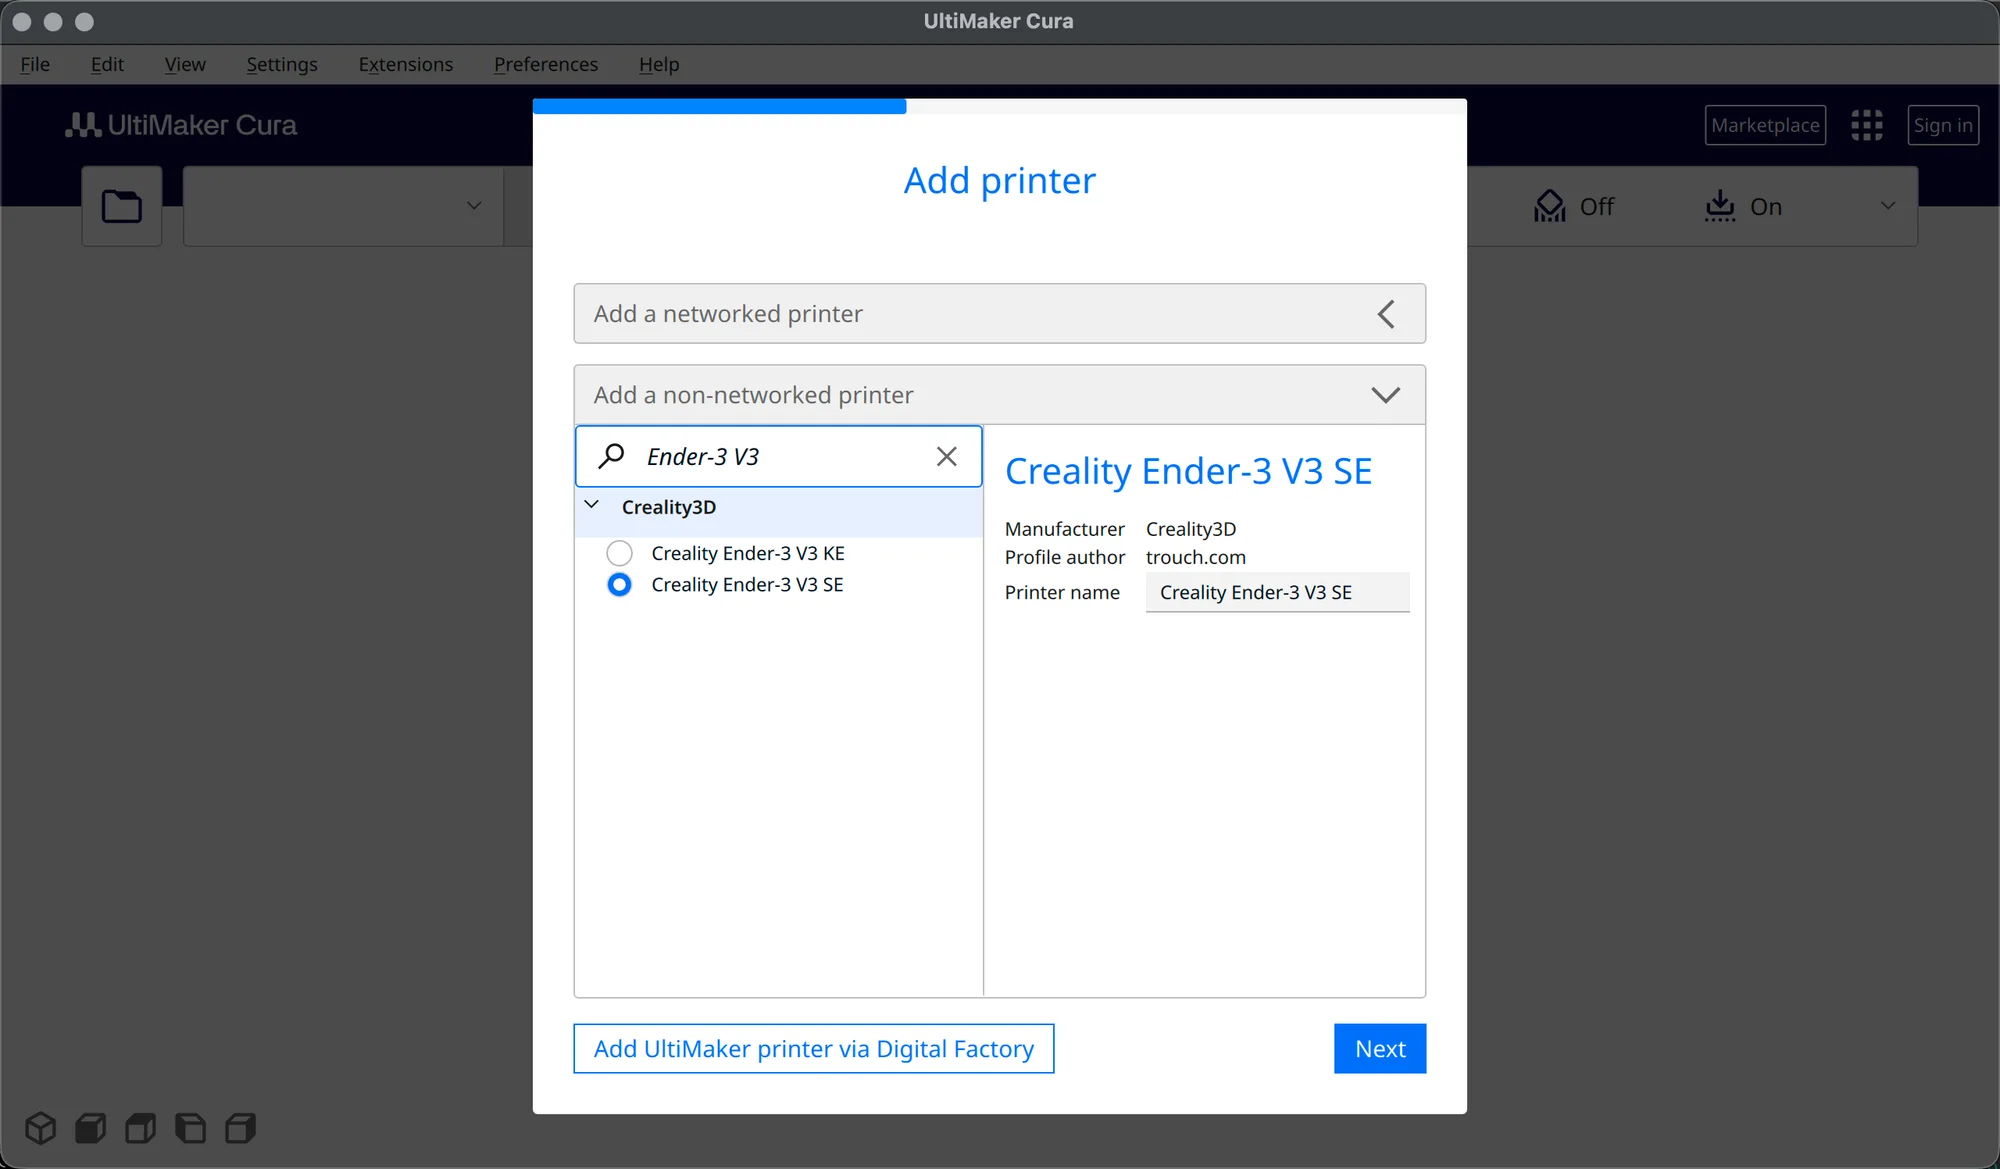
After that, a second Add printer page has two collapsible sections. Add a networked printer was open first and said "There is no printer found over your network", with Refresh, Add printer by IP and Troubleshooting buttons. Open the second section, Add a non-networked printer. It holds a Search Printer box and a list grouped by maker, with the first group, Ultimaker B.V., expanded and UltiMaker S5 preselected. A panel on the right shows the manufacturer, the profile author and an editable Printer name field. A button at the bottom left reads Add UltiMaker printer via Digital Factory.
The quickest route is to type in the search box. We typed Ender-3 V3 and the list narrowed to one group, Creality3D, with two rows: Creality Ender-3 V3 KE and Creality Ender-3 V3 SE. Cura had preselected the first row, the KE, so we clicked Creality Ender-3 V3 SE and checked that the heading on the right changed to match before pressing Next. Choose the exact model, because the profile carries the bed size and start G-code for that machine.
What does the Machine Settings page contain?
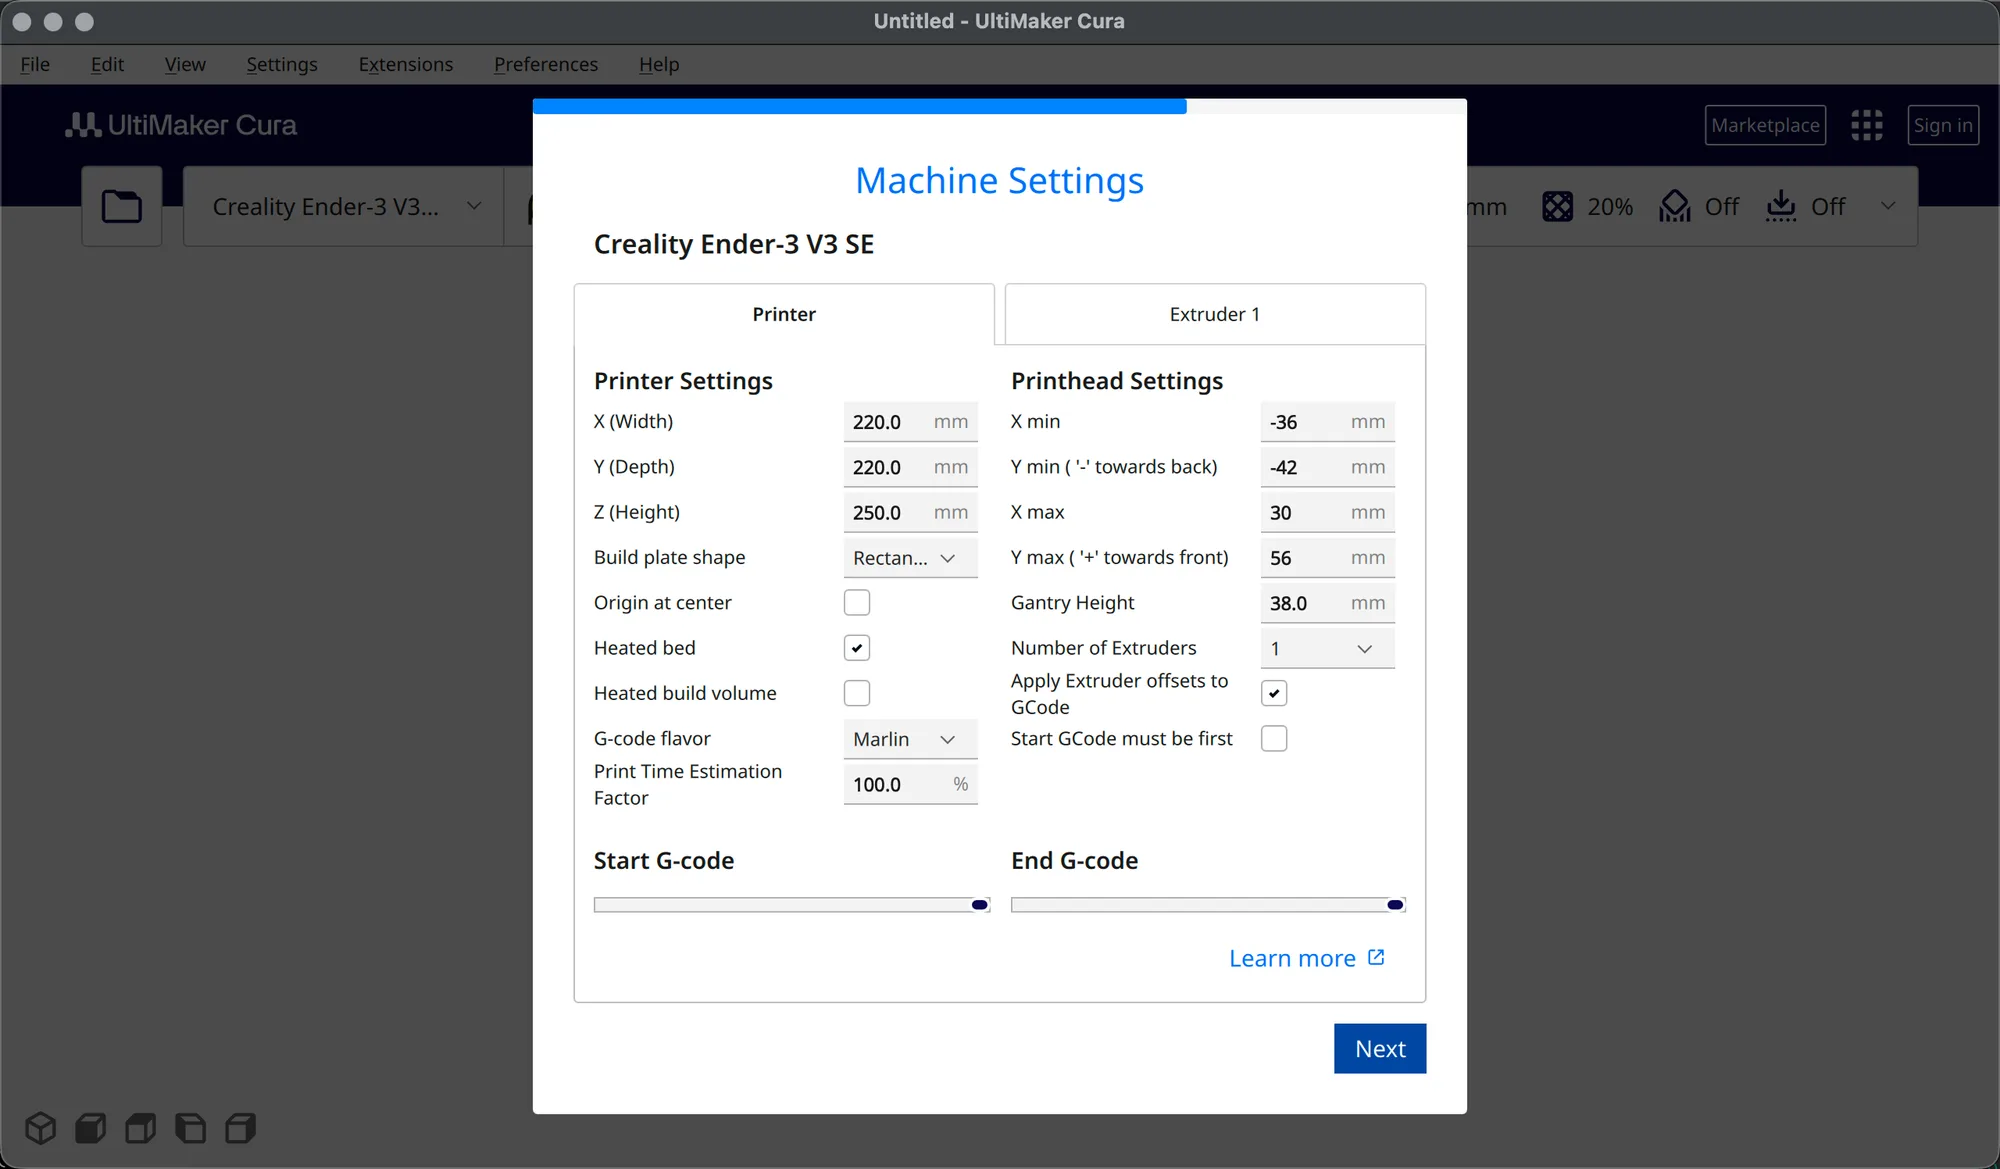
It contains the physical details Cura uses to size the build plate and write G-code for your printer. The page is titled Machine Settings with the printer name beneath it, and has two tabs, Printer and Extruder 1. For the Creality Ender-3 V3 SE profile, the Printer tab showed these values:
| Field | Value shown |
|---|---|
| X (Width), Y (Depth), Z (Height) | 220.0, 220.0 and 250.0 mm |
| Origin at center | unticked |
| Heated bed | ticked |
| G-code flavor | Marlin |
| Print Time Estimation Factor | 100.0 % |
| Printhead X min, Y min, X max, Y max | -36, -42, 30 and 56 mm |
| Gantry Height | 38.0 mm |
| Number of Extruders | 1 |
Below those are Start G-code and End G-code boxes. The Extruder 1 tab listed a compatible material diameter of 1.75, nozzle offsets of 0.0 and a cooling fan number of 0. Leave all of these alone when you chose a named profile: they come from the profile. Change them only if your printer is modified, for example a larger bed. A Learn more link sits at the bottom, then Next.
4. What's New, Release Notes and Finish
The next page is What's New, with a banner for the UltiMaker Factor 4 Plus and Skip and Next buttons. The last page is Release Notes for 5.13.0, which list new features such as the UltiMaker Factor 4+ printer and new settings, including a Lightning option for support infill and a Temperature Delta Top Surface setting. Press Finish.
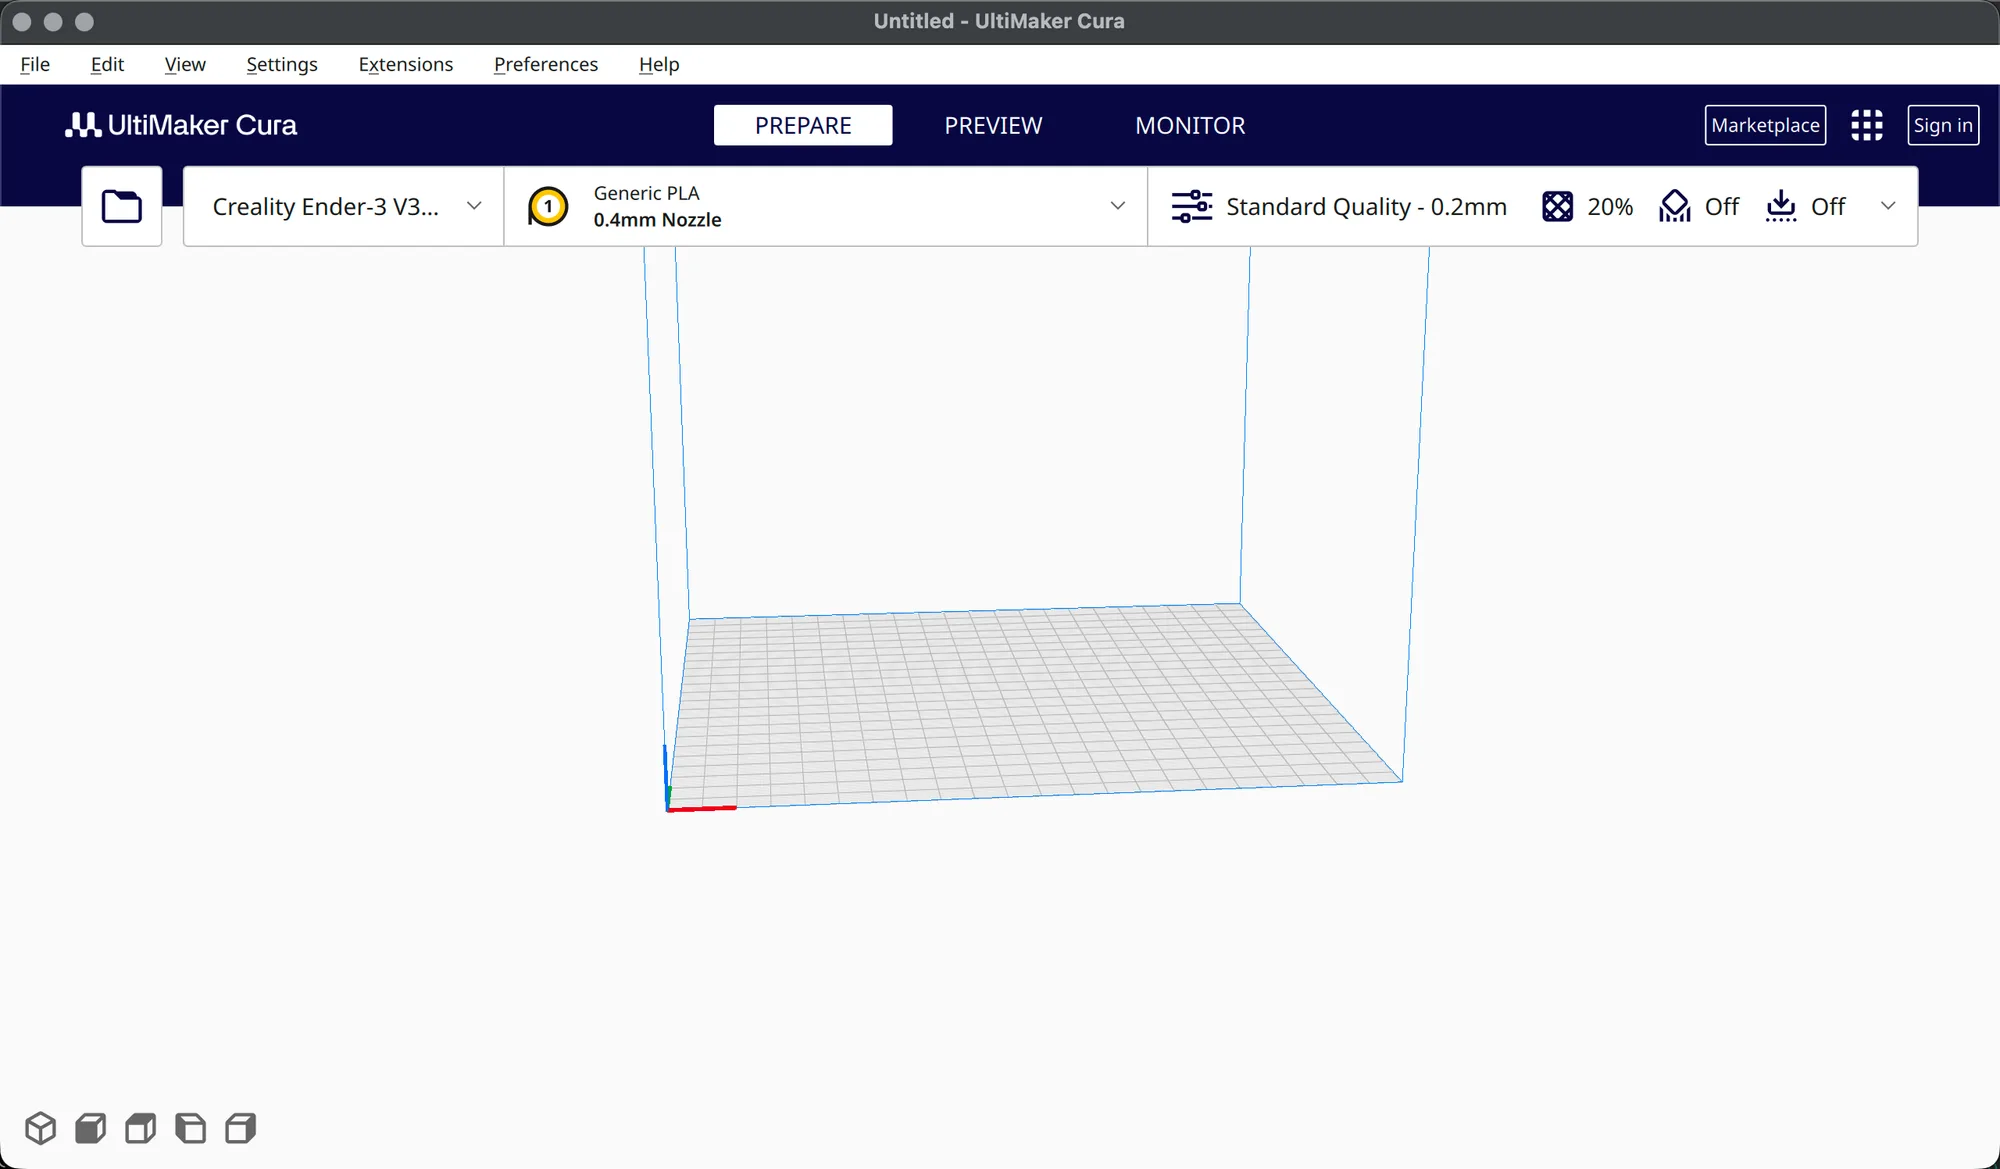
The main window opens on the Prepare stage and the title bar reads "Untitled - UltiMaker Cura". The toolbar shows three things worth checking: the printer name (Creality Ender-3 V3 SE, shortened in the dropdown), a material of Generic PLA with a 0.4mm Nozzle, and a print profile reading Standard Quality - 0.2mm with 20% infill and support and adhesion both Off. If those match your hardware, setup is done.
In short, the whole setup is:
- Press Get started, then Agree on the User Agreement.
- Press Next on the data page, and Skip on the sign in page unless you want an account.
- Choose Non UltiMaker printer, open Add a non-networked printer, search for your model and select the exact row, then press Next.
- Check Machine Settings, press Next, then Next and Finish through the release notes.
With the printer in place, you can load a file. If you are unsure what to open, STL vs 3MF vs G-code explains the file types, and Cura vs OrcaSlicer vs PrusaSlicer helps if you are still comparing slicers.
Next lesson: Cura Interface Tour: Menus, Toolbar and Panels.