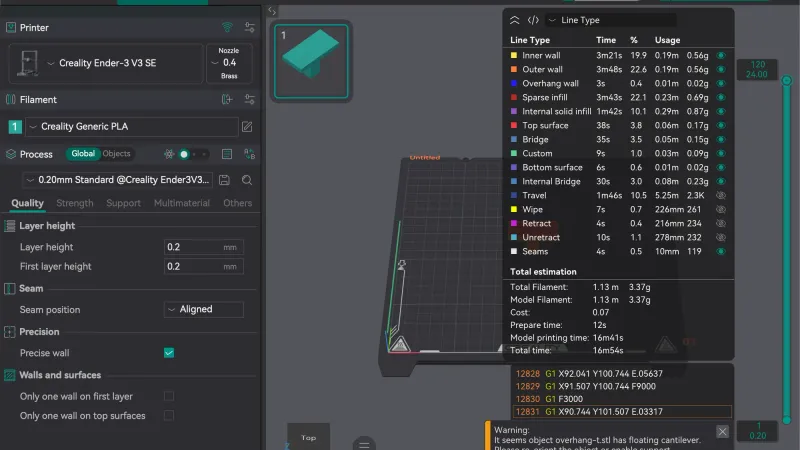
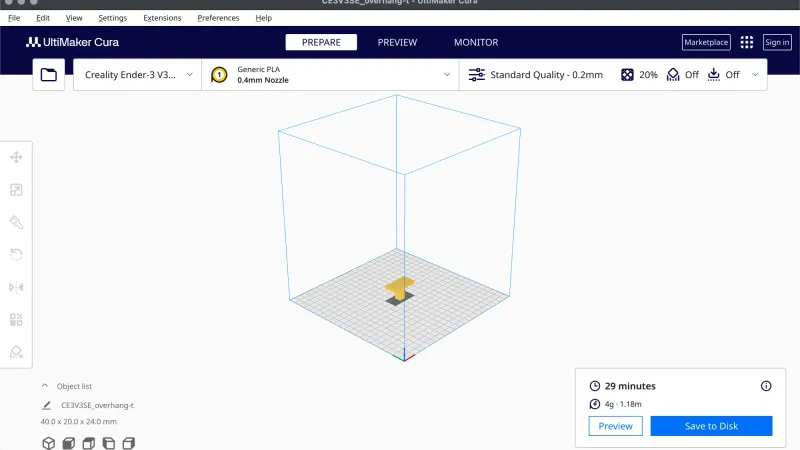
The Cura interface looks busy at first, but it is only a few zones: a top bar, a row of selectors, a left toolbar, a 3D build plate and a Slice area. This tour of UltiMaker Cura 5.13.0 on macOS names every control, with the tooltips and shortcuts shown by the program itself.
How is the Cura window laid out?
The window has five zones. The dark blue top bar holds the three stages and the Marketplace and Sign in buttons. Under it sits the selector row. The big middle area is the 3D build plate. The left edge carries the toolbar and, below it, the Object list. The bottom right holds the Slice area. If you have not yet added a printer, start with Cura first launch setup, and if you are new to the idea of slicing, read what a slicer is.
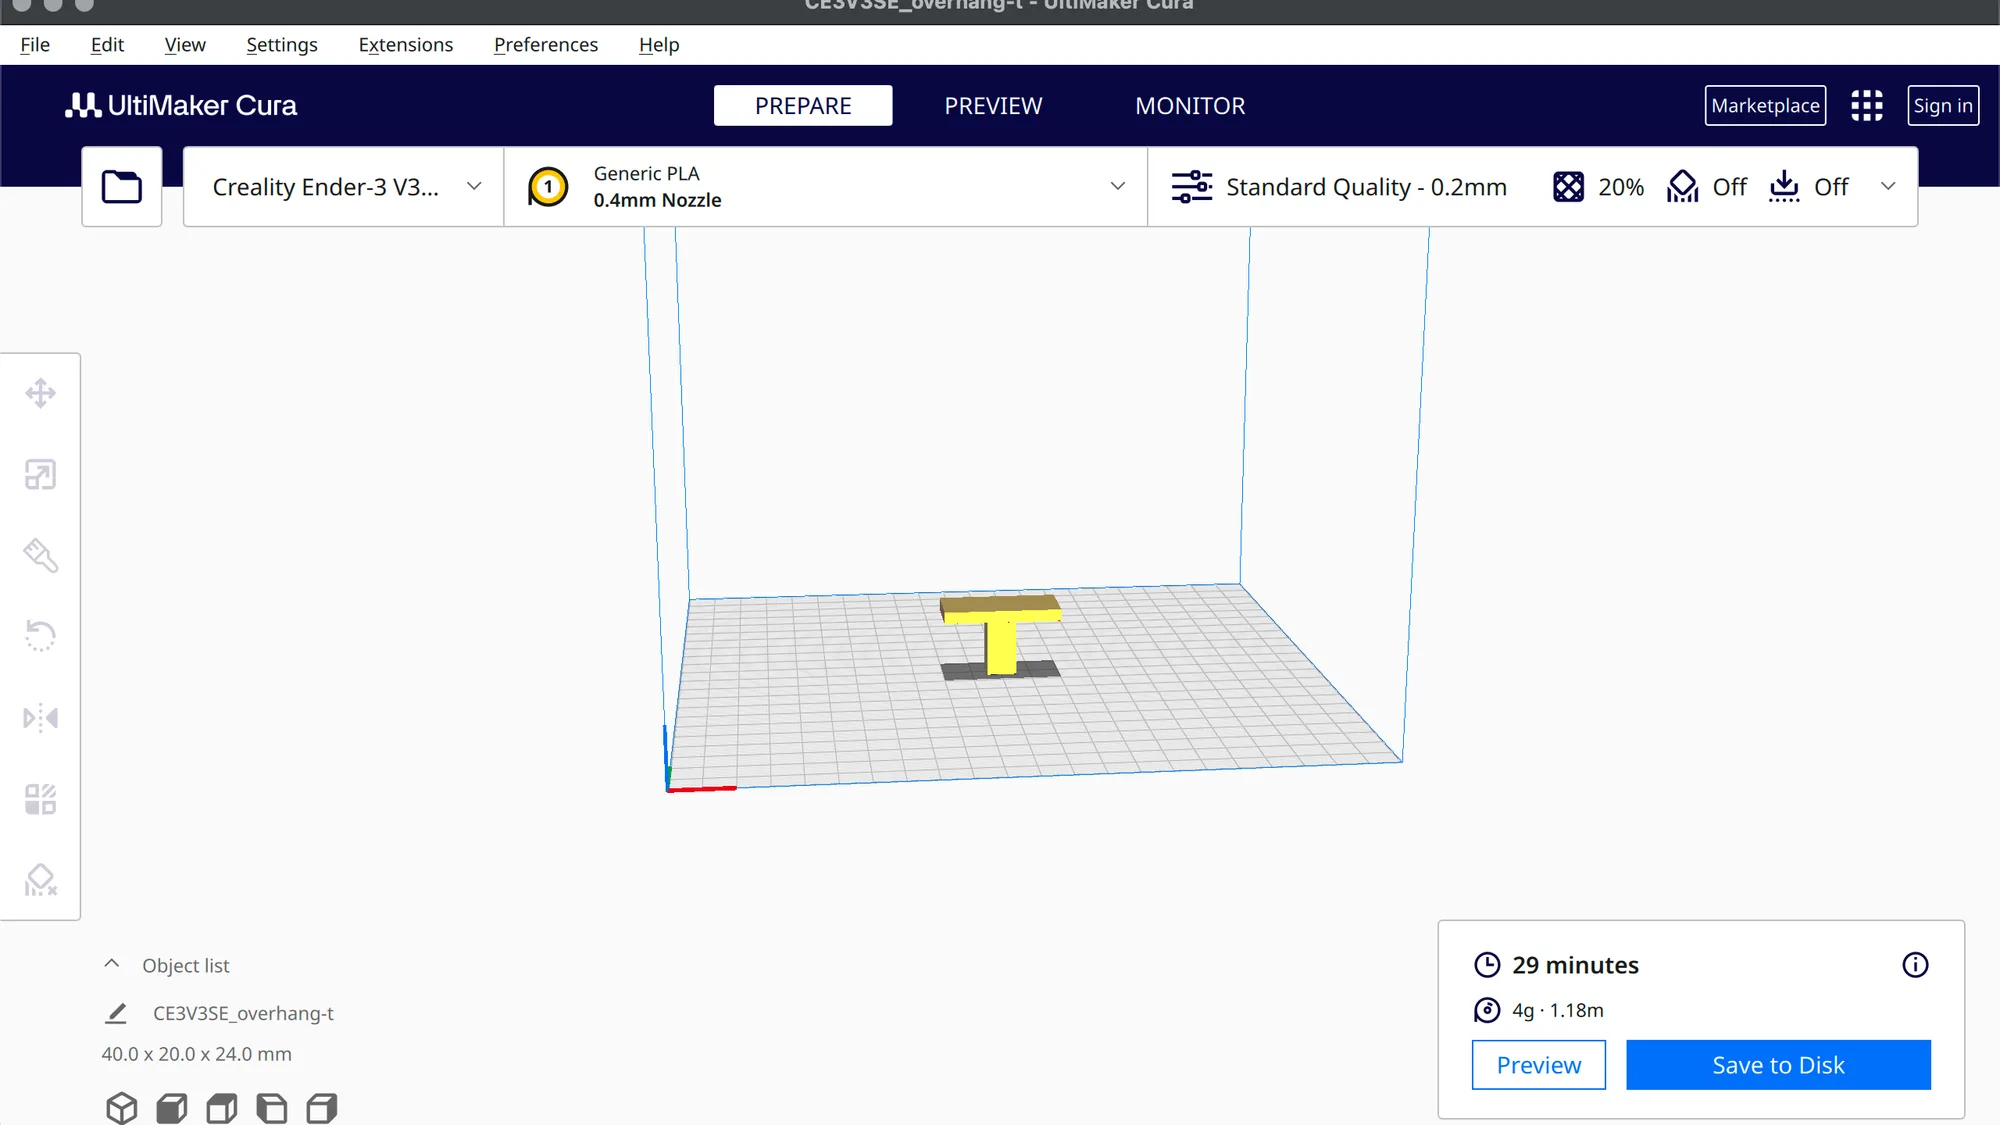
One thing surprised us: with an empty build plate the left toolbar, the Object list and the Slice area are all hidden. They appear as soon as you load a model. We loaded a small T-shaped test file called overhang-t, measuring 40.0 by 20.0 by 24.0 mm, to see the full interface.
What do Prepare, Preview and Monitor do?
The three buttons at the top centre switch between stages. PREPARE is where you place models and choose settings. PREVIEW shows the sliced result: it displays a View type of Layer view and a Color scheme of Line Type, with a vertical layer slider at the right that read 24.00mm and 120 layers for our model. MONITOR is for a connected printer. With none connected, our Monitor page showed the message "In order to monitor your print from Cura, please connect the printer."
At the top right are Marketplace (plug-ins and materials), a grid icon and Sign in. None of these are needed to slice.
What is in the Cura menu bar?
The macOS menu bar has seven entries: File, Edit, View, Settings, Extensions, Preferences and Help. We opened each one. This is what they contained in 5.13.0:
| Menu | Items we saw |
|---|---|
| File | New Project, Open File(s), Open Recent, Save Project (shown with the shortcut Cmd+S), Save Universal Cura Project, Export, Export Selection, Reload All Models, Quit |
| Edit | Undo, Redo, Select All Models, Arrange All Models, Multiply Selected, Delete Selected, Clear Build Plate, Reset All Model Positions, Reset All Model Transformations, Drop All Models to buildplate, Group Models, Merge Models, Ungroup Models |
| View | Camera position, Camera view (Perspective, ticked, or Orthographic), Toggle Full Screen |
| Settings | Extruder 1, Printer, Configure setting visibility |
| Extensions | Update Checker, Post Processing, Cura Backups |
| Preferences | Configure Cura |
| Help | Show Configuration Folder, Open Cura Log File, Show Online Documentation, Report a Bug, Sponsor Cura, Export Package For Technical Support, What's New, About |
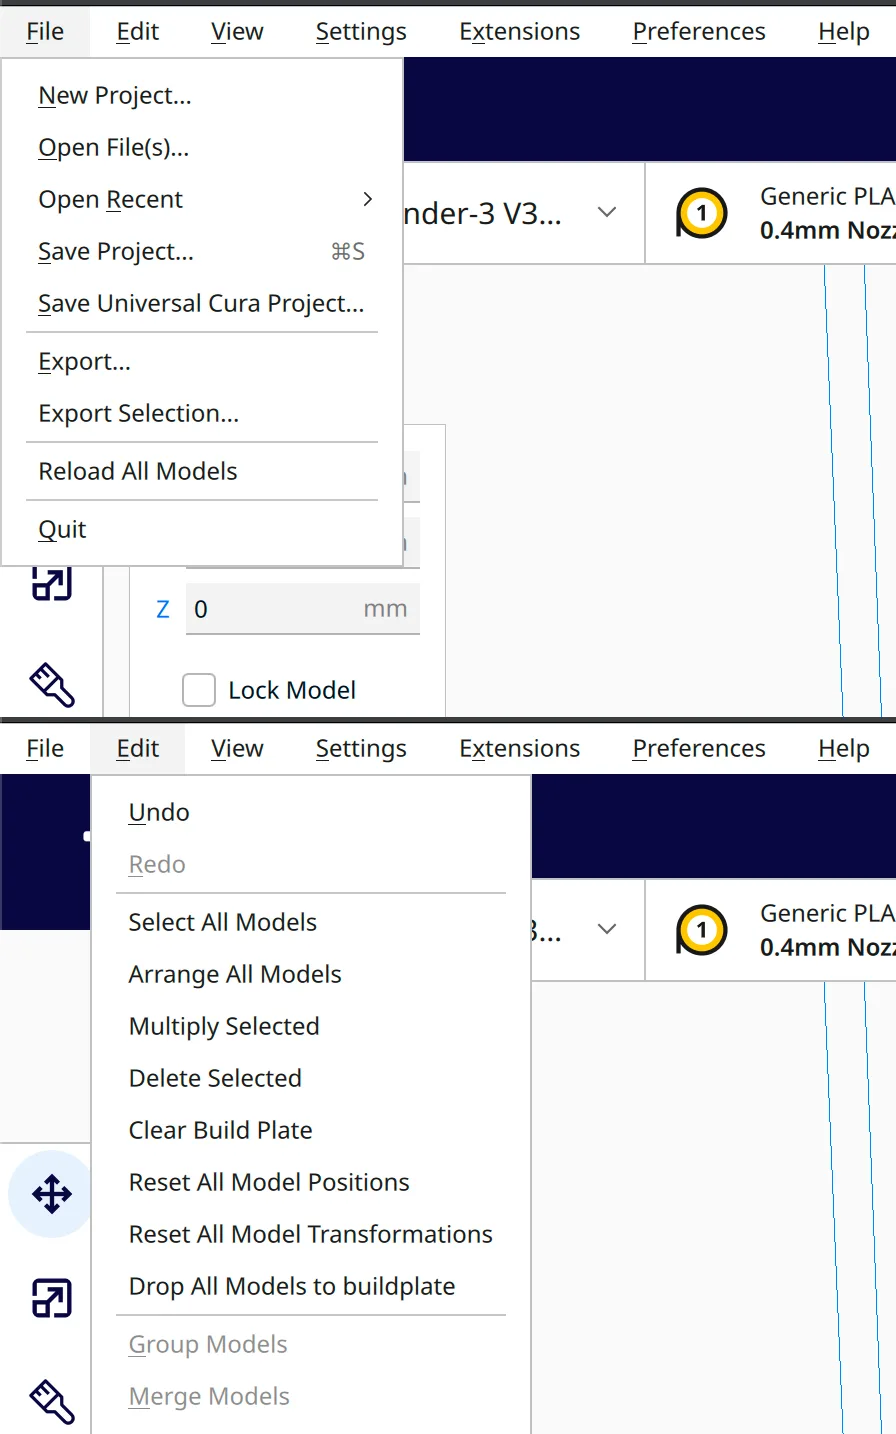
Group Models, Merge Models and Ungroup Models were greyed out because only one model was loaded. Arrange All Models is handy later when you print several parts at once. The Camera view setting switches between a perspective camera and an orthographic one, which removes the sense of depth.
What does each button on the left toolbar do?
The toolbar sits on the left edge and lists seven tools from top to bottom. We selected the model, hovered over each button and read the tooltip. The names and shortcuts below are exactly what Cura displayed.
| Button | Tooltip |
|---|---|
| 1 | Move ("T") |
| 2 | Scale ("S") |
| 3 | Paint ("P") |
| 4 | Rotate ("R") |
| 5 | Mirror ("M") |
| 6 | Per Model Settings (no shortcut shown) |
| 7 | Support Blocker ("E") |
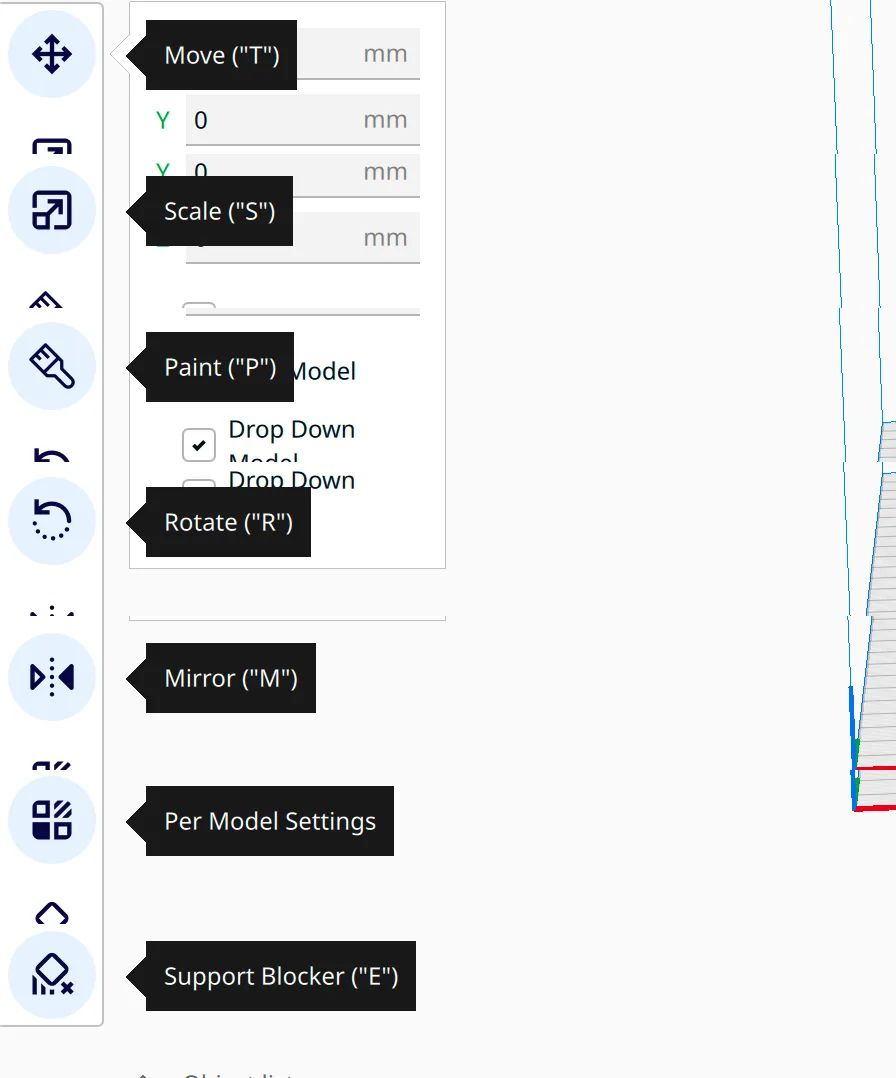
Clicking Move opens a small panel with X, Y and Z fields in millimetres, a Lock Model tick box and a Drop Down Model tick box, which was ticked. We keep the details of moving, scaling and rotating for the next lesson, Cura import, move, scale and rotate. Per Model Settings and the Support Blocker have their own lessons later in the course.
What are the selectors at the top?
The row under the top bar has four parts. A folder icon at the far left opens a file. Next is the printer selector, which read "Creality Ender-3 V3..." because the name is shortened. Then the material selector, which read Generic PLA with 0.4mm Nozzle. When we opened it, a panel headed Custom appeared with a Material drop-down set to PLA and a Nozzle Size drop-down set to 0.4mm Nozzle. The last block is the print profile: Standard Quality - 0.2mm, then three icons showing infill at 20%, support Off and adhesion Off. Click anywhere in that last block to open the settings panel.
What is the difference between Recommended and Custom settings?
Recommended is the short list of the settings most people change, and Custom is the full list. The panel opens titled Print settings, with a Profiles section whose Resolution drop-down said Standard Quality - 0.2mm. Below it, under Recommended print settings, we found:
- Strength: an Infill Density slider (20%), an Infill Pattern drop-down (Cubic) and Shell Thickness boxes (0.8 mm and 0.8 mm).
- Support: one on and off switch, Off.
- Adhesion: one on and off switch, Off.
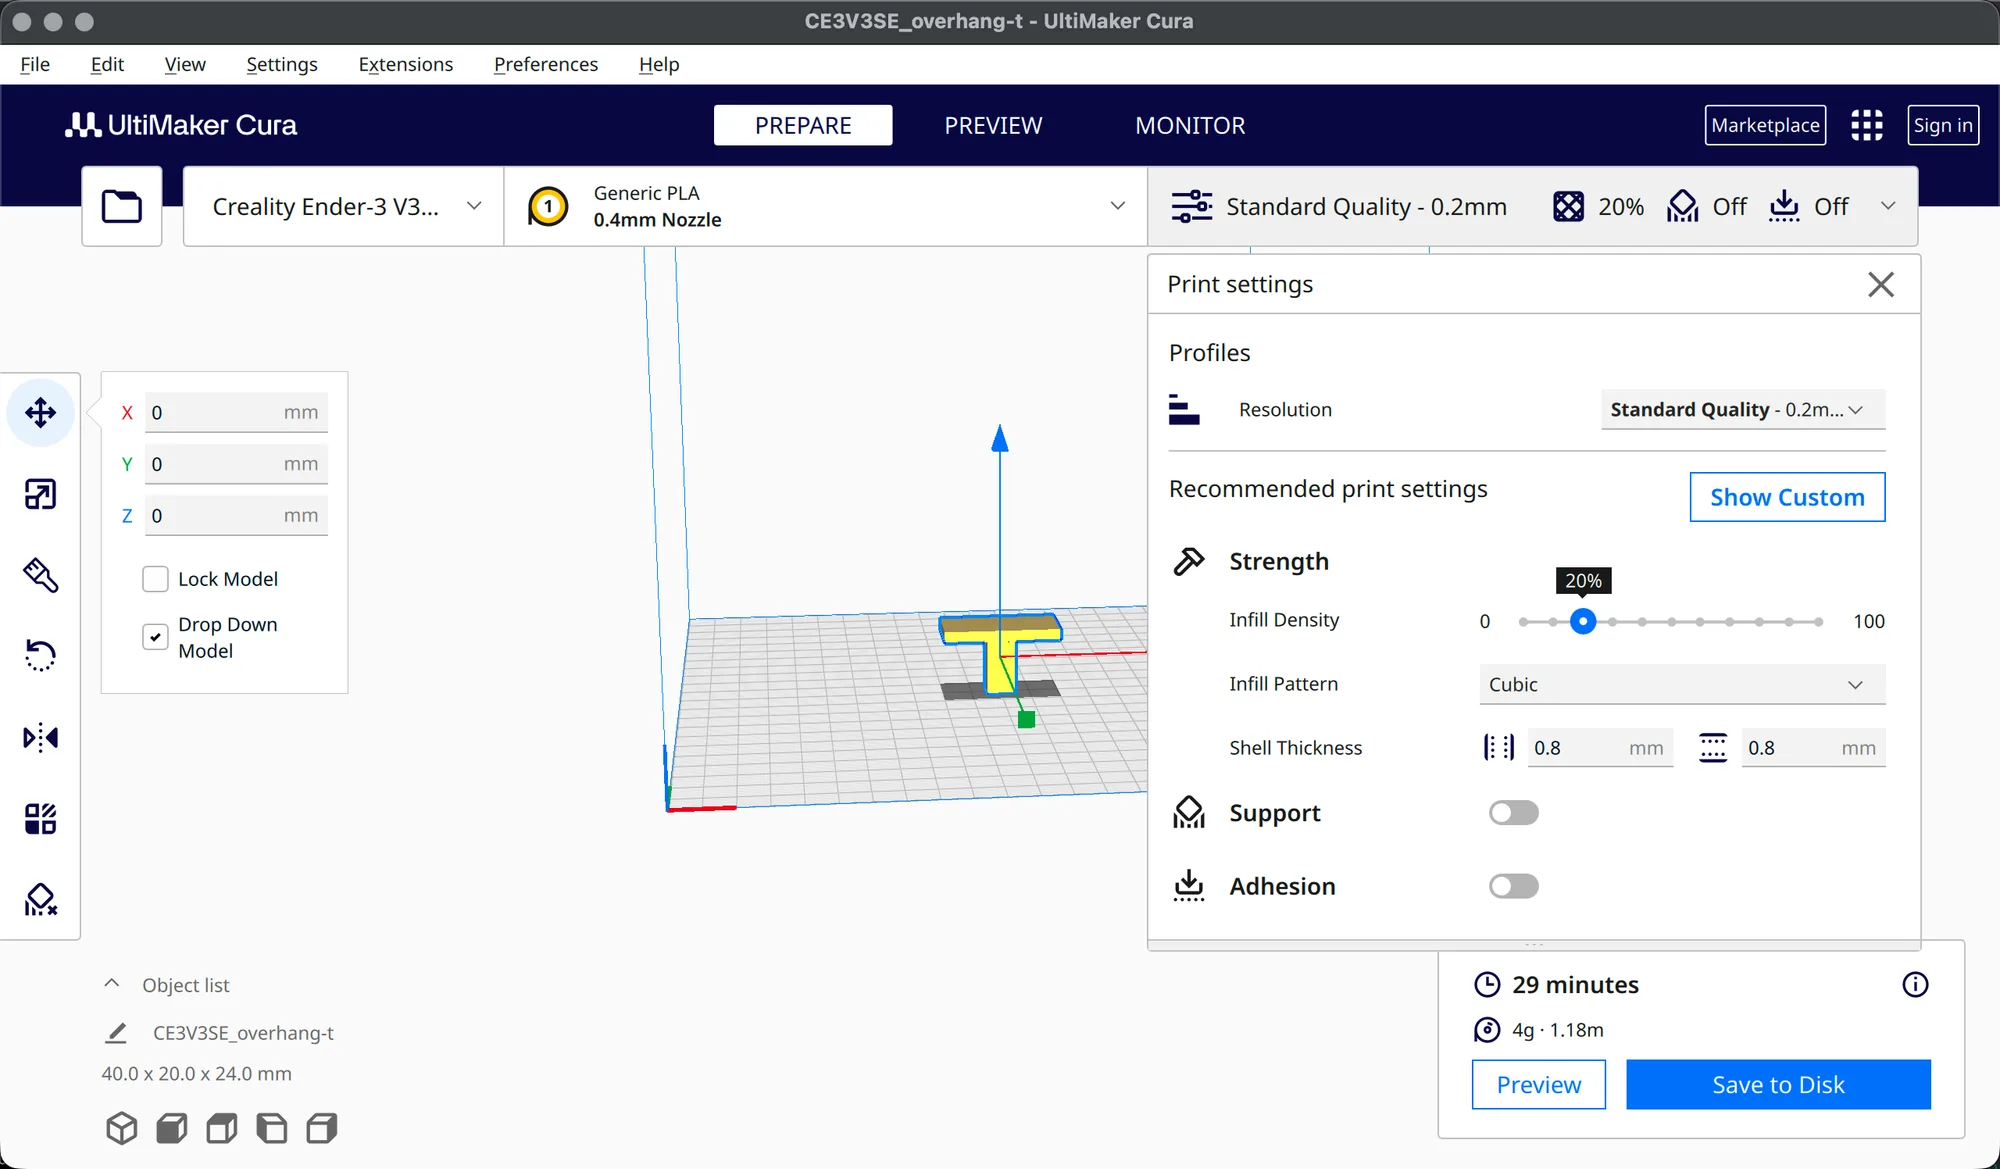
Press Show Custom to switch modes. The panel then shows a Profile drop-down, a Search settings box and a list of groups: Quality, Walls, Top/Bottom, Infill, Material, Speed, Travel, Cooling and Support, with more further down. A button at the bottom reads Recommended and takes you back. For background on the values themselves, see infill explained. The next lessons cover both modes in detail.
How do you move the camera and read the Slice estimate?
Five small cube buttons at the bottom left set the camera. We hovered over each one and the tooltips read 3D View, Front View, Top View, Left View and Right View, in that order. Beside them, the Object list shows the model name and its size, and in our run it read CE3V3SE_overhang-t and 40.0 x 20.0 x 24.0 mm.
The Slice area is at the bottom right. Before slicing it shows a blue Slice button. We pressed it with the default Standard Quality - 0.2mm profile, and after a few seconds the area changed to a readout of 29 minutes and 4g · 1.18m, with two buttons: Preview and Save to Disk. That is the slicer's own estimate of print time, filament weight and filament length. We did not print the model, so it says nothing about real print time.
In short, the tour works like this:
- Load a model so the toolbar, Object list and Slice area appear.
- Check the printer, material and profile block at the top.
- Use the left toolbar or its shortcuts to place the model.
- Open the settings panel and stay on Recommended until you need more.
- Press Slice and read the estimate, then Preview or Save to Disk.
The next lesson is Cura import, move, scale and rotate (cura-import-move-scale-rotate), which is not published yet. For a wider comparison of programs, see Cura vs OrcaSlicer vs PrusaSlicer.
Next lesson: Cura Import Model: Open, Position and Resize Parts.