A Cura import model step takes seconds: press Cmd+O, pick an STL, and the part appears on the plate. This lesson, tested in UltiMaker Cura 5.13.0 on macOS, then moves, scales, rotates, mirrors, copies, arranges, groups and resets models, using exact numbers wherever Cura offers fields.
How do you import a model in Cura?
Start in the Prepare stage. There are two routes we used. Choose File, then Open File(s)..., or press Cmd+O. The File menu itself showed no shortcut beside Open File(s), so we confirmed Cmd+O by pressing it: the file chooser opened. The folder icon at the top left of the window is a third way in. We did not test dragging a file onto the window. For help choosing a file type, see STL vs 3MF vs G-code.
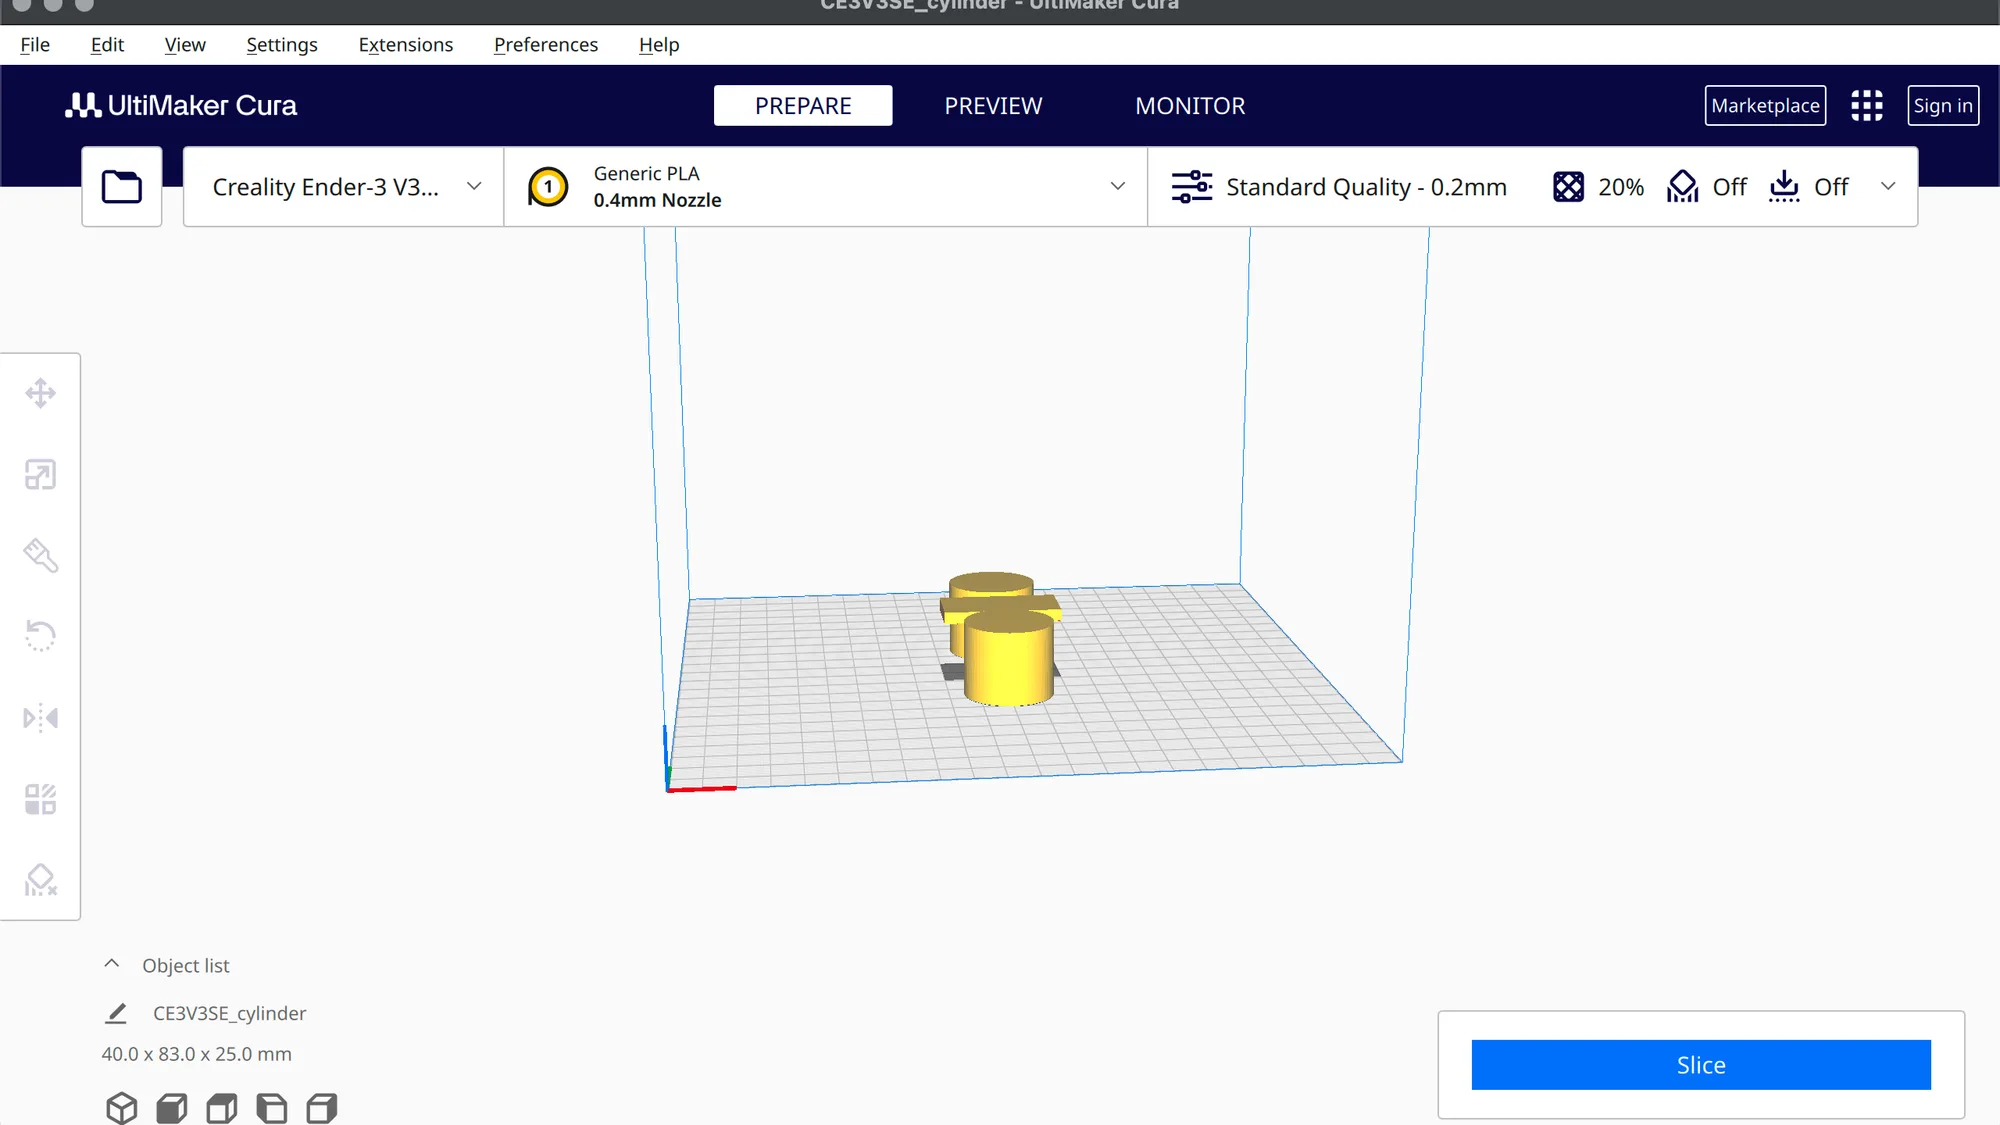
We opened cylinder.stl. It appeared near the centre of the plate and the Object list at the bottom left read 30.0 x 30.0 x 25.0 mm. One surprise: the model was not selected on arrival. The toolbar buttons on the left were dimmed and the model had no blue outline. Click the model once and the toolbar lights up. If you have not seen the toolbar before, the Cura interface tour names every button.
How do you move a model in Cura?
With the model selected, press T or click the top toolbar button, whose tooltip reads Move ("T"). The panel has three fields in mm, X, Y and Z, plus two checkboxes: Lock Model and Drop Down Model. Click a field, select its contents with Cmd+A, type a number and confirm it. We typed 60 into X and the cylinder slid to the right. Each axis works the same way. Y moves the model forwards or backwards on the plate: -30 sent ours towards the back.
Drop Down Model was ticked by default. With it ticked, typing 15 into Z made no lasting difference, because the model dropped back to Z 0. When we unticked it and typed 15 again, the cylinder floated above the plate with a dark shadow underneath. Leave it ticked unless you really want a floating part. We ticked Lock Model but did not test dragging, so we can only say it is there.
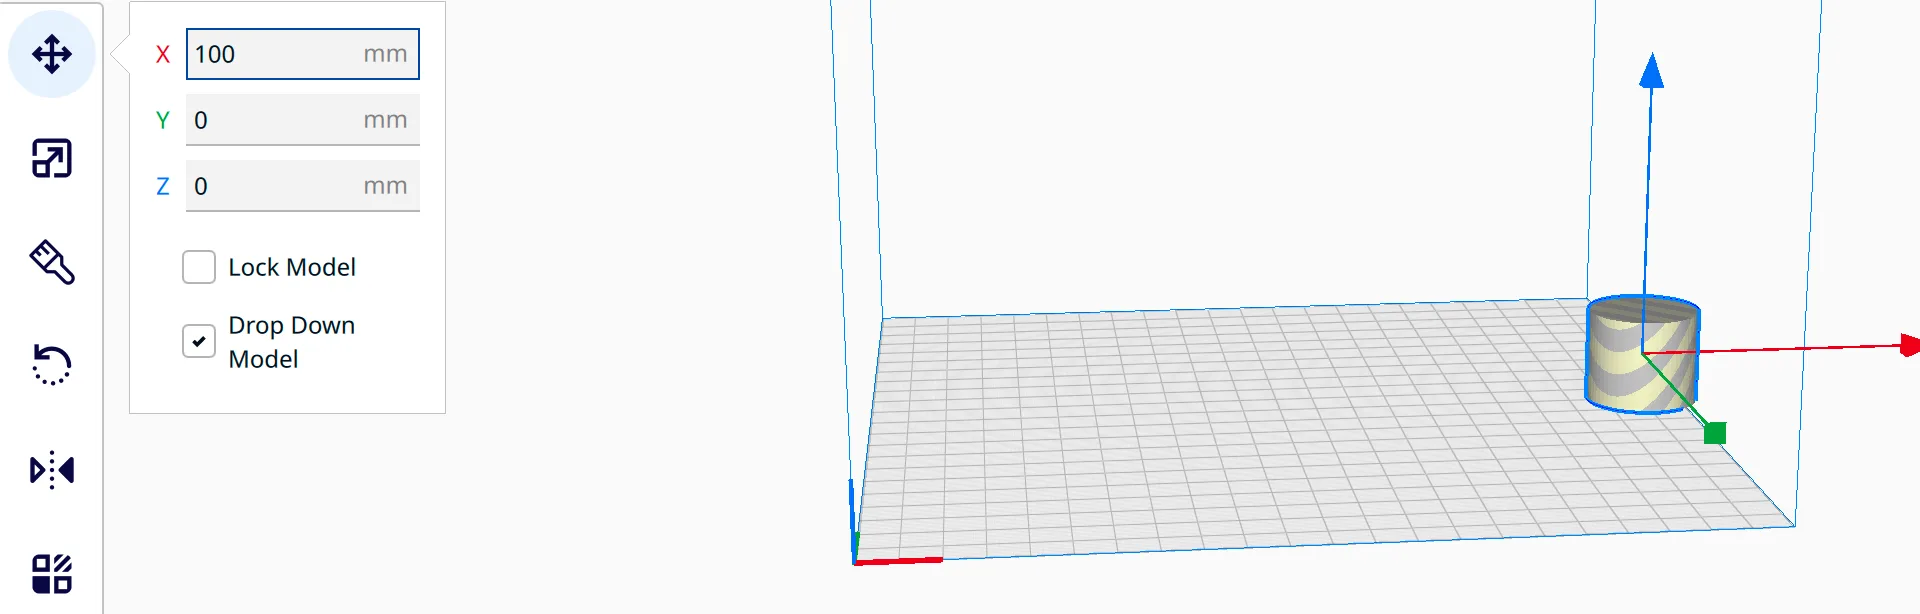
This was also our way to see the warning appearance. At X 100 mm the cylinder, 30 mm wide, reached past the edge of the plate and its surface turned banded in grey and yellow. Pull it back and the stripes vanish. We did not slice in this state, so we cannot say what Cura does with it.
How do you scale a model in Cura?
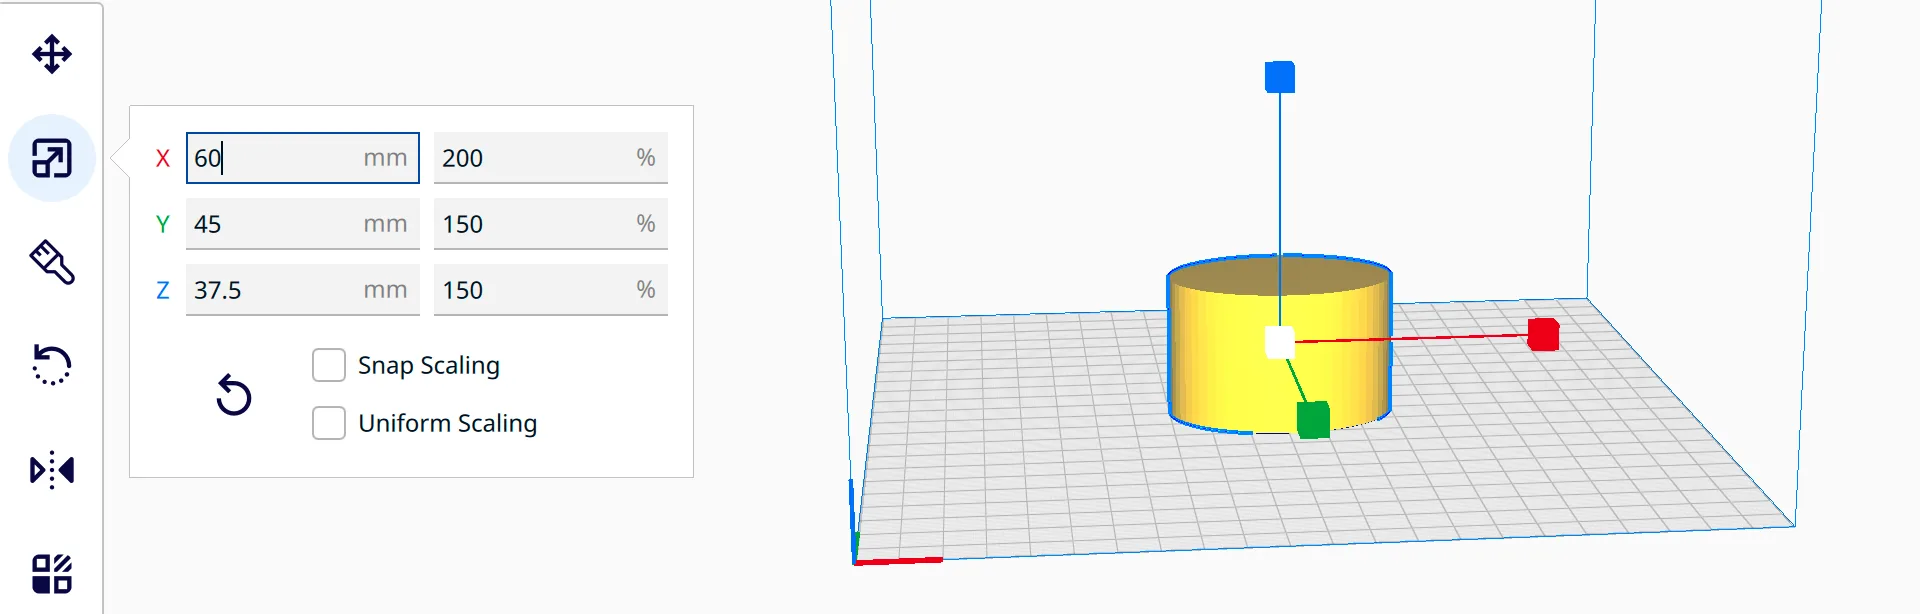
Press S for Scale, tooltip Scale ("S"). The panel has three rows, X, Y and Z, each with a size box in mm and a percent box. Below them are two checkboxes, Snap Scaling (unticked) and Uniform Scaling (ticked), and a circular arrow button that shows the tooltip Reset.
We typed 150 into the X percent box. All three rows went to 150%, and the sizes became 45, 45 and 37.5 mm, which the Object list confirmed as 45.0 x 45.0 x 37.5 mm. Then we unticked Uniform Scaling and typed 60 into the X size box. X went to 200% and Y and Z stayed at 150%, so the cylinder became oval. Pressing Reset returned all rows to 100% and the size to 30 x 30 x 25 mm. We did not test Snap Scaling. Scaling changes the model itself, so check supports and wall thickness afterwards.
How do you rotate a model and lay it flat?
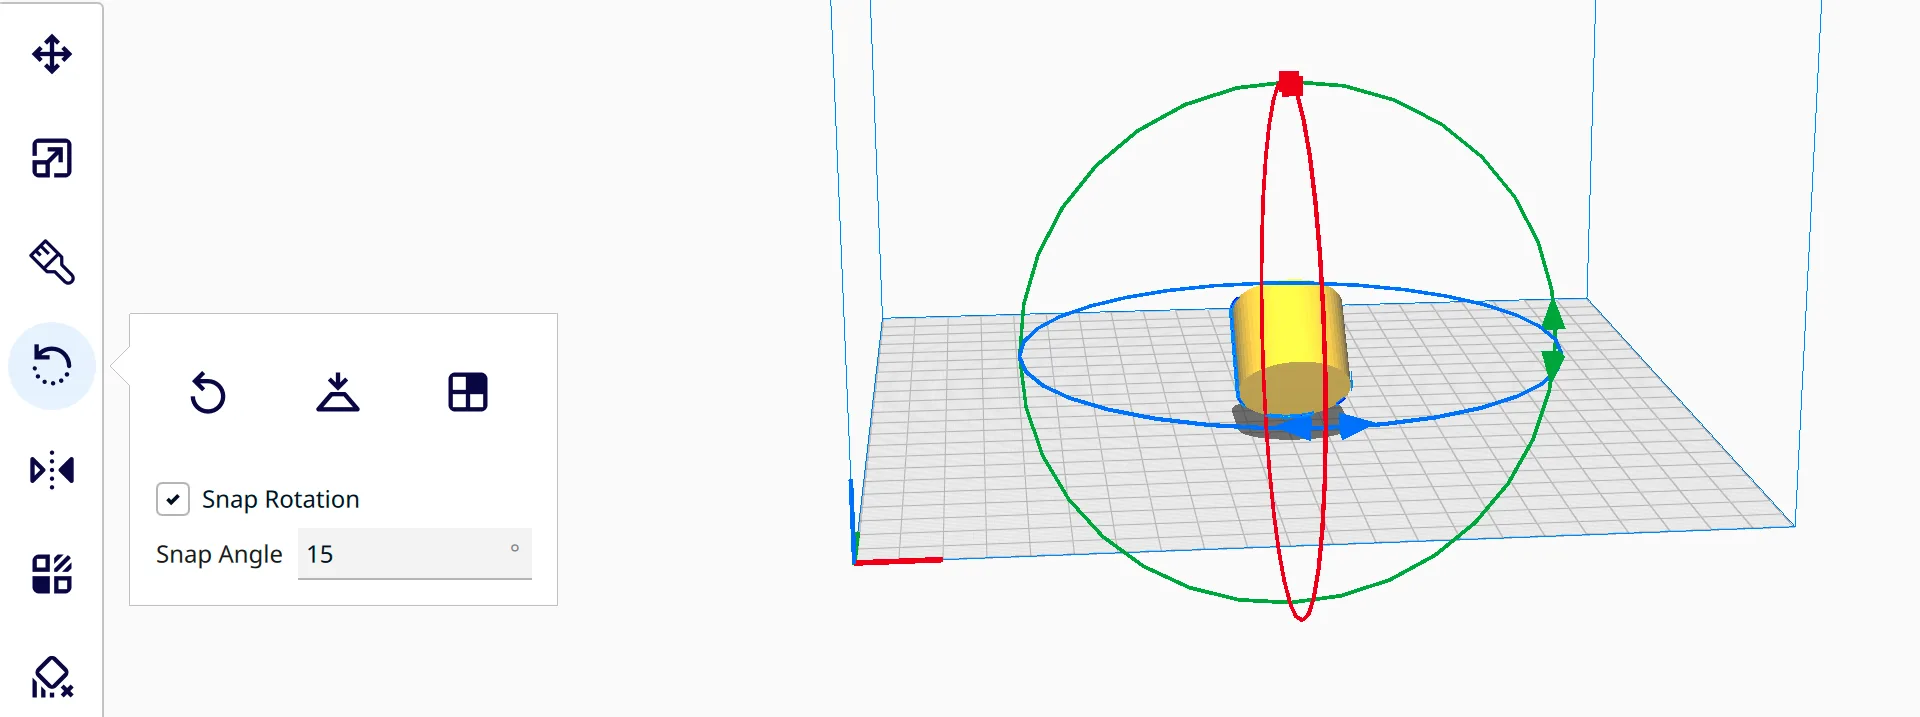
Press R, tooltip Rotate ("R"). Three coloured rings surround the model, red, green and blue. Drag a ring to turn the model about that axis. Our first drag tilted the cylinder and the Object list read 30.0 x 38.5 x 36.7 mm. The panel has three buttons, whose tooltips read Reset, Lay flat and Select face to align to the build plate. Beneath them Snap Rotation is ticked, with a Snap Angle of 15 degrees.
Lay flat worked at once: the tilted cylinder went back to 30.0 x 30.0 x 25.0 mm. The face button switches on a mode. A box at the bottom says Select Face Mode Active, adding "Select a face on the model to align it to the build plate. The rotation controls are disabled while in this mode." and a button labelled Exit Select Face Mode. We clicked a face, but the result was not clear enough to describe with confidence, so we left the mode and pressed Reset, which restored the model.
Mirror is the fifth toolbar button, tooltip Mirror ("M"). It shows arrow handles around the model, red left and right and blue up and down. Our test cylinder is symmetric, so we saw no visible change and cannot describe the flip.
How do you arrange, copy and group several models?
Opening a second file with Cmd+O (we added overhang-t.stl) kept the cylinder selected, and the Object list showed the combined footprint, 40.0 x 51.5 x 25.0 mm. The Edit menu holds the multi-model tools:
- Arrange All Models. We dragged the cylinder to X -50 and then pressed Cmd+R. It jumped back next to the T part, at Y 26.502. The menu shows no shortcut, so check this on your own machine. The right-click menu also offers Arrange All Models in a grid. We found no Arrange Selection item in either menu.
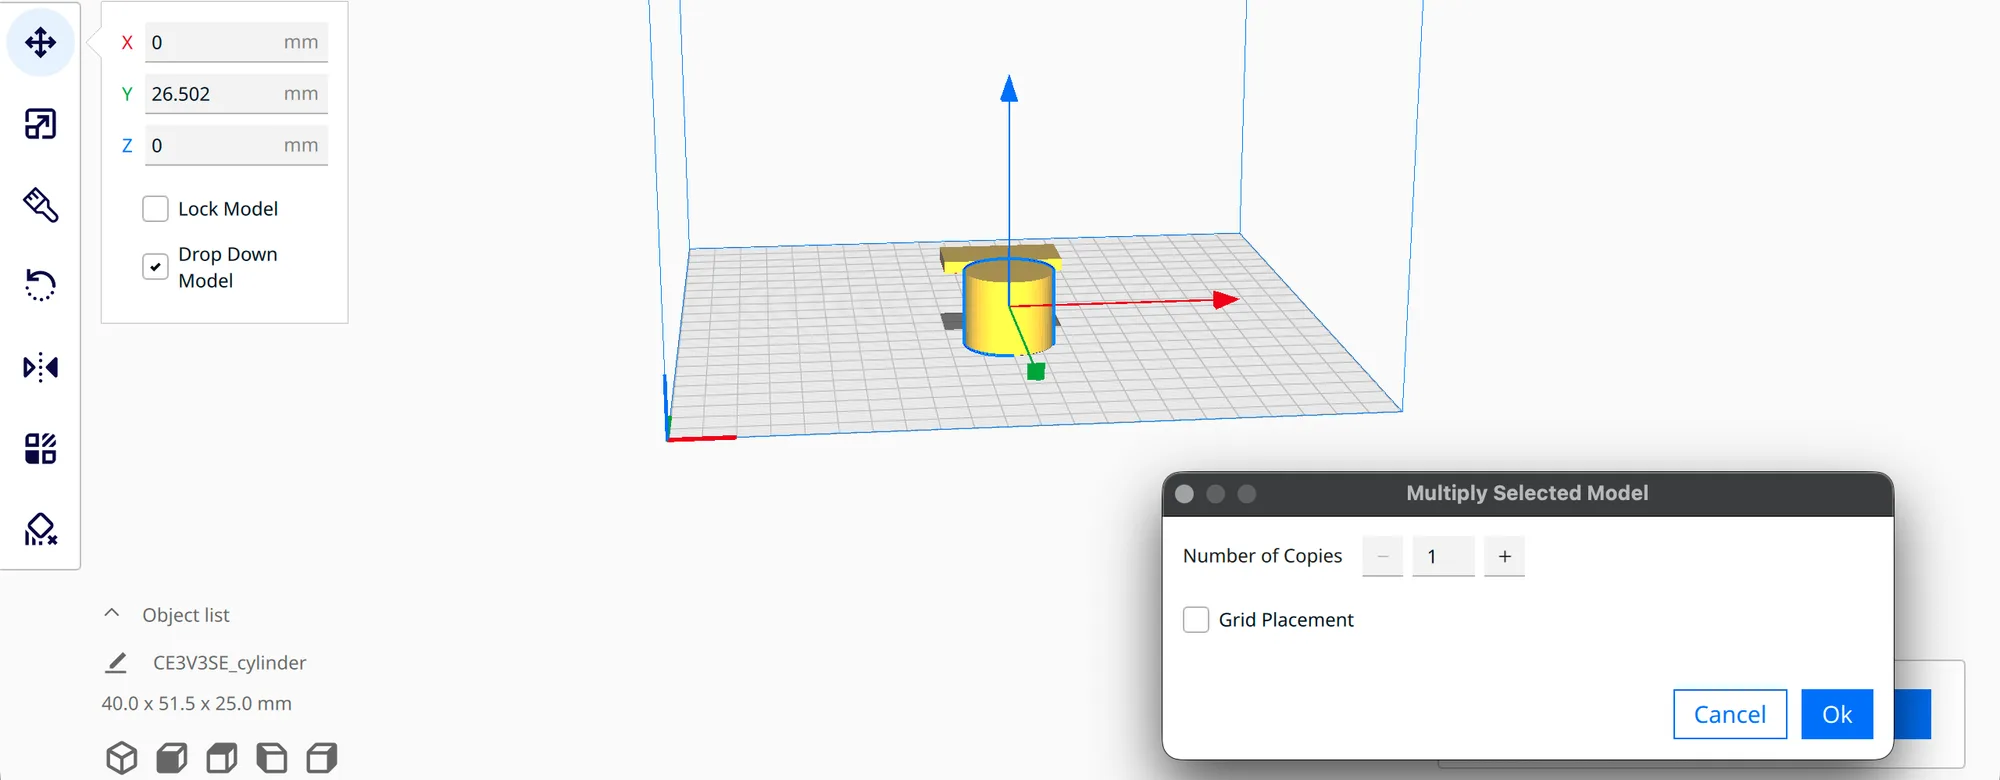
- Multiply Selected opens a window titled Multiply Selected Model with Number of Copies (a box with minus and plus buttons, set to 1), a Grid Placement checkbox, Cancel and Ok. One copy took us to three models and a 40.0 x 83.0 x 25.0 mm footprint.
- Select All Models outlines every model. The Per Model Settings button dims while several are selected.
- Group Models merged the three into one object with a single outline and a dashed box. While grouped, Group Models and Merge Models were greyed out and Ungroup Models was available. Ungroup gave us three outlines again. We did not test Merge Models.
- Reset All Model Positions piled all three at the centre of the plate, overlapping, with a 40.0 x 30.0 x 25.0 mm footprint. Cmd+R fixed it. Reset All Model Transformations and Drop All Models to buildplate sit beside it, which we did not run.
To delete, click a model and press the delete key (backspace on a Mac). It removed the selected cylinder. Edit also has Delete Selected and Clear Build Plate, which emptied the plate with no prompt. The right-click menu adds Center Selected, Copy to clipboard and Paste from clipboard. Next comes the settings lesson, Cura print settings recommended (cura-print-settings-recommended), which is not published yet. If you are new to slicing, read what a slicer is.
Next lesson: Cura Recommended Settings: Resolution, Infill and Adhesion.