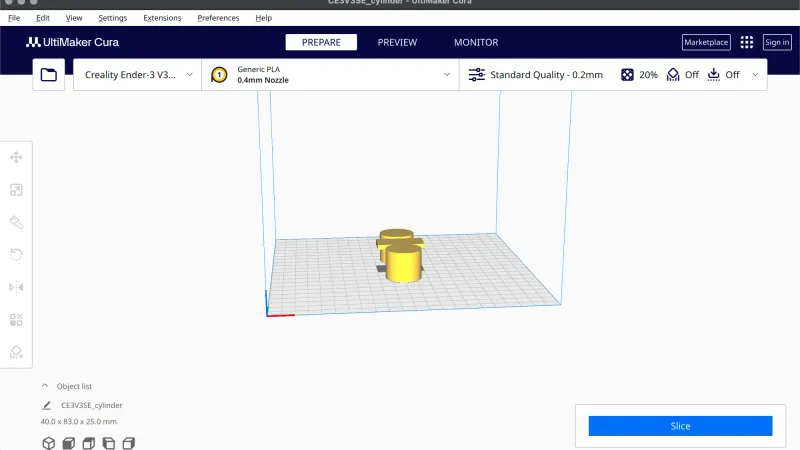
Cura per model settings let one model, or one region of a model, use different print settings from the rest of the plate. This lesson, tested in UltiMaker Cura 5.13.0 on macOS, opens the tool, overrides infill and walls, then uses a second model as an infill mesh. Every number is a slicer estimate. We did not print anything.
Where is the Per Model Settings tool in Cura?
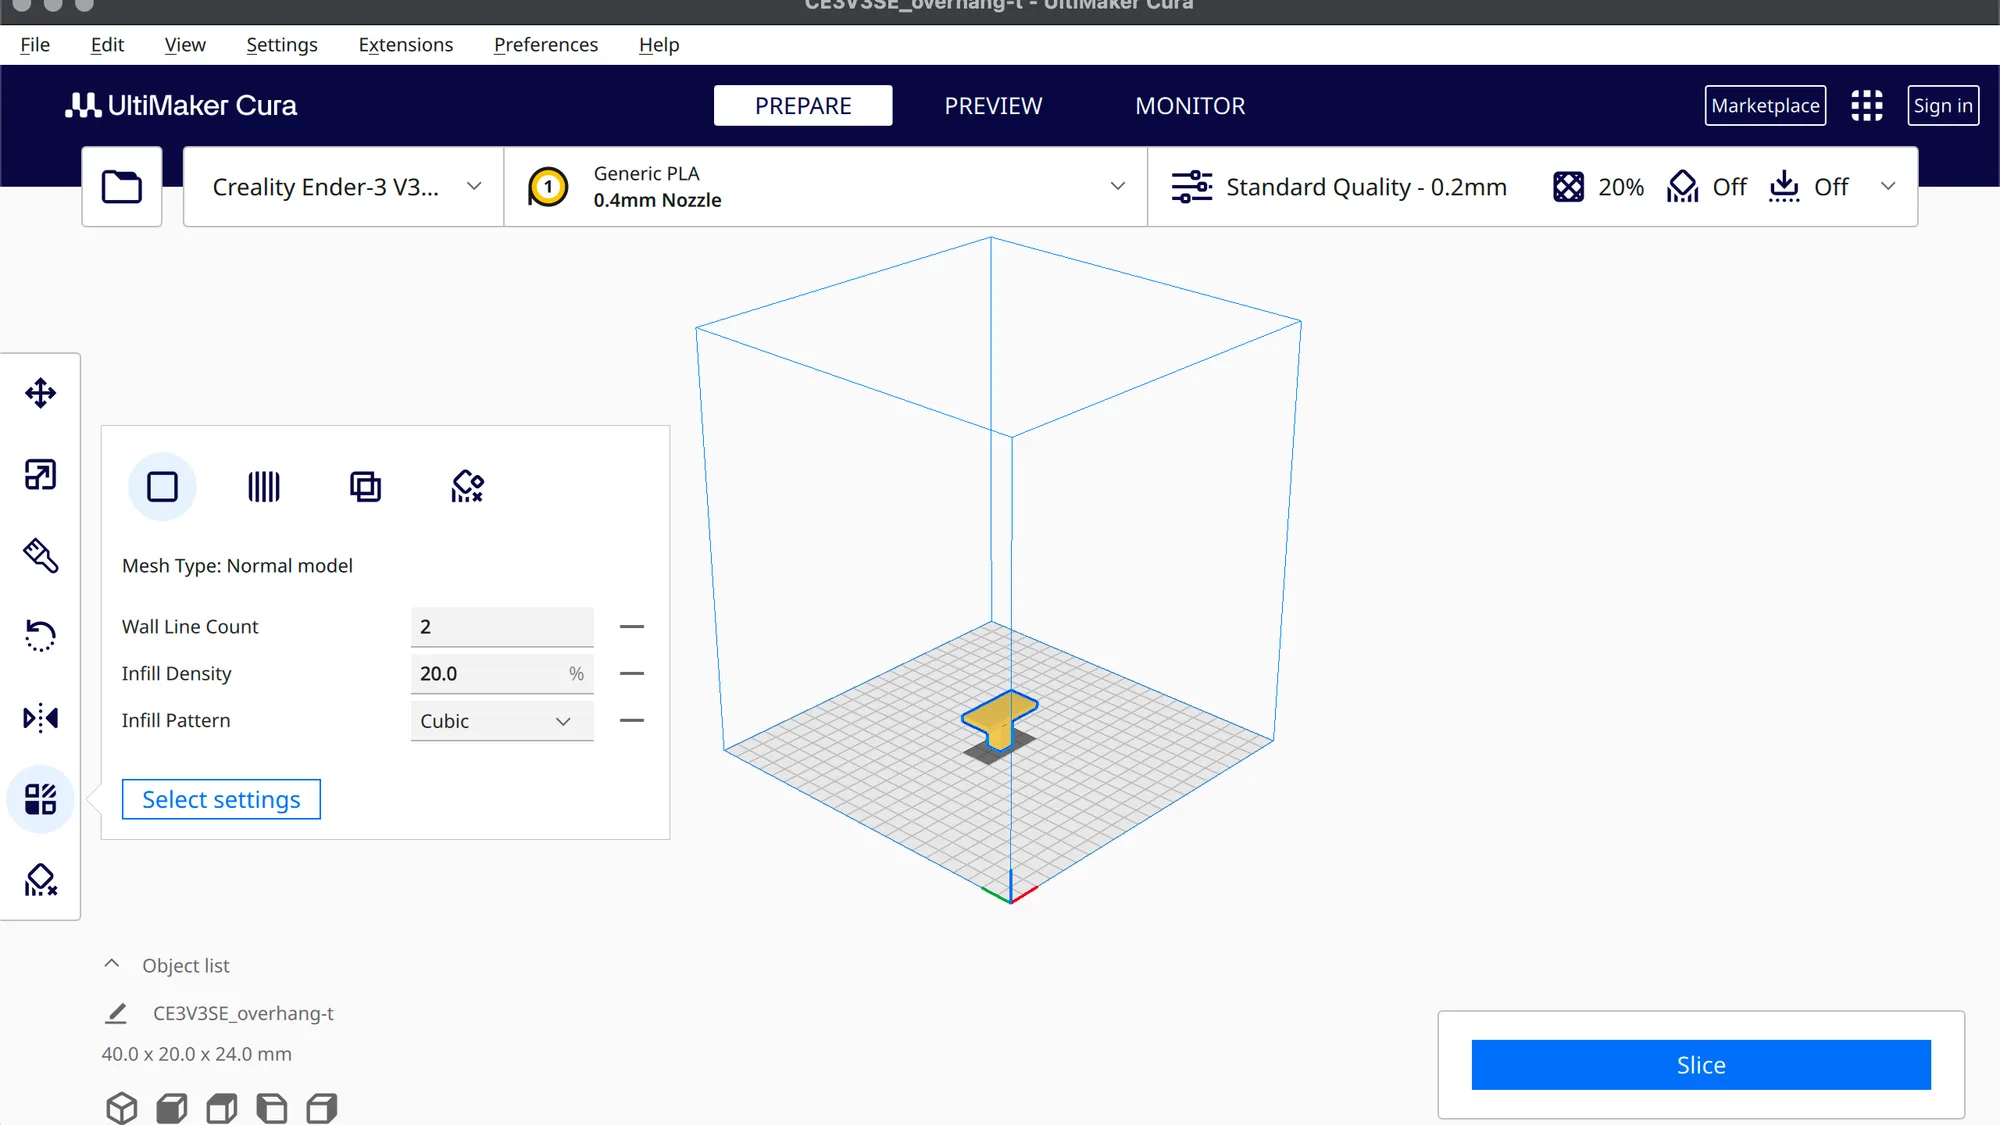
It is on the left toolbar, and it only works when a model is selected. With nothing selected, every toolbar icon was greyed out. We clicked overhang-t to select it. The toolbar then listed Move, Scale, Paint, Rotate, Mirror, Per Model Settings and Support Blocker from top to bottom. Hovering the sixth icon showed a tooltip reading Per Model Settings. Move showed Move ("T") and Support Blocker showed Support Blocker ("E"), but Per Model Settings had no shortcut letter, so you have to click it.
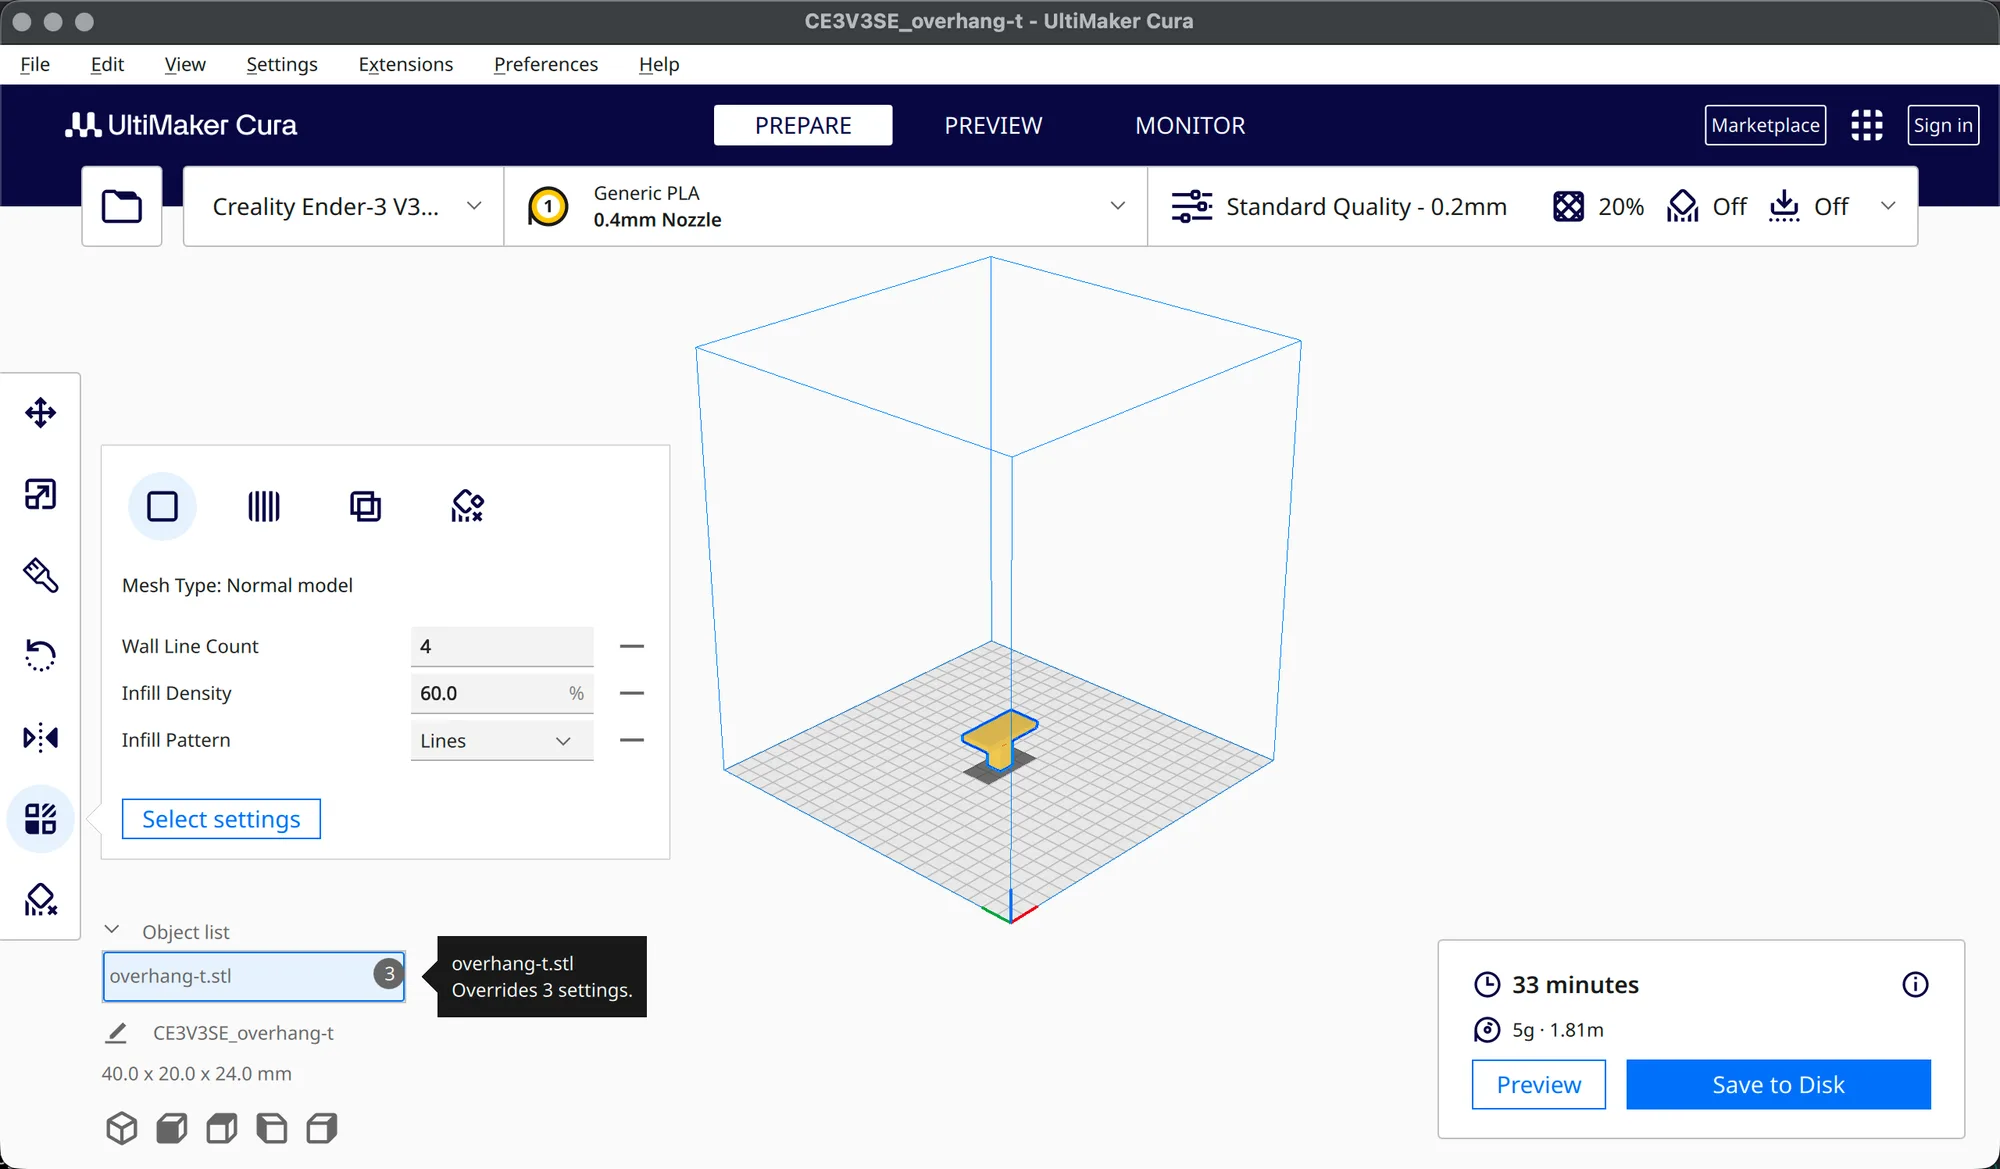
One quirk: our first click on the icon only switched the toolbar to a different tool, and a second click switched it away again. Click once, wait a second, and check the panel. It opens beside the toolbar. At the top are four round buttons, a line reading Mesh Type: Normal model, and a button called Select settings. If you are new to the toolbar, the Cura interface tour is a better place to start.
How do you add settings for one model?
Click Select settings. A dialog titled Select Settings to Customize for this model opens. It has a Filter... box, a Show all checkbox, a scrolling list grouped by category (Quality, then Walls, then Infill and so on) and a Close link at the bottom. Without filtering, the first screen listed Line Width settings under Quality and Wall Thickness, Wall Line Count and Wall Transition settings under Walls.
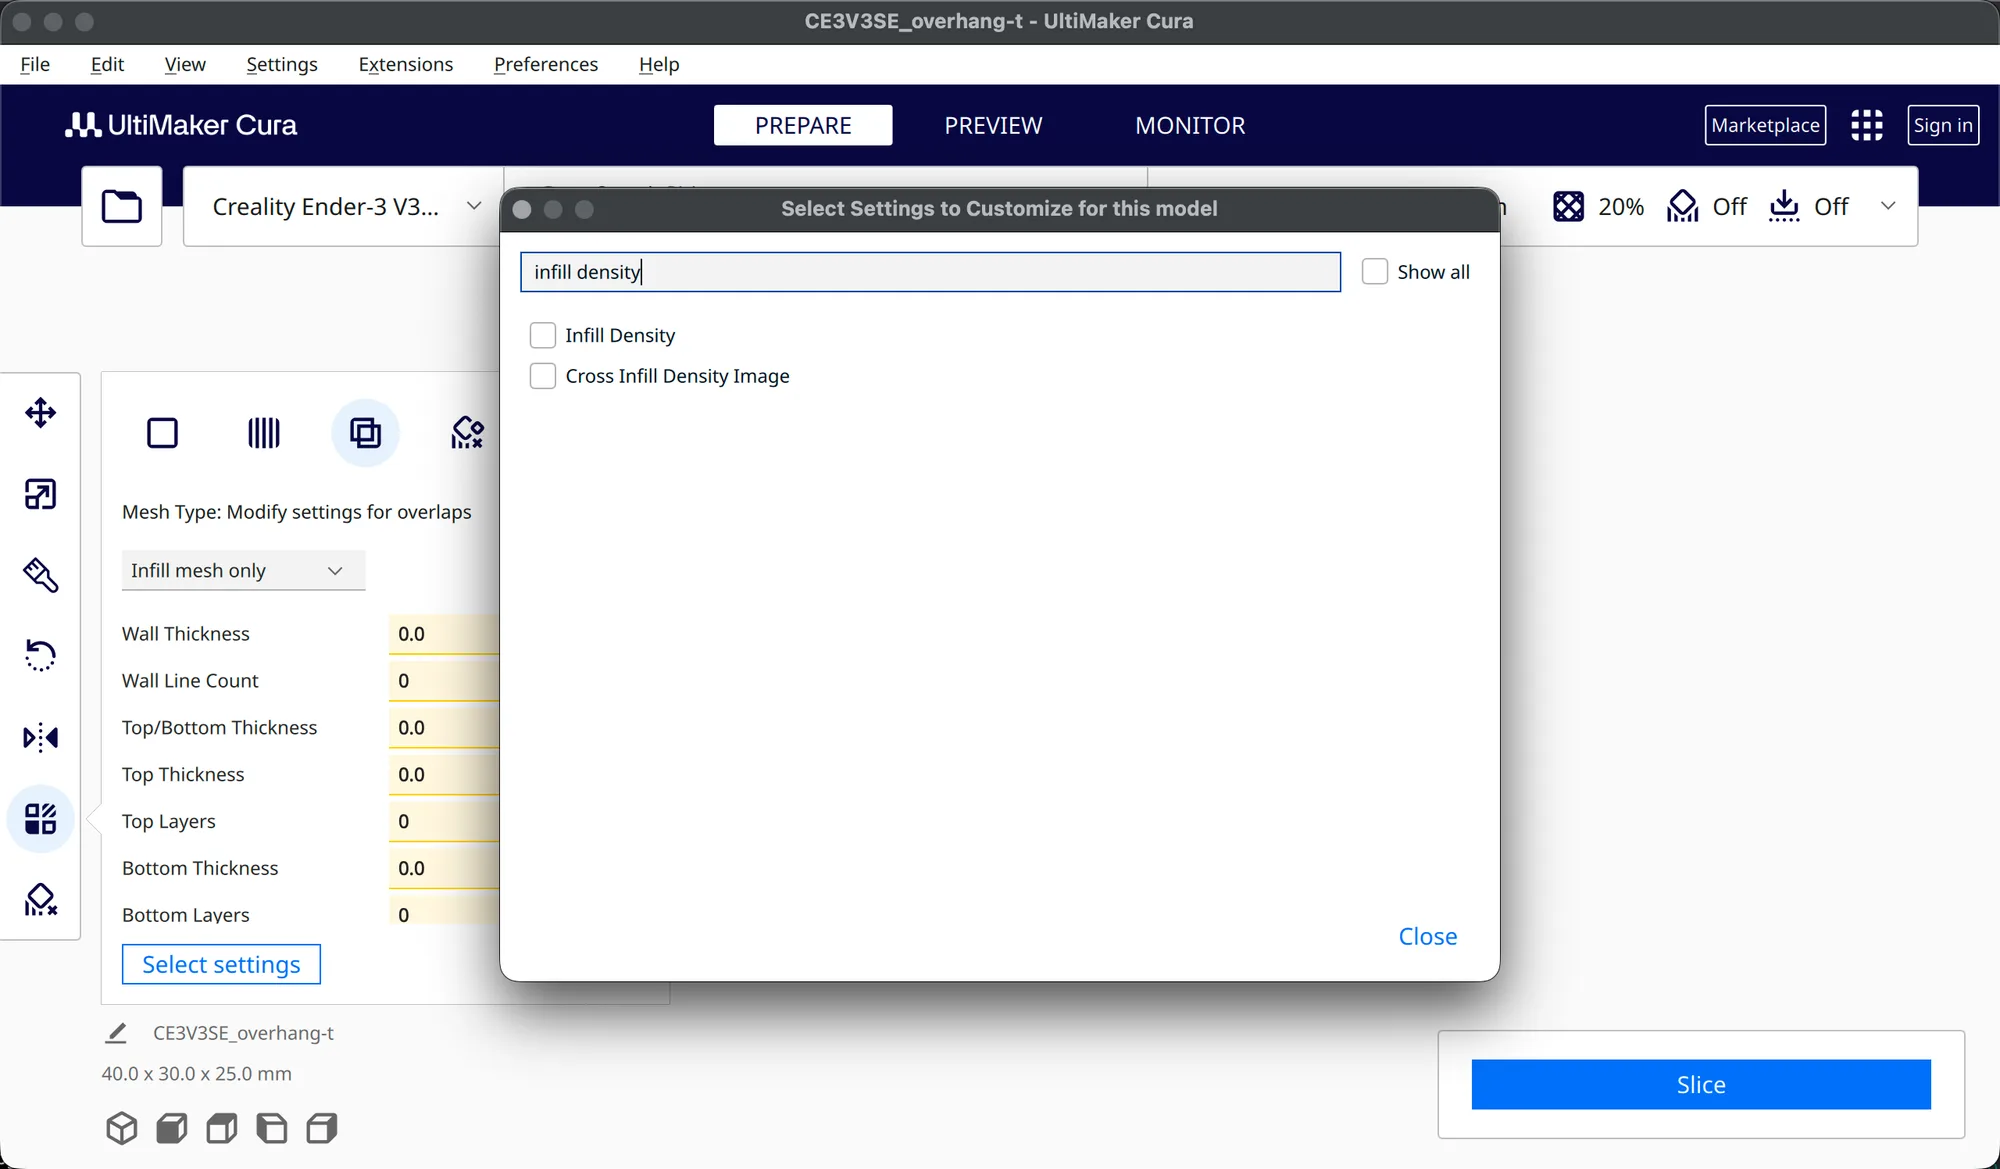
We ticked Wall Line Count under Walls. Then we clicked the filter box and typed "infill". The list narrowed to infill settings: Infill Line Width, then under the Infill category Infill Density, Infill Line Distance, Infill Pattern, Connect Infill Lines and more. We ticked Infill Density and Infill Pattern, then clicked Close. Typing "infill density" gave just two results, Infill Density and Cross Infill Density Image, so the filter is the fast way in.
Each tick added a row to the panel at once, using the value the global profile already had. Wall Line Count read 2, Infill Density read 20.0 % and Infill Pattern read Cubic in a drop-down. For background on what these mean, see walls and perimeters explained and infill explained.
How do you edit and remove per model settings?
Every row has an editable field and, on the right, a dash button that removes that row. We typed 4 into Wall Line Count, 60 into Infill Density and set Infill Pattern to Lines. We pressed Return after each number. The top bar still read 20% for infill, because the bar shows the global value and our change belongs to this one model.
The object list at the bottom left proves it. We expanded Object list, and overhang-t.stl had a small badge reading 3. Hovering the row showed overhang-t.stl, Overrides 3 settings. Each time we removed a row with its dash button, the badge dropped by one, and it disappeared when the last row went.
What are the mesh types in Cura?
The four round buttons at the top of the panel are the mesh types. We hovered each one and read the tooltip:
- Normal model: an ordinary part. This is the default.
- Print as support: the model is printed as a support structure.
- Modify settings for overlaps: the model is not printed itself, it changes settings where it overlaps another model.
- Don't support overlaps: supports are not generated where it overlaps another model.
The last two names match the Support Blocker idea in supports explained. We only tested Modify settings for overlaps. Cura 5.13.0 has no separate button called Infill mesh or Cutting mesh. Those two live in a drop-down that appears after you choose the overlaps type.
How do you use an infill mesh in Cura?
We removed the three overrides from overhang-t, then opened cylinder.stl with File, Open. It landed beside the model. We selected it in the object list, used the Move tool to set X 0 and Y 4 so it overlapped the stem and the top of the T, then opened Per Model Settings and clicked the third button, Modify settings for overlaps. The panel line changed to Mesh Type: Modify settings for overlaps and a drop-down appeared reading Infill mesh only.
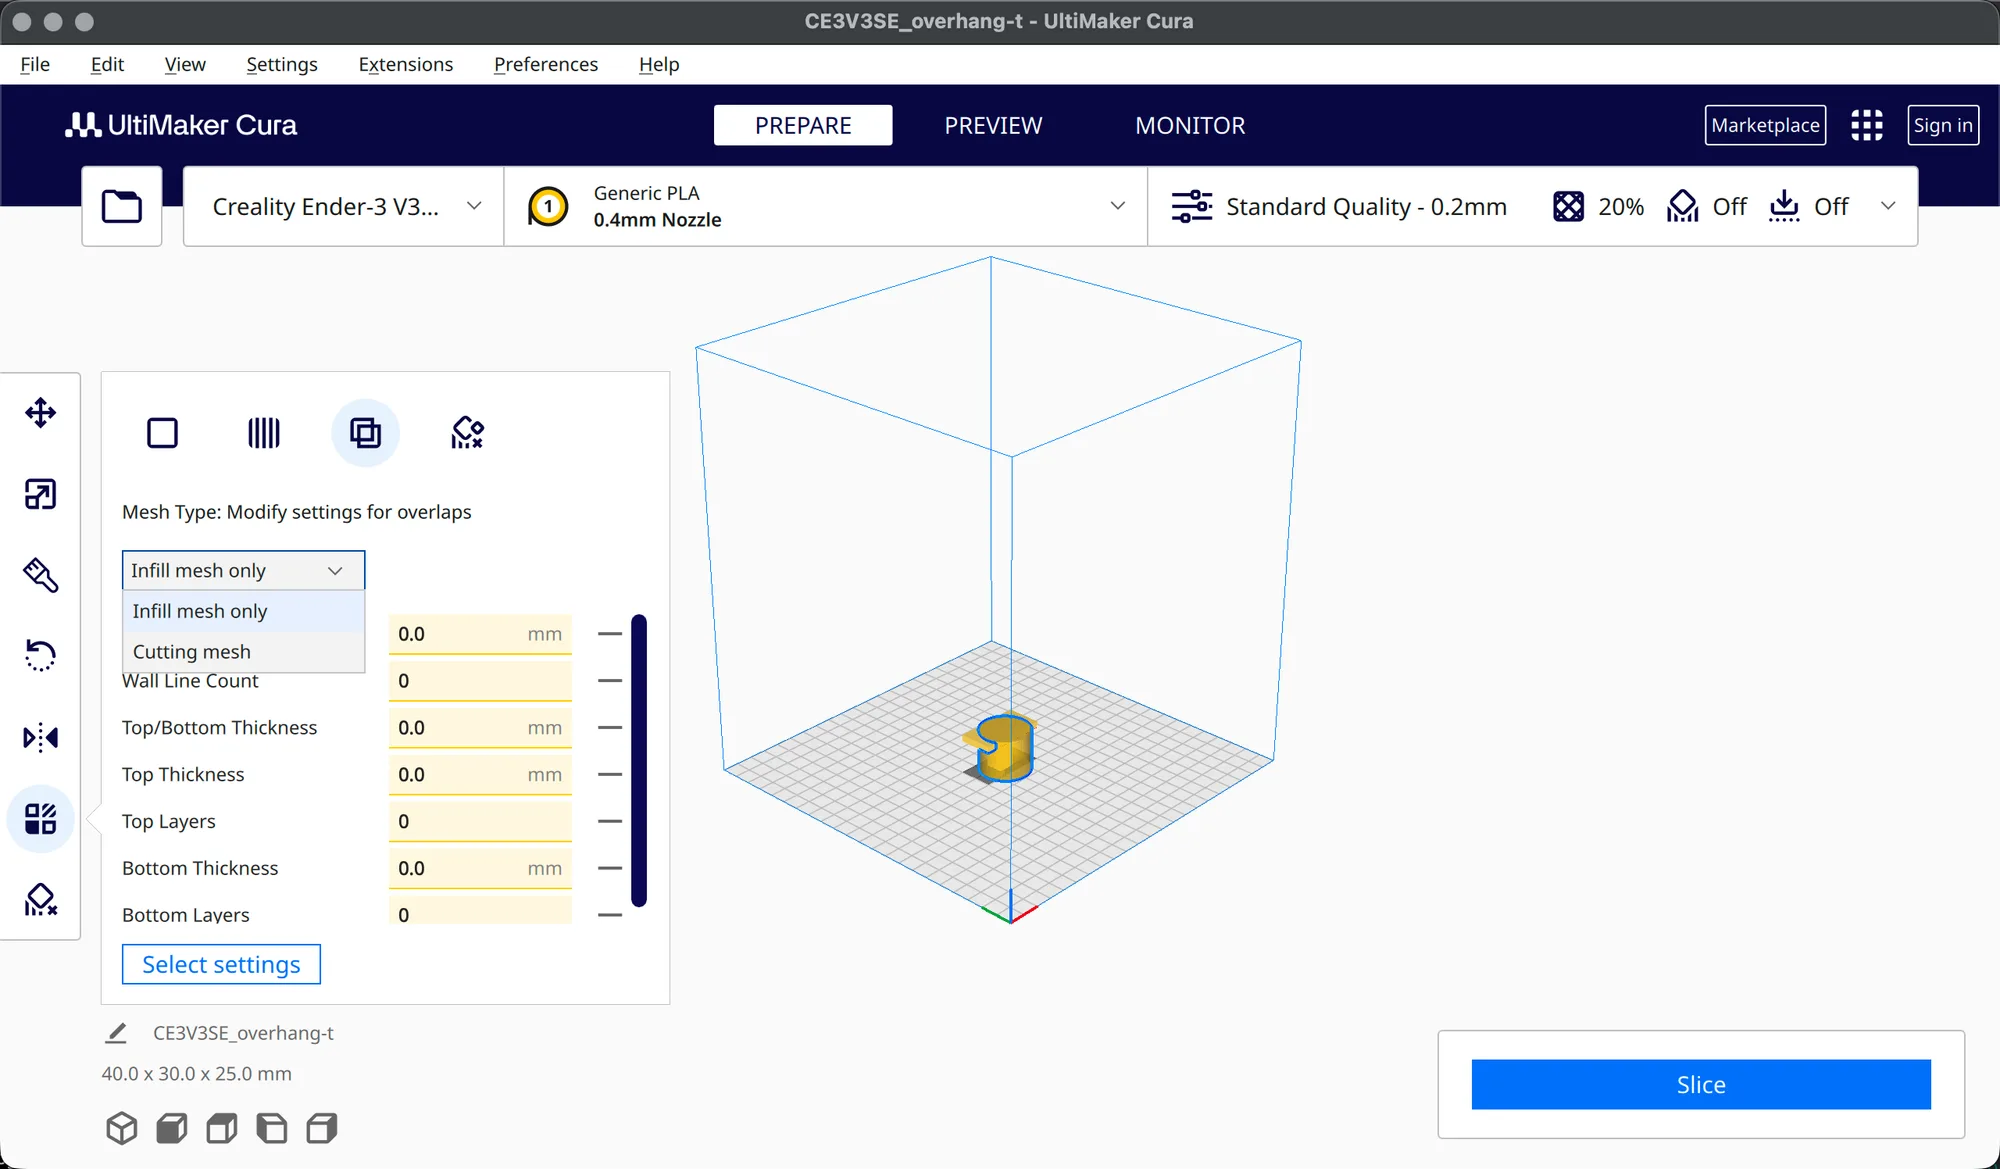
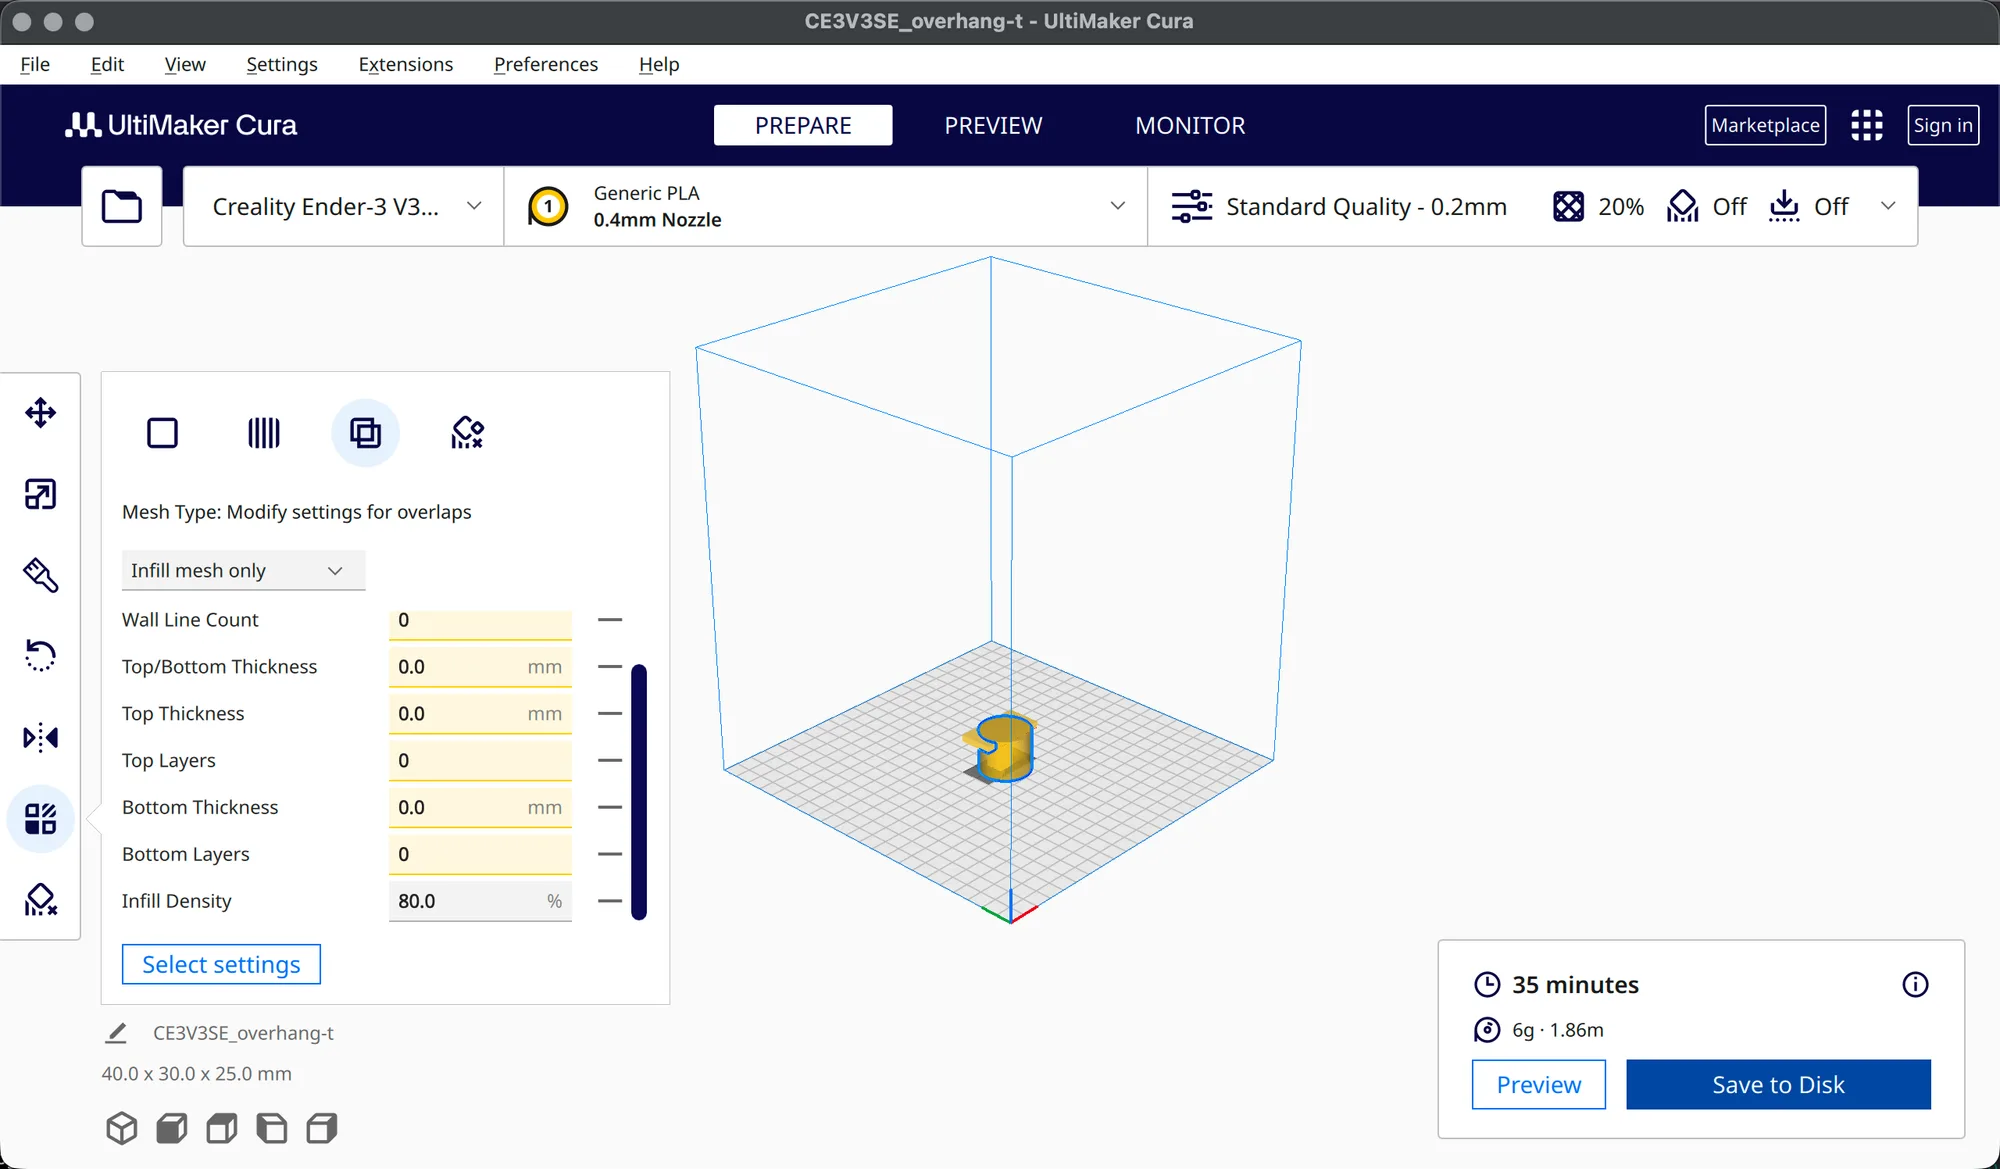
Opening it listed exactly two choices, Infill mesh only and Cutting mesh. Cura also pre-filled yellow rows in the panel: Wall Thickness 0.0 mm, Wall Line Count 0, Top/Bottom Thickness 0.0, Top Thickness 0.0, Top Layers 0, Bottom Thickness 0.0 and Bottom Layers 0. Those zeros stop the cylinder adding walls or skins. We kept Infill mesh only, then used Select settings to add Infill Density and scrolled the panel down to its row. It read 20.0 %, and we set it to 80. The idea is a stronger core only where the cylinder overlaps, with the rest of the part left at 20%.
What did it change in the estimates?
We pressed Slice at Standard Quality 0.2 mm with Generic PLA and no support, and read the readout at the bottom right each time.
| Setup | Time | Weight | Length |
|---|---|---|---|
| Global settings only (overhang-t) | 29 minutes | 4 g | 1.18 m |
| Per model: 4 walls, 60% infill, Lines pattern | 33 minutes | 5 g | 1.81 m |
| Cylinder as infill mesh, 80% infill over the overlap | 35 minutes | 6 g | 1.86 m |
These are slicer estimates for a small test part, not prints, so we make no claim about strength or quality. The direction is clear: more walls and denser infill cost time and filament. We did not open Preview to confirm where the dense region sits, so treat the placement as the intent of the setting. For the global versions of these controls, see Cura custom settings.
How should you use per model settings day to day?
Use them sparingly. They are right for a bracket that needs extra walls while a decorative part beside it stays light. They are wrong for settings you want on every print, which belong in a profile. The badge on the object list is your reminder of what is overridden, and the dash buttons undo it row by row. If you also use Orca Slicer, the same idea is covered in Orca Slicer per object settings, and the earlier lesson on Cura materials and profiles covers the global side.
We left Cura in Recommended mode with overhang-t loaded, no overrides and no dialogs open. The next lesson covers plugins and the marketplace (cura-plugins-and-marketplace), which is not published yet.
Next lesson: Cura Plugins and Marketplace: What You Can Add.