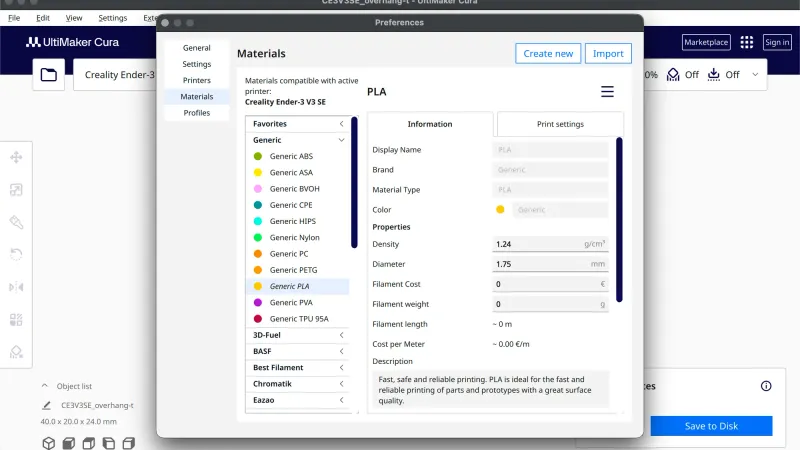
Cura plugins add features the base slicer does not have, from extra file readers to G-code scripts. This lesson, tested in UltiMaker Cura 5.13.0 on macOS, tours the Marketplace, the bundled plugins, the Post Processing scripts and a few useful preferences. We installed nothing and did not sign in. Nothing here was printed.
What is the Cura Marketplace?
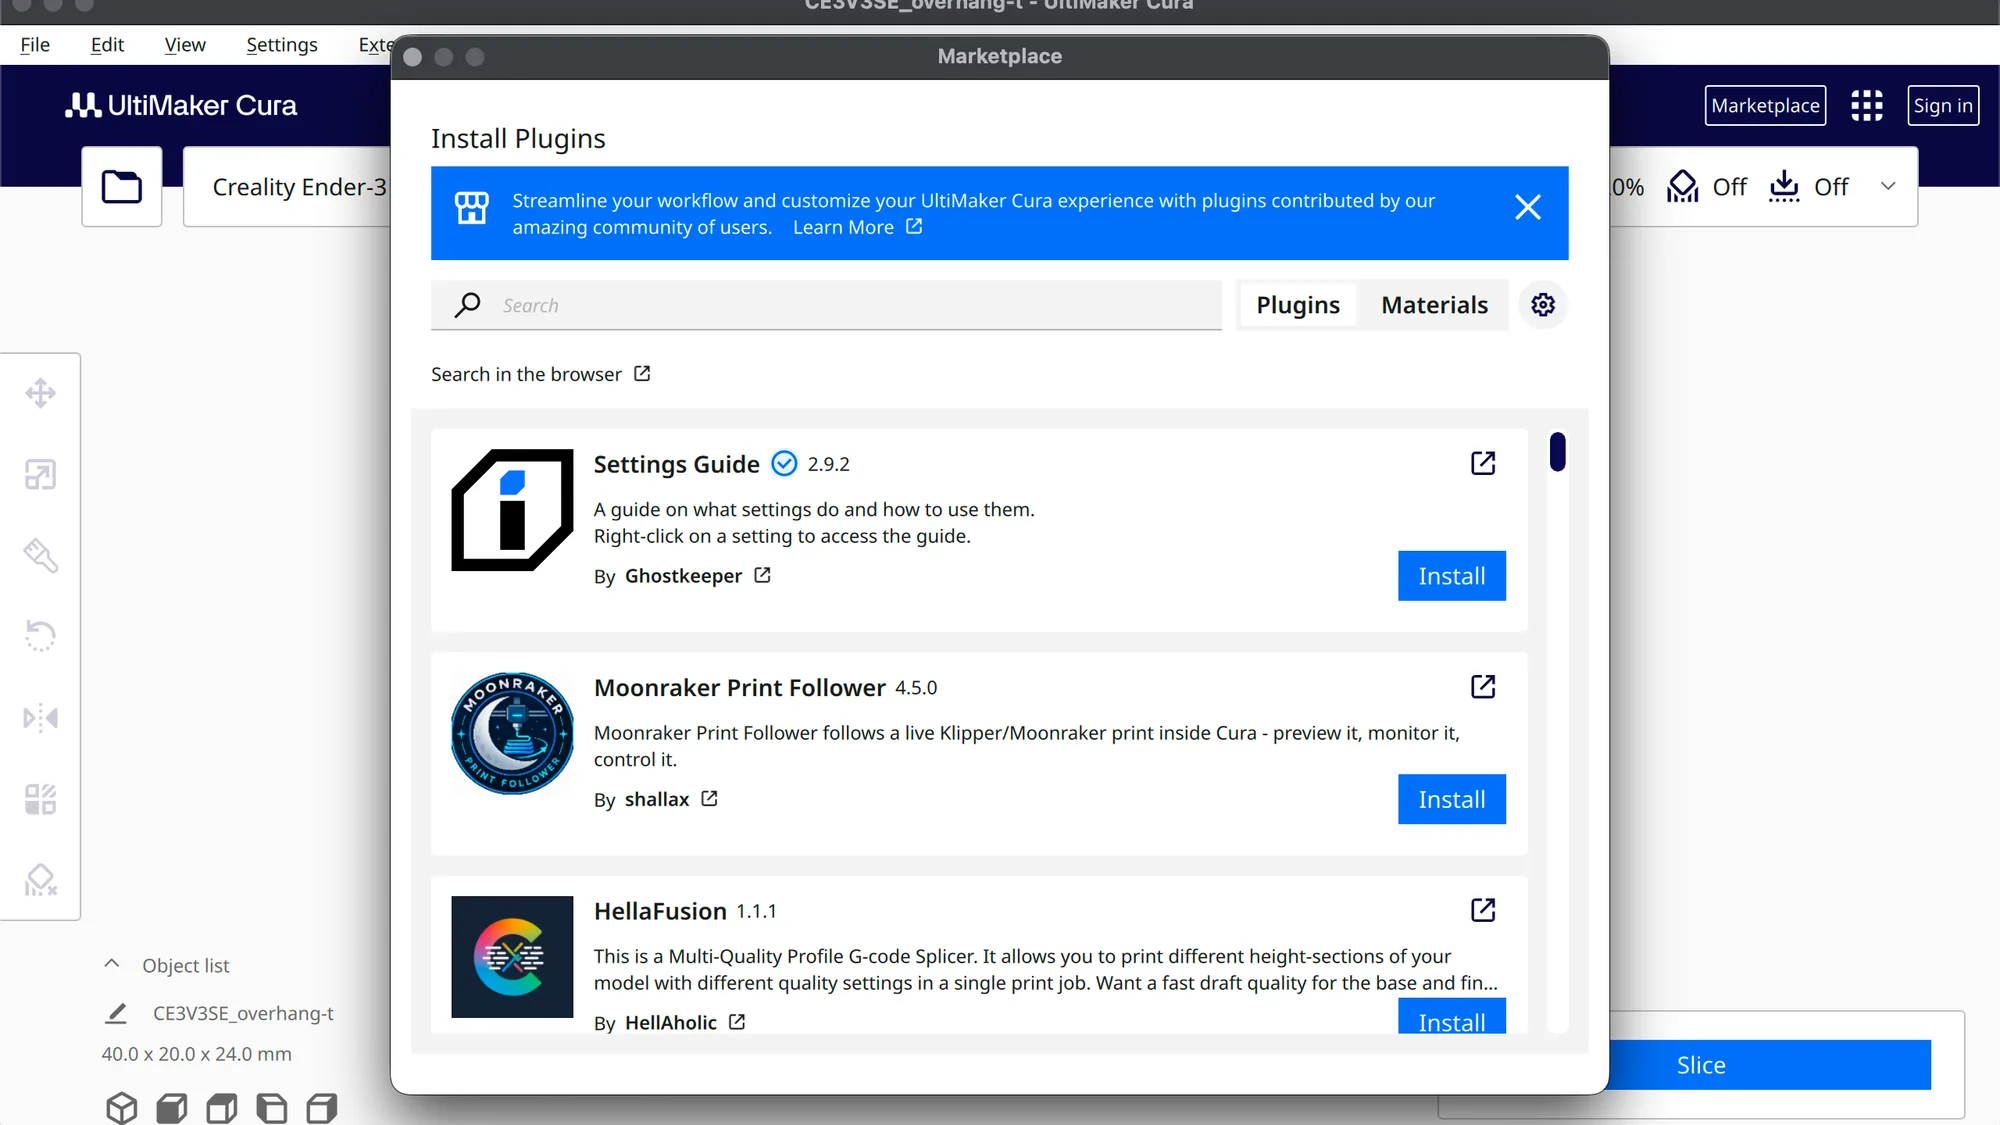
It is a catalogue of add-ons you can install into Cura. It sits behind the Marketplace button at the top right of the window, next to the grid icon and the Sign in button. Clicking it opened a separate window titled Marketplace. Ours opened on Install Materials, with a blue banner and material profiles from makers such as Forward AM and LEHVOSS Group.
At the top right are two tabs, Plugins and Materials, and a round gear button. There is a Search box and a link reading Search in the browser. Our 5.13.0 window had no tab called Installed. The gear button is where installed items live, which the next section covers. Browsing needed no account, since the cards loaded while we were signed out. Each card has an Install button. We left those alone and did not test what they do when signed out.
The Plugins tab changed the title to Install Plugins. Its banner read that plugins are contributed by the community of users. The first cards were Settings Guide 2.9.2 by Ghostkeeper, Moonraker Print Follower 4.5.0 by shallax and HellaFusion 1.1.1 by HellAholic. Each card shows a short description, the author and a version number. Some authors carry badges and some do not.
Plugins are third party. Most of those names come from community authors, not from UltiMaker, and a plugin runs code inside your slicer. Read the description, check the author and keep it to things you need. If you are new to Cura, Cura for beginners covers the basics first.
How do you see which plugins you already have?
Click the gear button. Its tooltip read Manage packages, and the window title changed to Manage packages. A banner said to manage your Cura plugins and material profiles there and to keep plugins up to date.
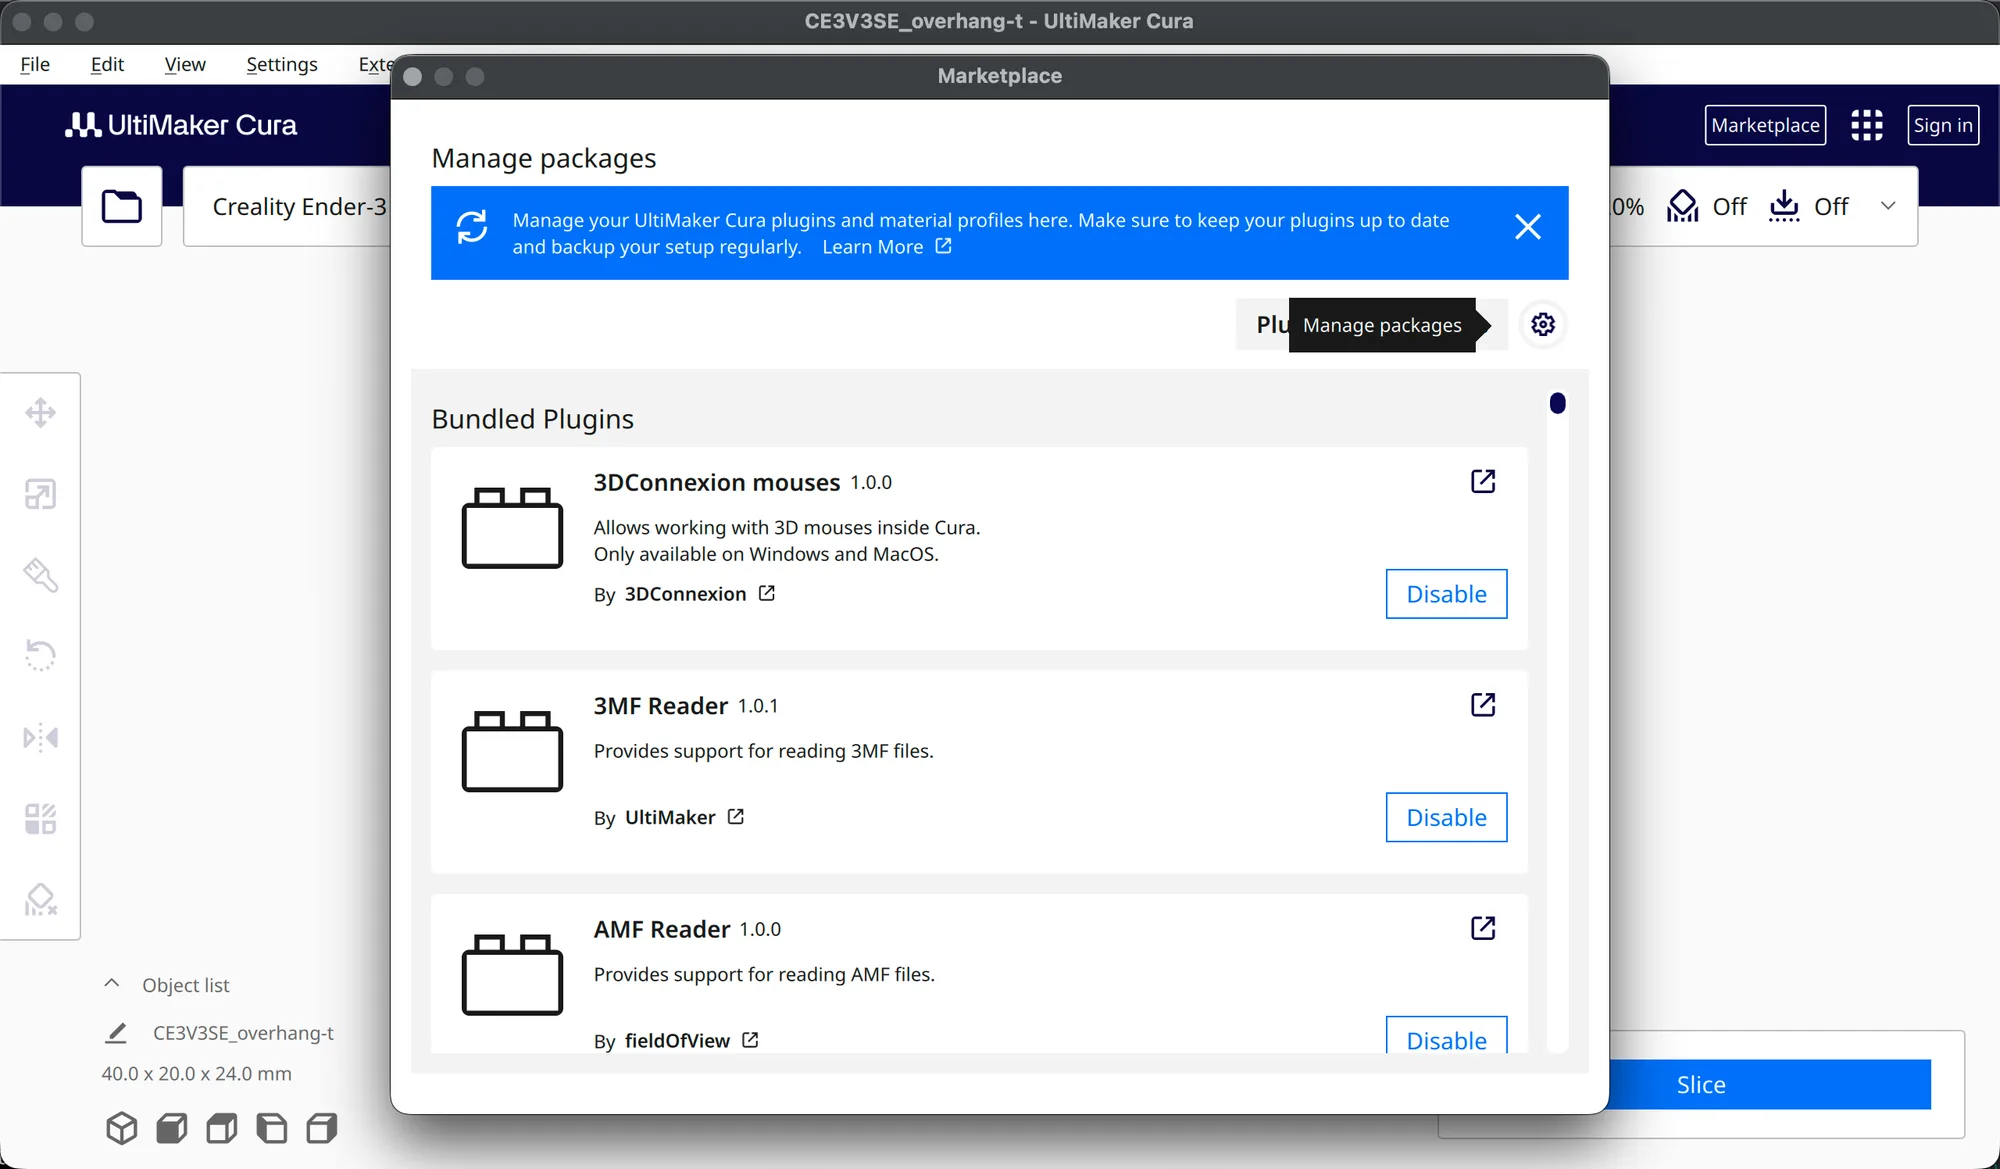
The first section is Bundled Plugins, the ones that ship with Cura. The first three we saw were 3DConnexion mouses 1.0.0 (3D mouse support, macOS and Windows only), 3MF Reader 1.0.1 and AMF Reader 1.0.0. Each has a Disable button rather than Install. We did not press it. We did not scroll the whole list, so we cannot say how many bundled plugins there are. We closed the window with its red button.
What is in the Extensions menu?
Less than you might expect. Opening Extensions in the menu bar showed three entries: Update Checker, Post Processing and Cura Backups, each with a submenu arrow. Plugins you install later can add their own entries here, so your menu may differ from ours. We saw no entry named Installed plugins, Material or Visibility in this version. Installed items are managed from the Marketplace gear button instead.
How do Post Processing scripts work?
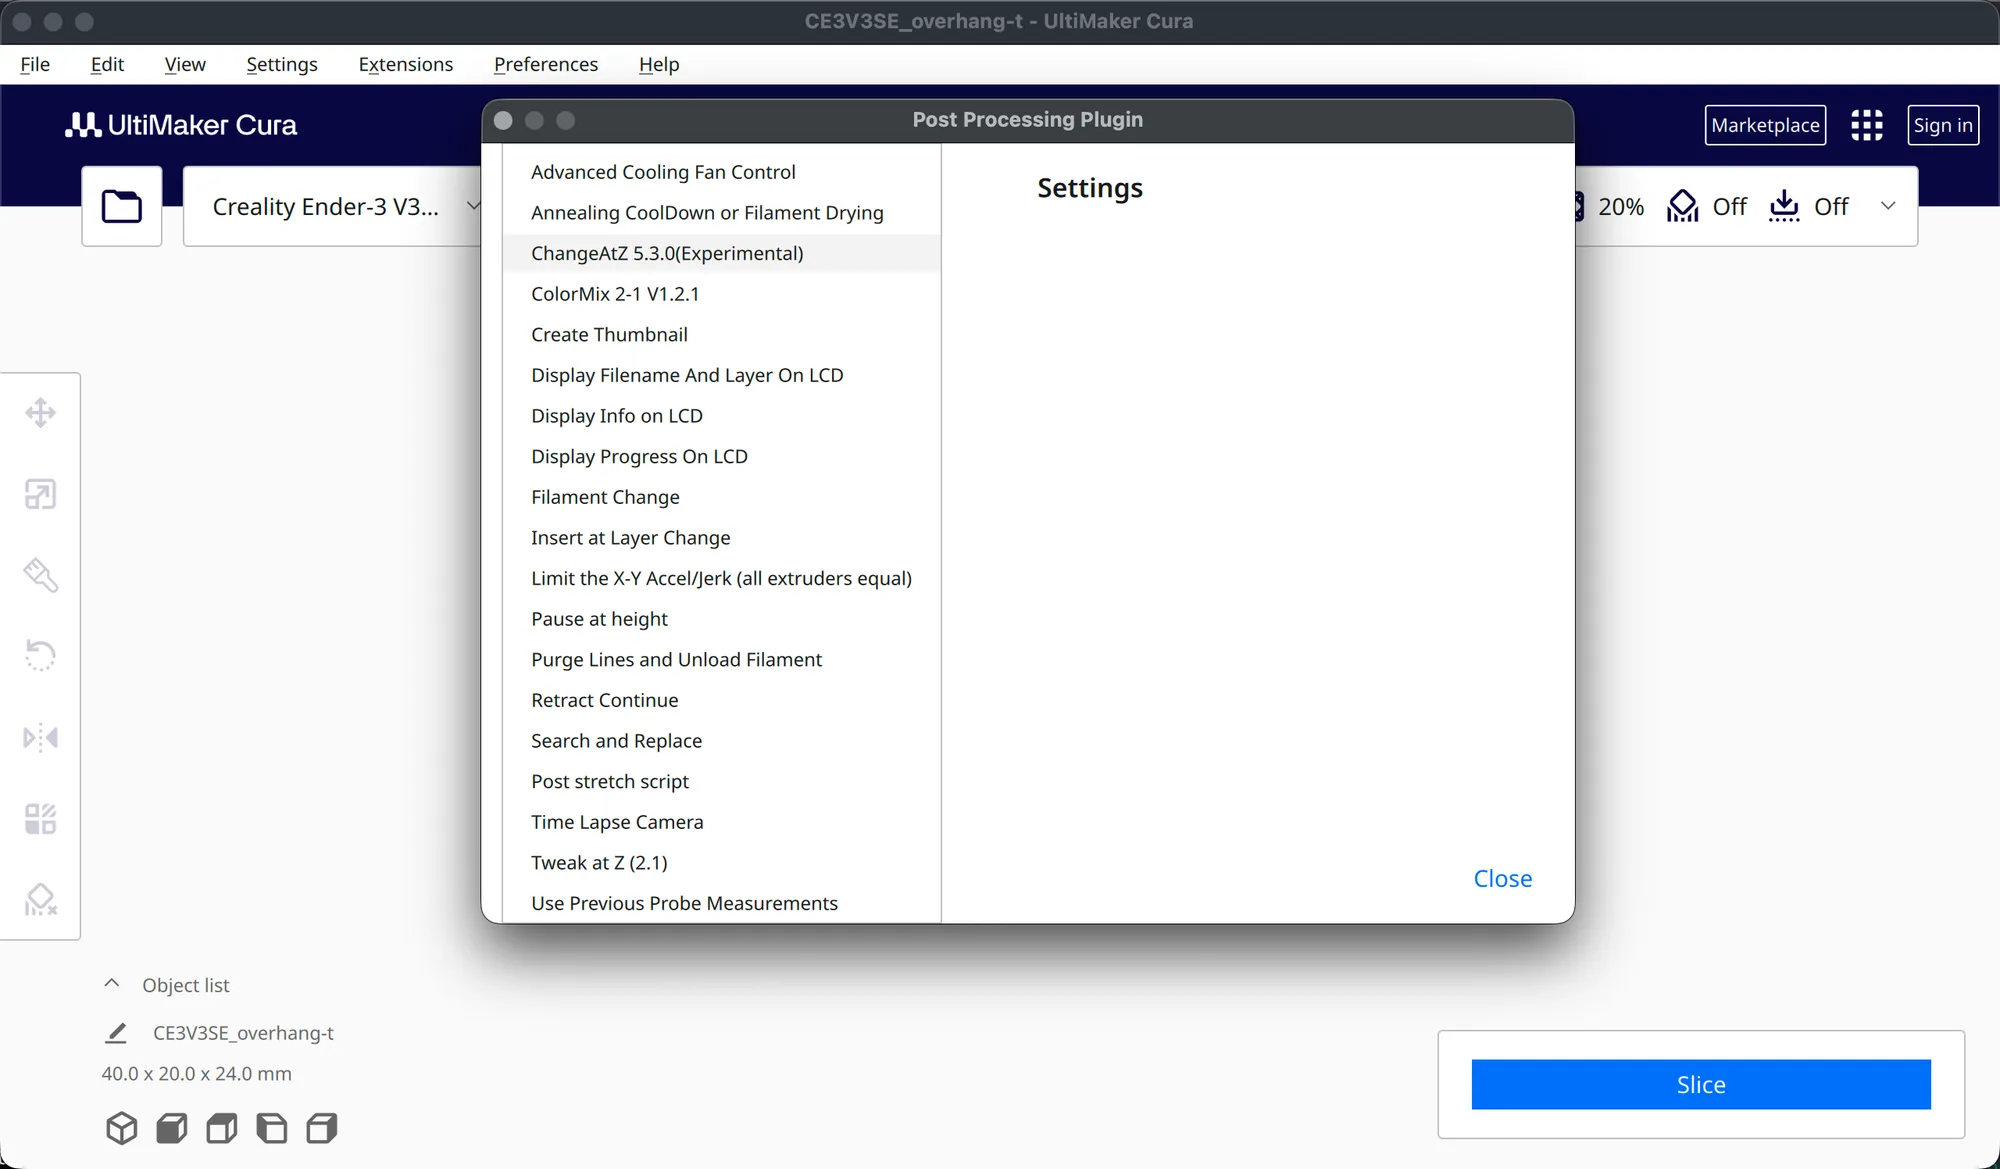
Post Processing changes the G-code after slicing. For what G-code is, see what is G-code. Choosing Extensions, Post Processing showed one item, Modify G-Code. It opened a window titled Post Processing Plugin with a heading Post Processing Scripts, an Add a script button and an empty Settings pane. Part of the window can sit off screen, so drag its title bar if the list is cut off.
Clicking Add a script listed these 19 scripts, in this order:
- Advanced Cooling Fan Control
- Annealing CoolDown or Filament Drying
- ChangeAtZ 5.3.0(Experimental)
- ColorMix 2-1 V1.2.1
- Create Thumbnail
- Display Filename And Layer On LCD
- Display Info on LCD
- Display Progress On LCD
- Filament Change
- Insert at Layer Change
- Limit the X-Y Accel/Jerk (all extruders equal)
- Pause at height
- Purge Lines and Unload Filament
- Retract Continue
- Search and Replace
- Post stretch script
- Time Lapse Camera
- Tweak at Z (2.1)
- Use Previous Probe Measurements
We picked Display Progress On LCD first. It was added to the list, and a message appeared: This script is now an option in 'Display Info on LCD'. This post processor no longer works. So not every script in the list is current. We removed it with the cross button on its row. The first removal click did not register, so check that the row has really gone.
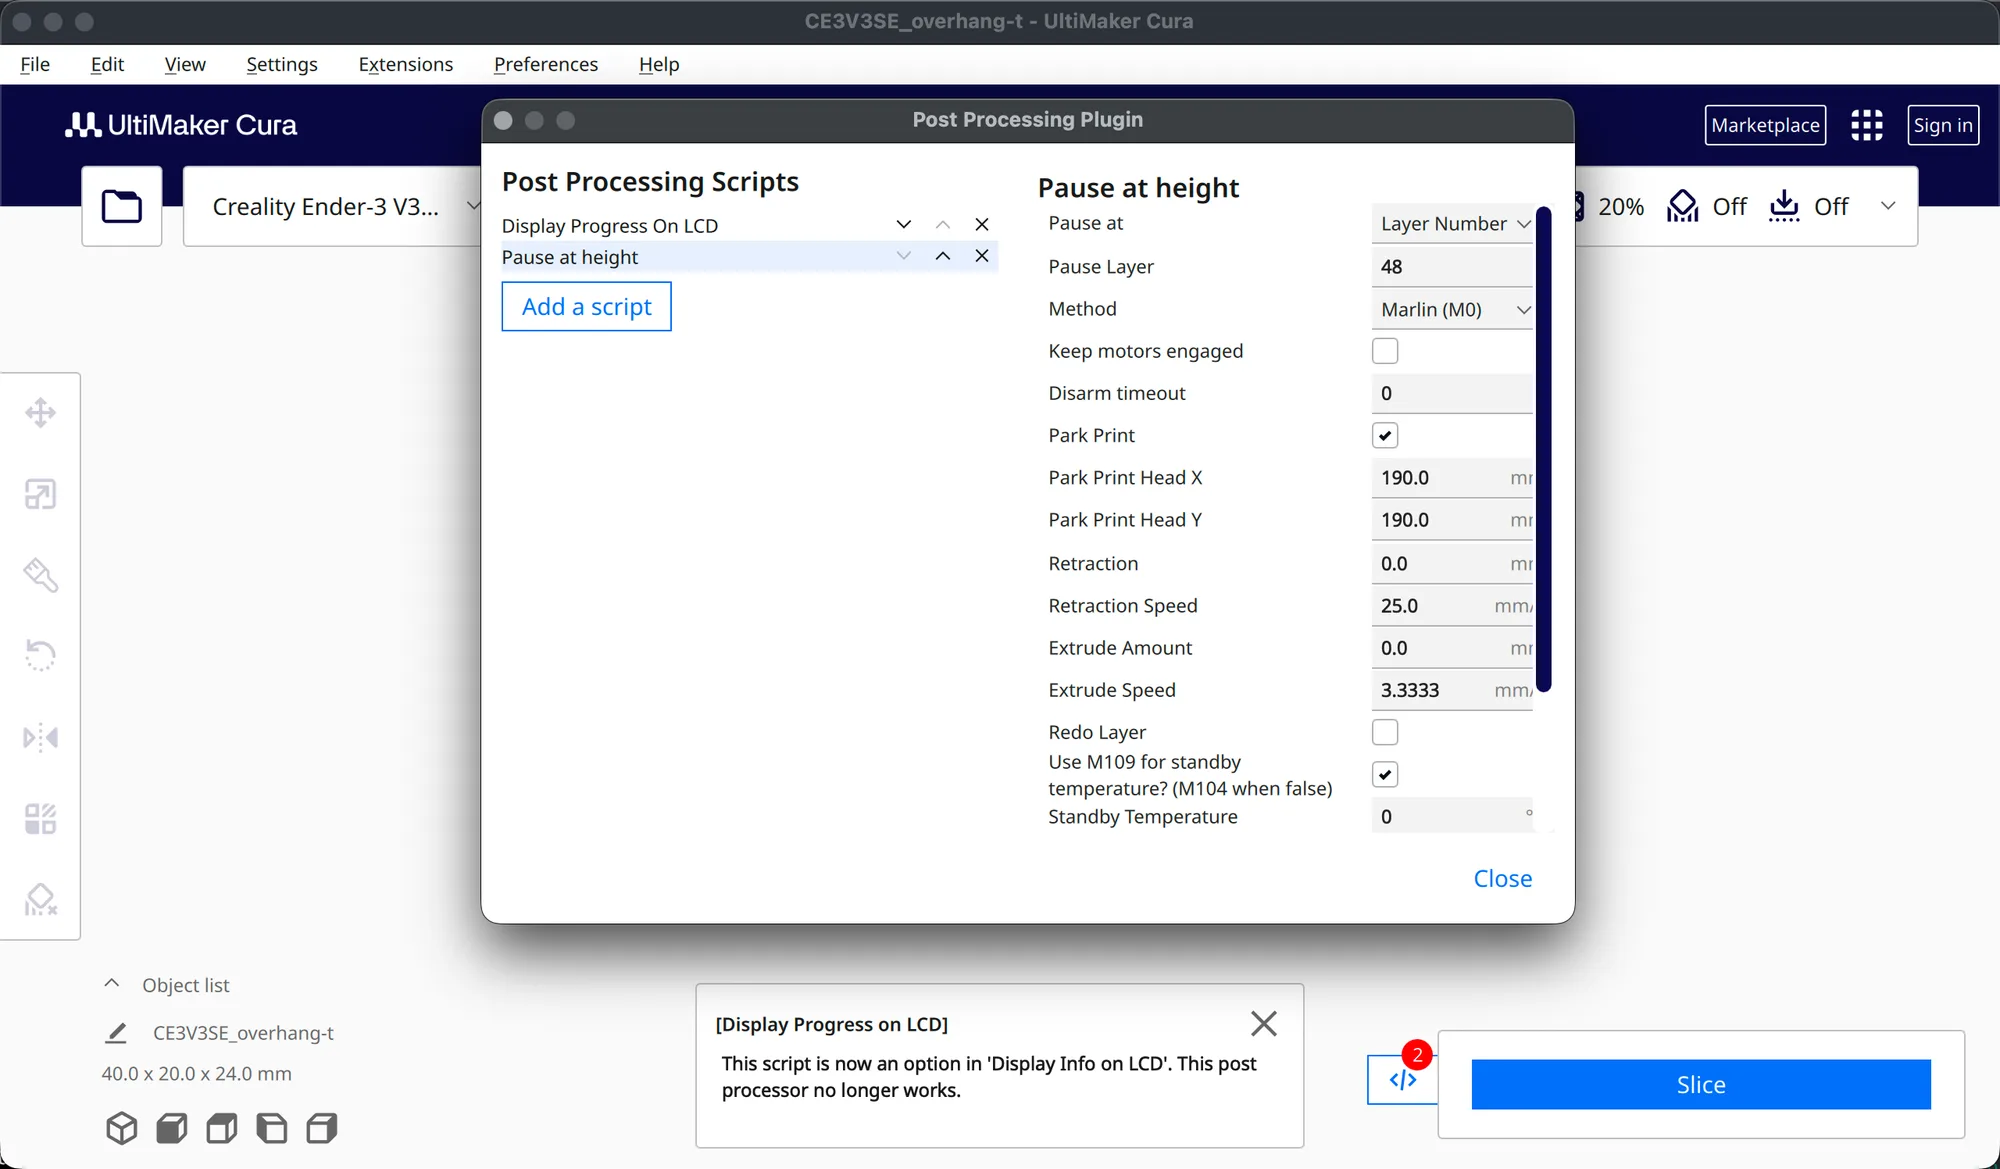
Then we added Pause at height to see a working script's fields. It showed Pause at (Layer Number), Pause Layer 48, Method (Marlin (M0)), Keep motors engaged, Disarm timeout 0, Park Print (ticked), Park Print Head X 190.0 and Y 190.0, Retraction, Retraction Speed 25.0, Extrude Amount, Extrude Speed 3.3333, Redo Layer and Use M109 for standby temperature. Those park positions are the script's defaults, not values for the Ender-3 V3 SE, so check them before you use the script on a real printer. We did not slice with it and made no claims about how it behaves in a print. We removed both scripts, leaving the list empty, and closed the dialog with Close.
Which preferences are worth knowing about?
Open Preferences, then Configure Cura.... The window has five pages on the left: General, Settings, Printers, Materials and Profiles. We only read General and changed nothing.
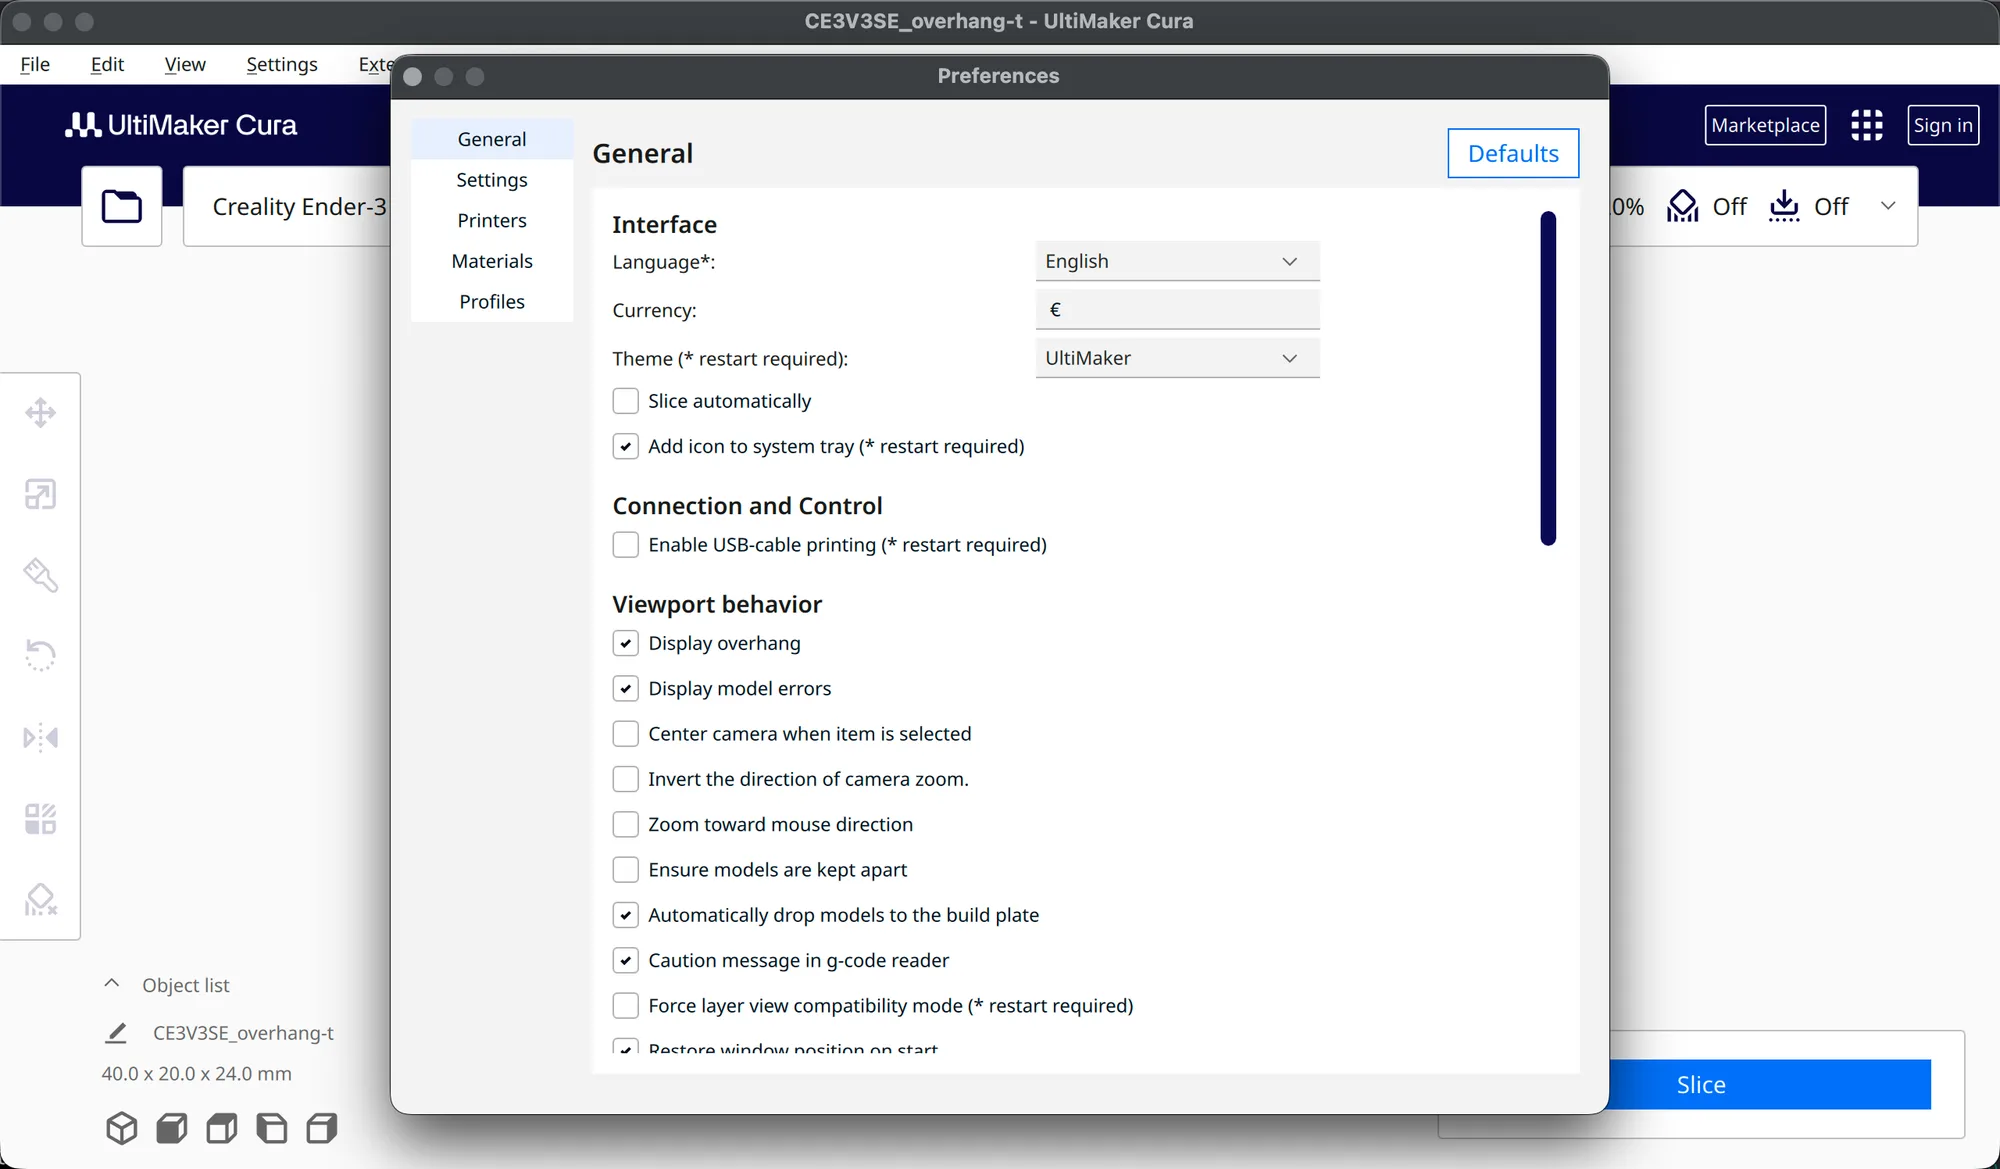
Under Interface we saw Language (English), Currency, Theme (UltiMaker, restart required), Slice automatically (unticked in ours) and Add icon to system tray. Under Connection and Control was Enable USB-cable printing, also unticked. Viewport behavior held camera and model options: Display overhang, Display model errors, Center camera when item is selected, Invert the direction of camera zoom, Zoom toward mouse direction, Ensure models are kept apart, Automatically drop models to the build plate, and Force layer view compatibility mode. A Defaults button sits at the top right. The settings you will touch most are Slice automatically and the camera options. The Cura interface tour shows where the slice button lives.
What does the Help menu offer?
The Help menu listed Show Configuration Folder, Open Cura Log File, Show Online Documentation, Report a Bug, Sponsor Cura, Export Package For Technical Support, What's New and About. We opened only About.... It showed the title About UltiMaker Cura and the text version: 5.13.0. The text beneath says Cura is developed by UltiMaker in cooperation with the community, followed by a table of open source projects with their licences and versions. Show Configuration Folder is the one to remember if a plugin ever needs removing by hand, because plugins you install end up in that folder. We did not open it, so check that for yourself.
We left Cura in Recommended mode with overhang-t loaded and no windows open. Before this lesson, see Cura per model settings. The hands-on review (cura-review) comes next and is not published yet.
Next lesson: Cura Review: Hands On With UltiMaker Cura 5.13.0.