Cura material profiles tell the slicer which temperatures, fan speed and filament size to use. This lesson, tested in UltiMaker Cura 5.13.0 on macOS, covers the material selector, the Materials and Profiles pages in Preferences, and what changed when we swapped Generic PLA for PETG and ABS. We installed nothing and did not sign in.
Where do you choose a material in Cura?
Click the middle block of the top bar. In our Recommended mode it showed Generic PLA and 0.4mm Nozzle. It opens a panel titled Custom with two drop-downs: Material (reading PLA) and Nozzle Size (reading 0.4mm Nozzle). We opened the nozzle list and saw 0.2, 0.3, 0.4, 0.5, 0.6, 0.8 and 1.0 mm entries, with 0.4 ticked. Pick the size that is actually fitted to your printer, because it changes line widths and speeds.
The Material drop-down is a cascading menu. The first level is the brand: Generic comes first, then 3D-Fuel, BASF, Best Filament, Chromatik, Eazao, eMotionTech, Eryone, eSUN, Extrudr, FABtotum, FDplast, Fiberlogy HD, Filo3D, GOOFOO, ideagen3D, IMADE3D, Jabil, Layer One, Leapfrog, OctoFiber and Polymaker. That was as far as the menu showed on our window, so there may be more brands below.
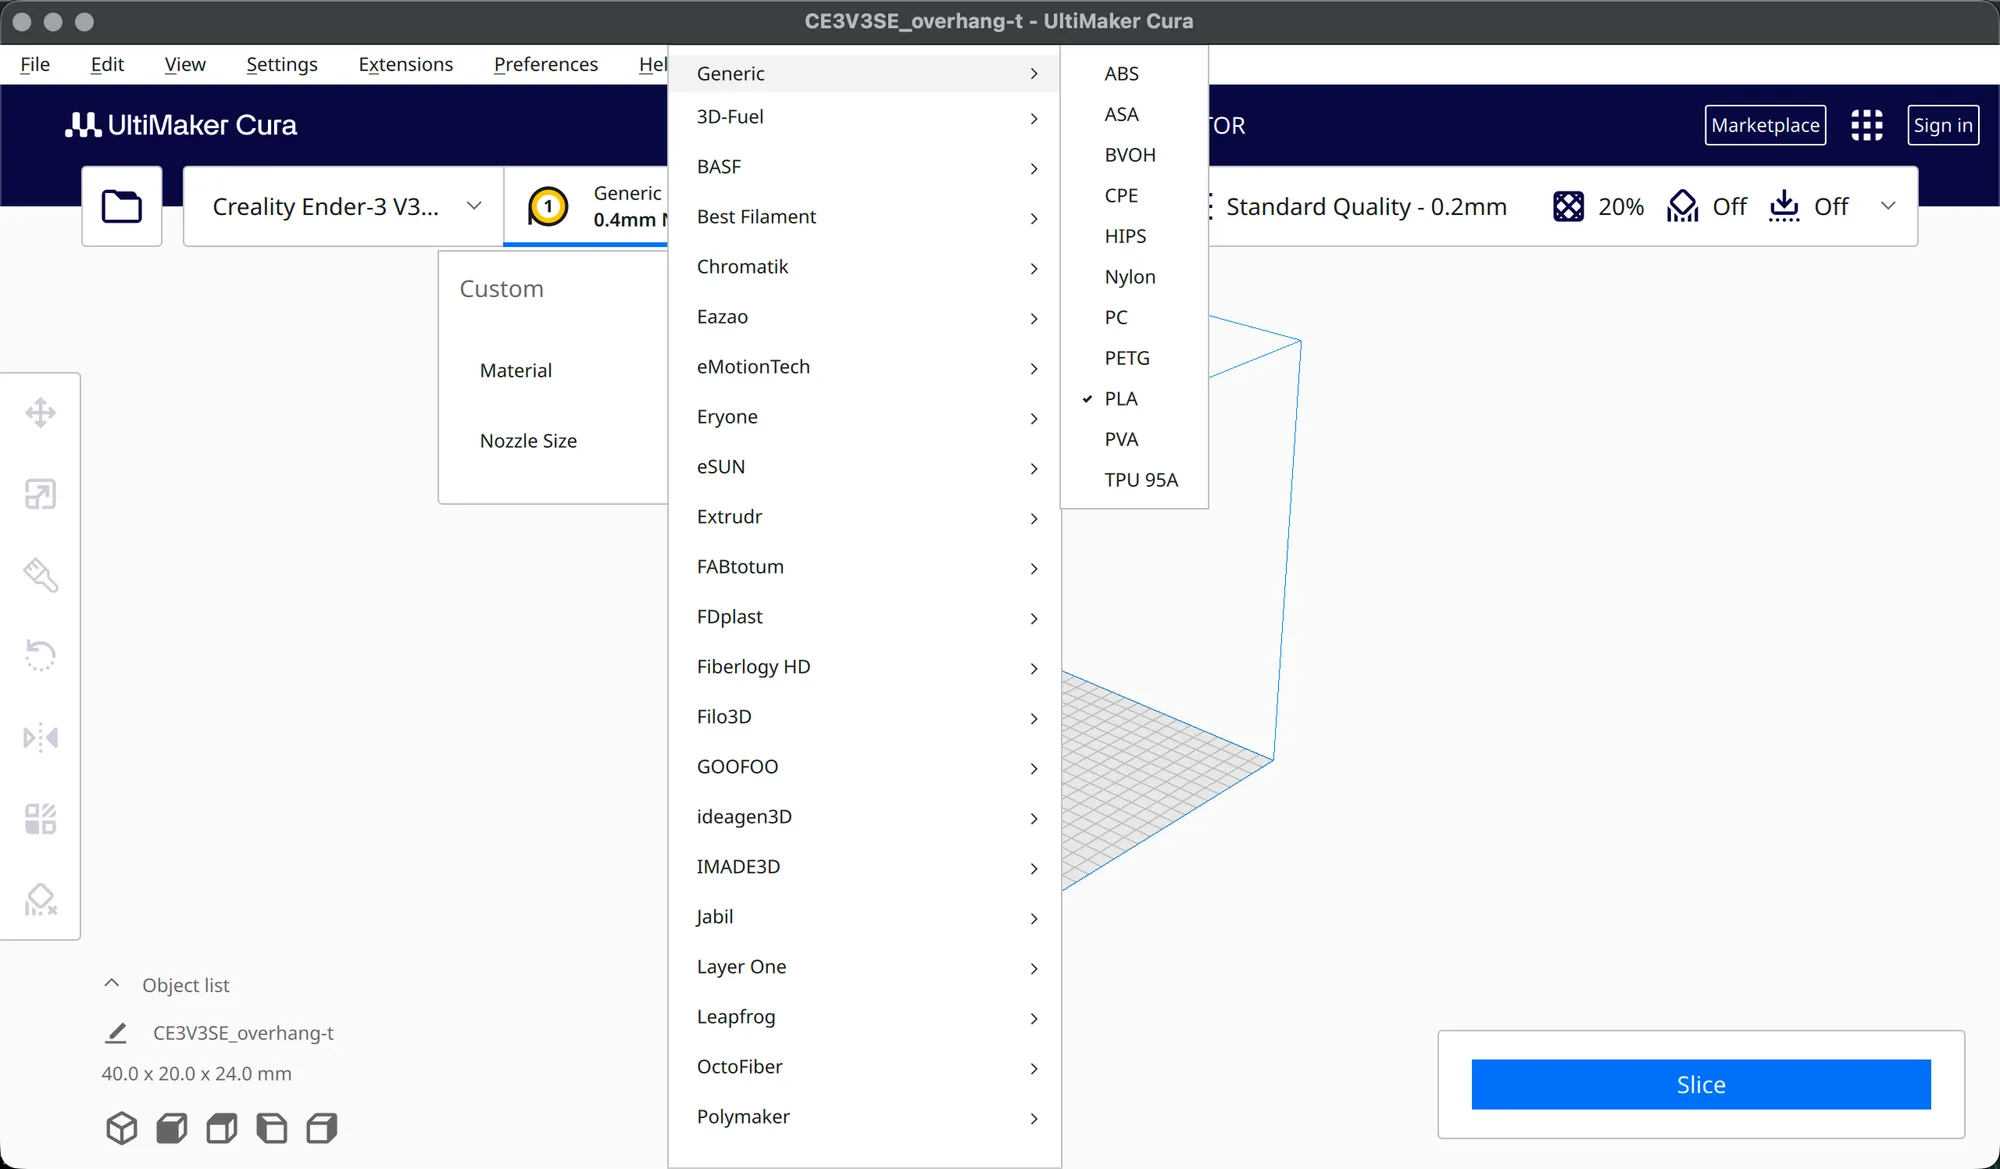
Hovering over Generic opened the type list: ABS, ASA, BVOH, CPE, HIPS, Nylon, PC, PETG, PLA (ticked), PVA and TPU 95A. Hovering over eMotionTech showed a different list: ABS, Acetate, ASA-X, Nylon, PC, PEKK, PETG, PLA, Soluble and TPU. Each of those is another level, so a brand material takes one more click. If you do not know your filament's exact brand, a Generic entry of the right type is the safe starting point.
What is inside a material in Preferences?
Open Preferences > Configure Cura... and click Materials in the left list. The page says Materials compatible with active printer: Creality Ender-3 V3 SE, so it only lists materials that fit this printer. It has Create new and Import buttons at the top right, a brand list on the left (Favorites, Generic, 3D-Fuel and so on) and two tabs on the right.
The Information tab for Generic PLA listed Display Name, Brand, Material Type and Color, then Properties: Density 1.24 g/cm3, Diameter 1.75 mm, Filament Cost, Filament weight, Filament length and Cost per Meter. Cost, weight and length were all 0 for us, because we never entered a spool. The description reads that PLA is ideal for fast, reliable printing of parts and prototypes. Density and diameter matter for the gram estimate, so a wrong diameter gives a wrong weight.
The Print settings tab holds the defaults a material brings with it. For the same Generic PLA it read:
- Default Printing Temperature: 200 C
- Default Build Plate Temperature: 60 C
- Standby Temperature: 175 C
- Retraction Distance: 0.8 mm, Retraction Speed: 40 mm/s
- Fan Speed: 100%
How do Generic PLA, PETG and ABS compare in Cura?
We clicked each material in the list and read both tabs. These are the values the profiles ship with, not recommendations for your filament, and the PETG description itself warns that the data in the file may not be correct for your specific machine.
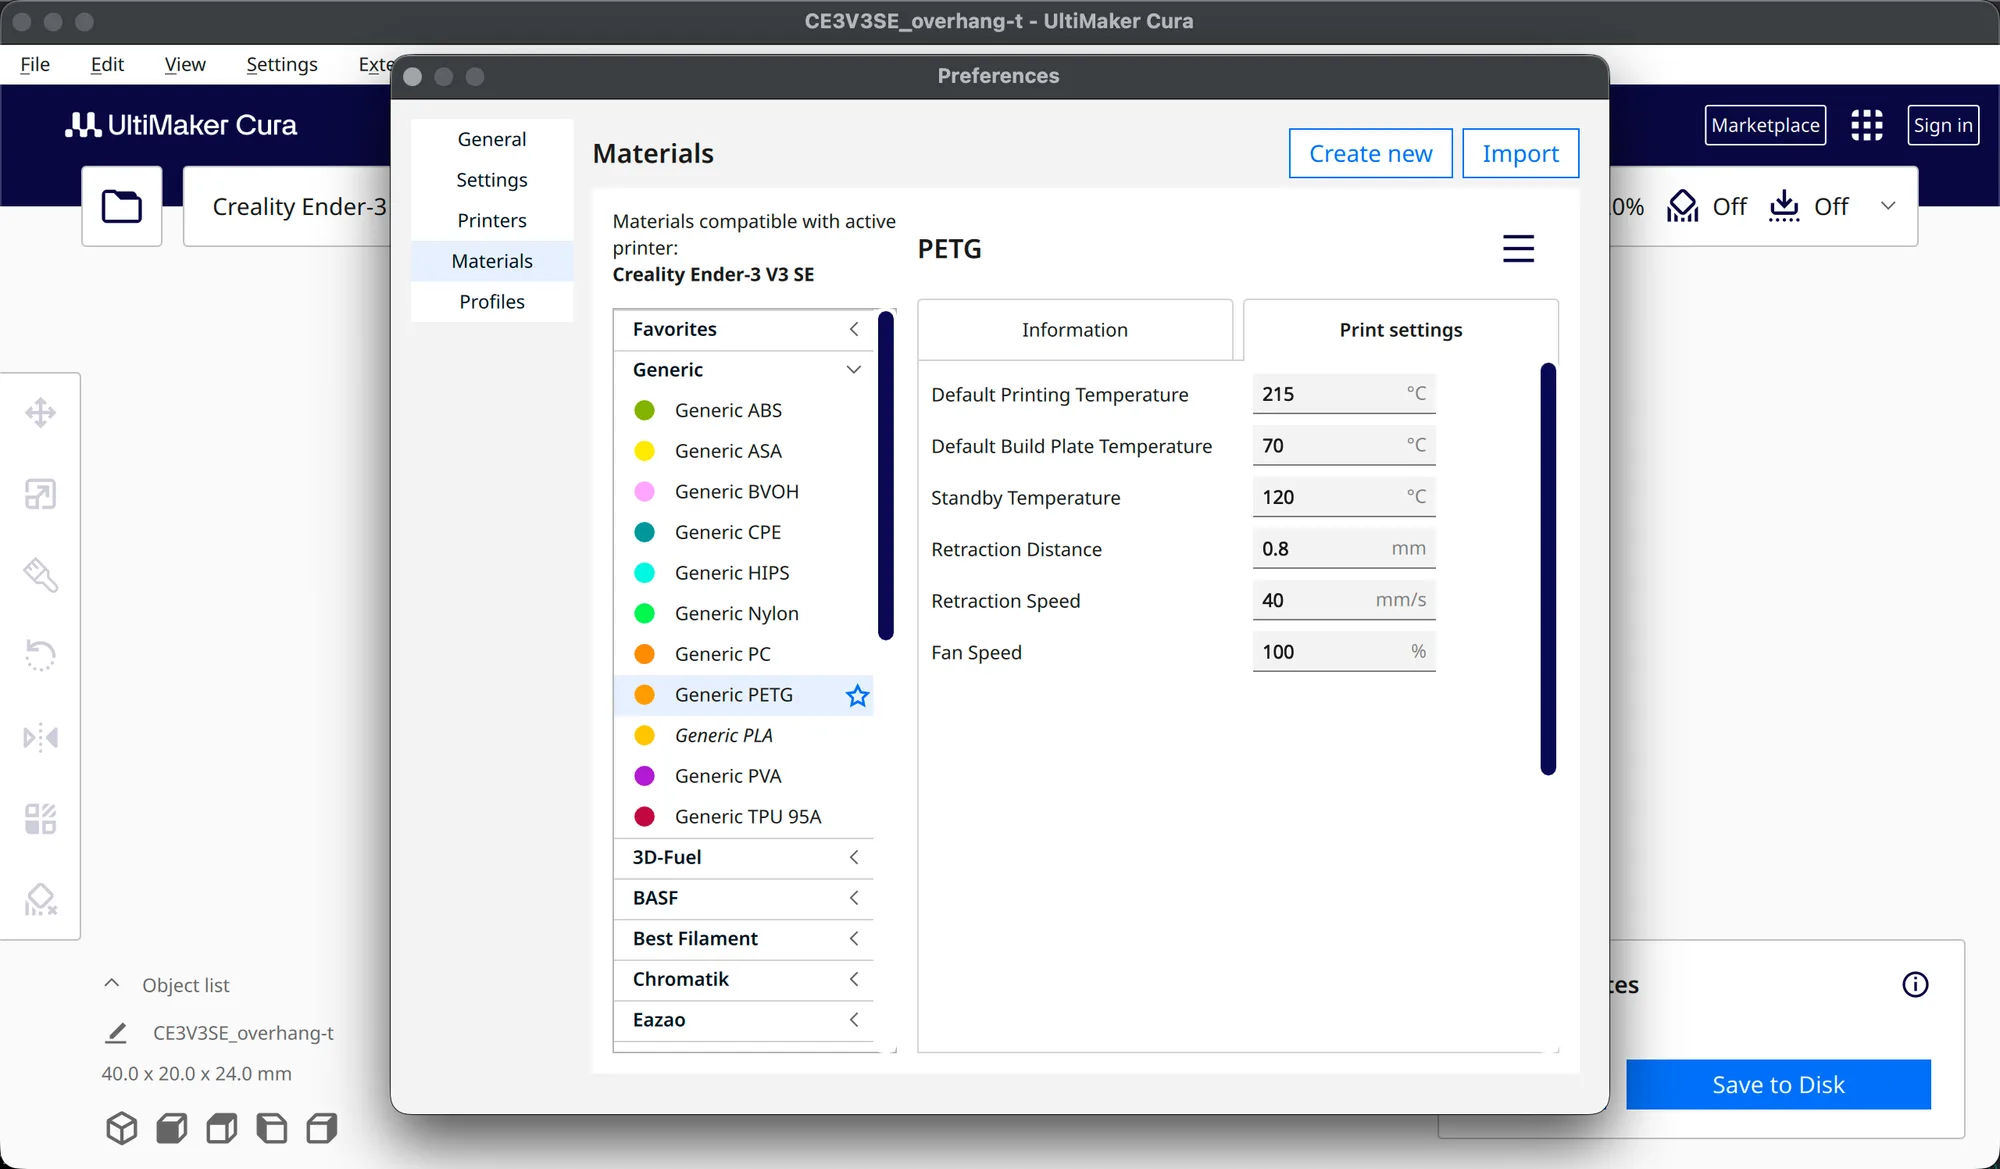
| Generic material | Nozzle | Bed | Standby | Fan | Density |
|---|---|---|---|---|---|
| PLA | 200 C | 60 C | 175 C | 100% | 1.24 g/cm3 |
| PETG | 215 C | 70 C | 120 C | 100% | 1.27 g/cm3 |
| ABS | 230 C | 80 C | 200 C | 100% | 1.1 g/cm3 |
All three listed 1.75 mm diameter, 0.8 mm retraction and 40 mm/s retraction speed. For background on why these plastics behave differently, see types of 3D printer filament, PETG vs PLA and ABS vs PETG.
What changes when you switch material?
We chose Generic PETG from the Material menu with overhang-t loaded at Standard Quality 0.2 mm, 20% infill, no support, and pressed Slice. Then we opened the right hand panel, pressed Show Custom and expanded the Material category. Printing Temperature, Printing Temperature Initial Layer, Initial Printing Temperature and Final Printing Temperature all read 215.0 C. Build Plate Temperature read 70 C. Further down, Flow read 100.0%.
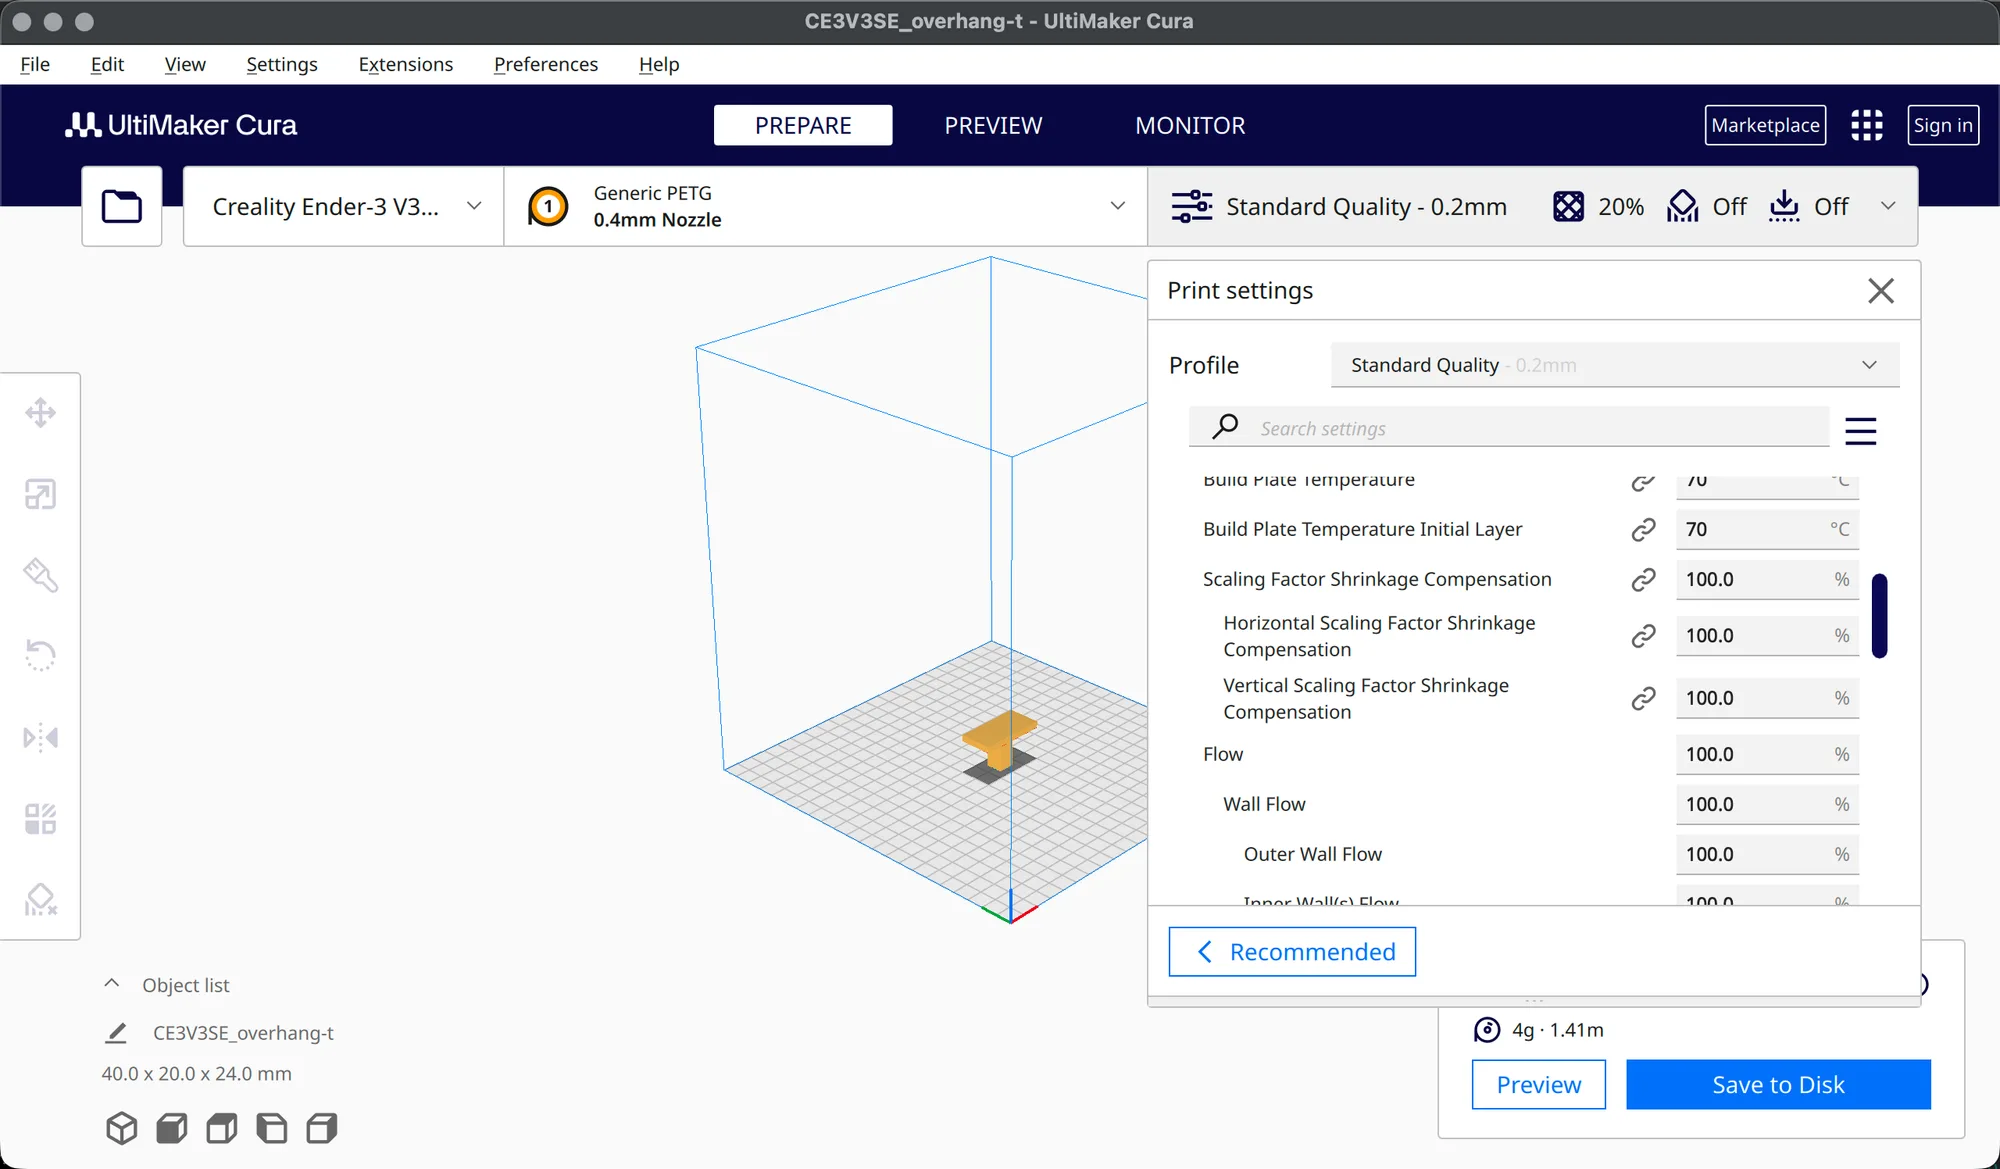
Hovering over Build Plate Temperature showed a tooltip saying it is the temperature used for the heated build plate, that it affects the initial layer value, and that it is affected by Default Build Plate Temperature. That is the field you saw on the Print settings tab, so the material page sets the default and the Custom panel shows the value in use. Edit it there and it becomes an override for this print only. Our run did not change any of these values. For the rest of that panel see Cura custom settings.
The slicer estimates, all for the same model and profile, came out like this:
| Material | Time | Weight | Length |
|---|---|---|---|
| Generic PLA | 29 minutes | 4 g | 1.18 m |
| Generic PETG | 29 minutes | 4 g | 1.41 m |
| Generic ABS | 29 minutes | 4 g | 1.41 m |
These are slicer estimates, not prints. Time did not move at this size. The length differs, and we found one reason: with PETG active the Recommended panel showed a wall Shell Thickness of 1.6 mm, while back on PLA it showed 0.8 mm. So the material swap changed more than temperatures, because the profile for each material can carry its own settings. We did not check every difference, so read the settings before you compare materials on estimates alone.
What does the Profiles page do?
In the same Preferences window, click Profiles. It says Profiles compatible with active printer: Creality Ender-3 V3 SE. The list was short: under Balanced there were Super Quality, Dynamic Quality, Standard Quality (shown in italics, meaning active) and Low Quality. We saw no custom profile, because we had not made one.
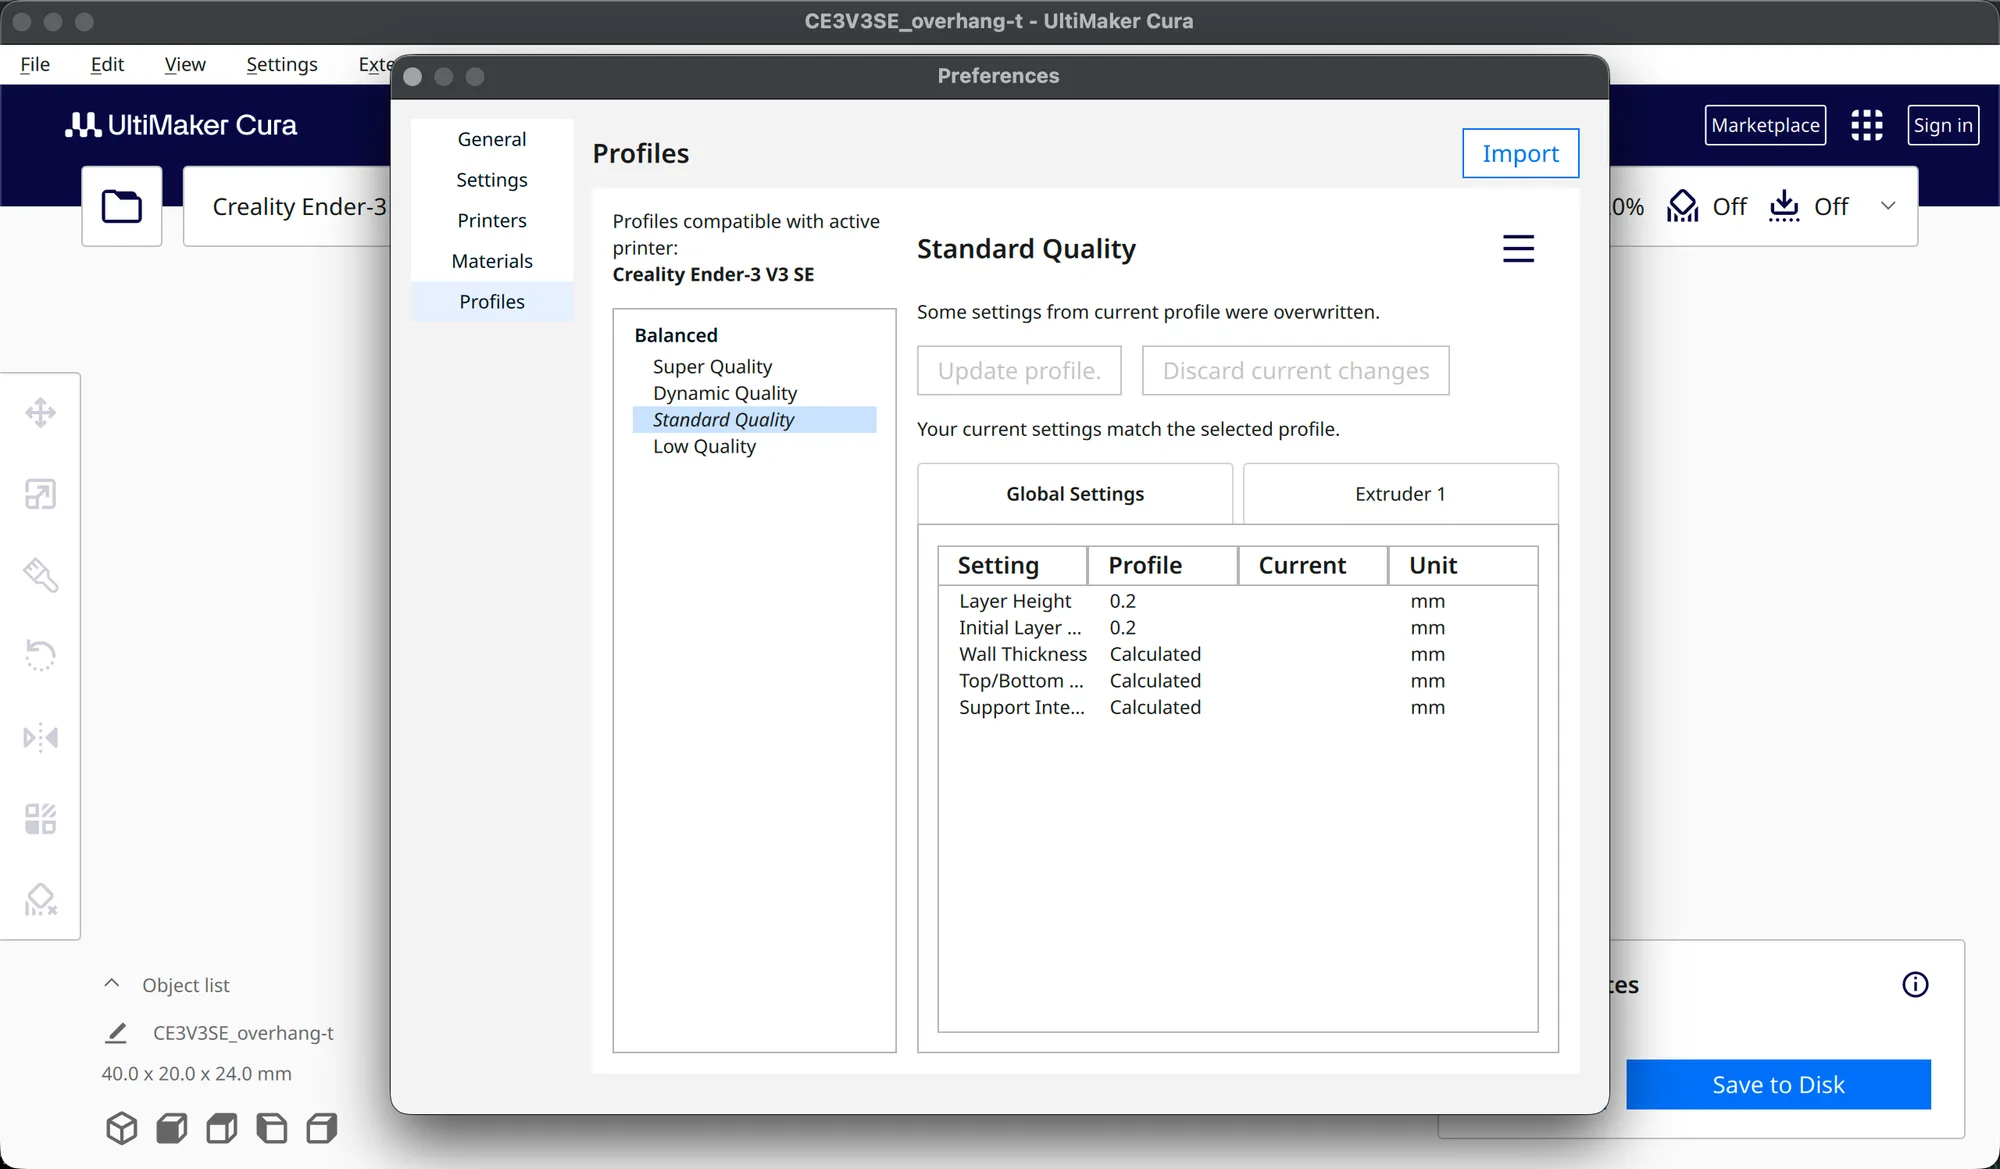
The only button at the top was Import. Selecting Standard Quality showed the line Some settings from current profile were overwritten. plus greyed Update profile. and Discard current changes buttons, then Your current settings match the selected profile. and a table with Setting, Profile, Current and Unit columns: Layer Height 0.2, Initial Layer 0.2, and Calculated for wall, top/bottom and support thickness. The two messages looked contradictory, so we only report them as shown.
The three-line menu at the top right of the page offered Activate, Duplicate, Remove, Rename and Export. For this built-in profile only Duplicate was usable and the other four were greyed out. So there is no Create or Reset button in this version. To make your own profile you duplicate a built-in one and then edit the copy, and built-in profiles cannot be removed or renamed. We did not duplicate anything, so we cannot describe what the copy looks like.
The Materials page has the same kind of menu. For Generic PLA it offered Activate, Duplicate, Remove (greyed out) and Export. As with profiles, the way to a custom material is Create new or Duplicate, and we did not use either.
What does the Marketplace Materials tab show?
The Marketplace button at the top right opens a window titled Marketplace. It has Plugins and Materials tabs. We clicked Materials without signing in. The banner read that you can select and install material profiles optimised for your UltiMaker 3D printers, and the first entries were Ultrafuse 17-4PH by Forward AM, a LUVOCOM 3F PAHT 9825 NT engineering profile by LEHVOSS Group, and Ultrafuse Support Layer. Each row had an Install button, which we did not press. Those are mostly specialty industrial materials, so for ordinary PLA or PETG the Generic and brand entries already in the menu are usually enough.
How should you manage materials day to day?
Keep it simple. Pick the brand if it is in the list, otherwise Generic of the right type. Check the Print settings tab once and compare it with your filament's label. If you want different numbers for one print, change them in Custom mode. If you want different numbers every time, duplicate the material and edit the copy. Cura also saves material files inside a project, as we saw in the save and export lesson. For a broader view of the slicer, see Cura for beginners.
We left Cura in Recommended mode with Generic PLA, 0.4mm Nozzle and Standard Quality selected, overhang-t loaded and no dialogs open. The next lesson covers per model settings (cura-per-model-settings), which is not published yet.
Next lesson: Cura Per Model Settings: Override Infill and Walls.