Cura export gcode is two clicks: press Slice, then Save to Disk. This lesson, tested in UltiMaker Cura 5.13.0 on macOS, covers that button, the Save dialog and its formats, the File menu entries for projects and exports, and what the saved files contain. We saved to a scratch folder and did not print anything.
Where is the export button in Cura?
Load a model and slice it, as we did in the preview lesson. Before the slice there is only a blue Slice button at the bottom right. Once the slice finishes, the panel changes to a time and material readout with two buttons side by side: Preview and Save to Disk.
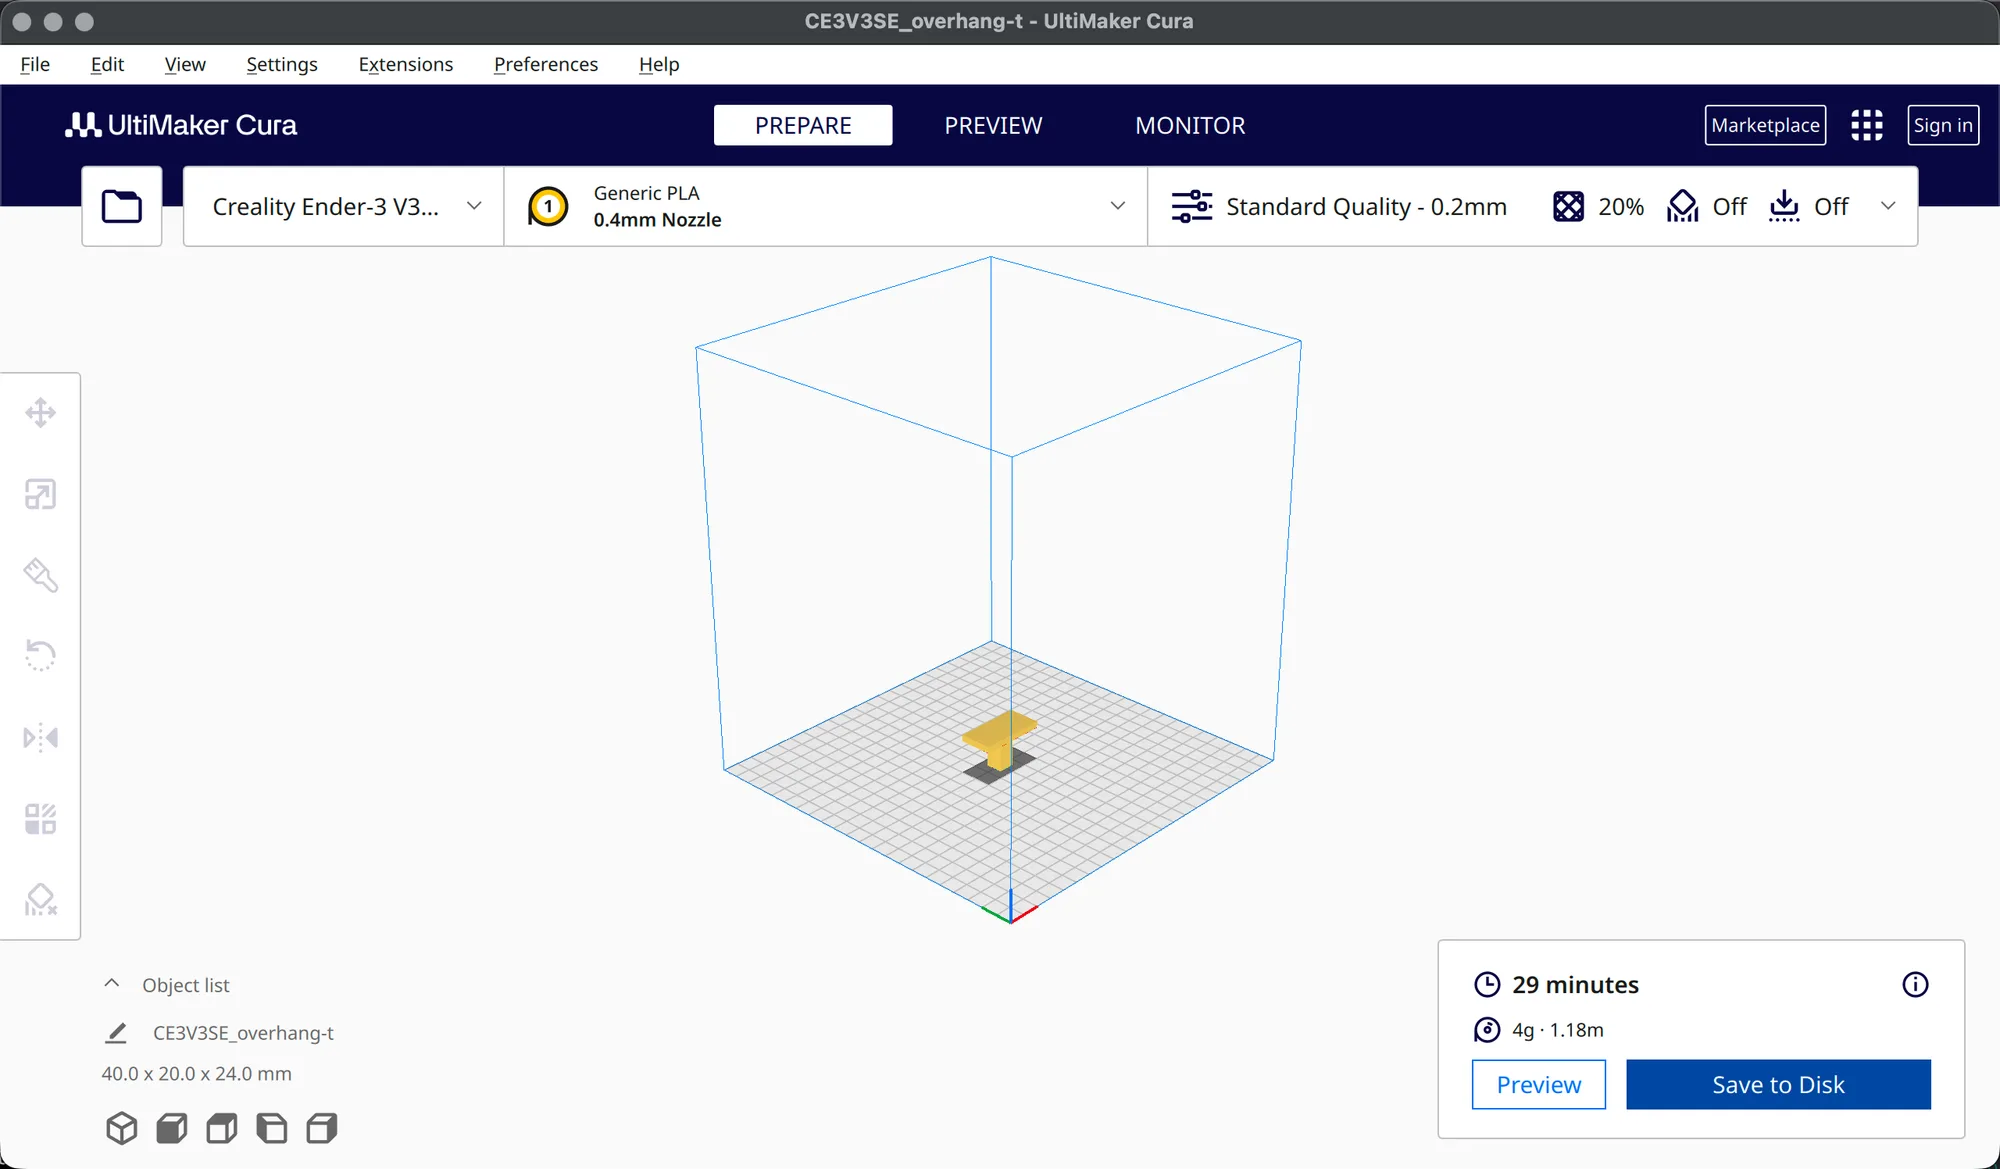
For overhang-t at Standard Quality 0.2 mm, 20% infill and no support, the readout said 29 minutes and 4 g, 1.18 m. Those are slicer estimates. Preview takes you to the layer view and Save to Disk writes the file. If you change any setting, the buttons go away and you have to slice again, so check that the panel matches what you expect before you save.
Our Mac had no removable drive attached, so we only saw Save to Disk. We did not test what the button says with a USB stick plugged in, so we cannot confirm any other wording from our own run.
What does the Save to Disk dialog look like?
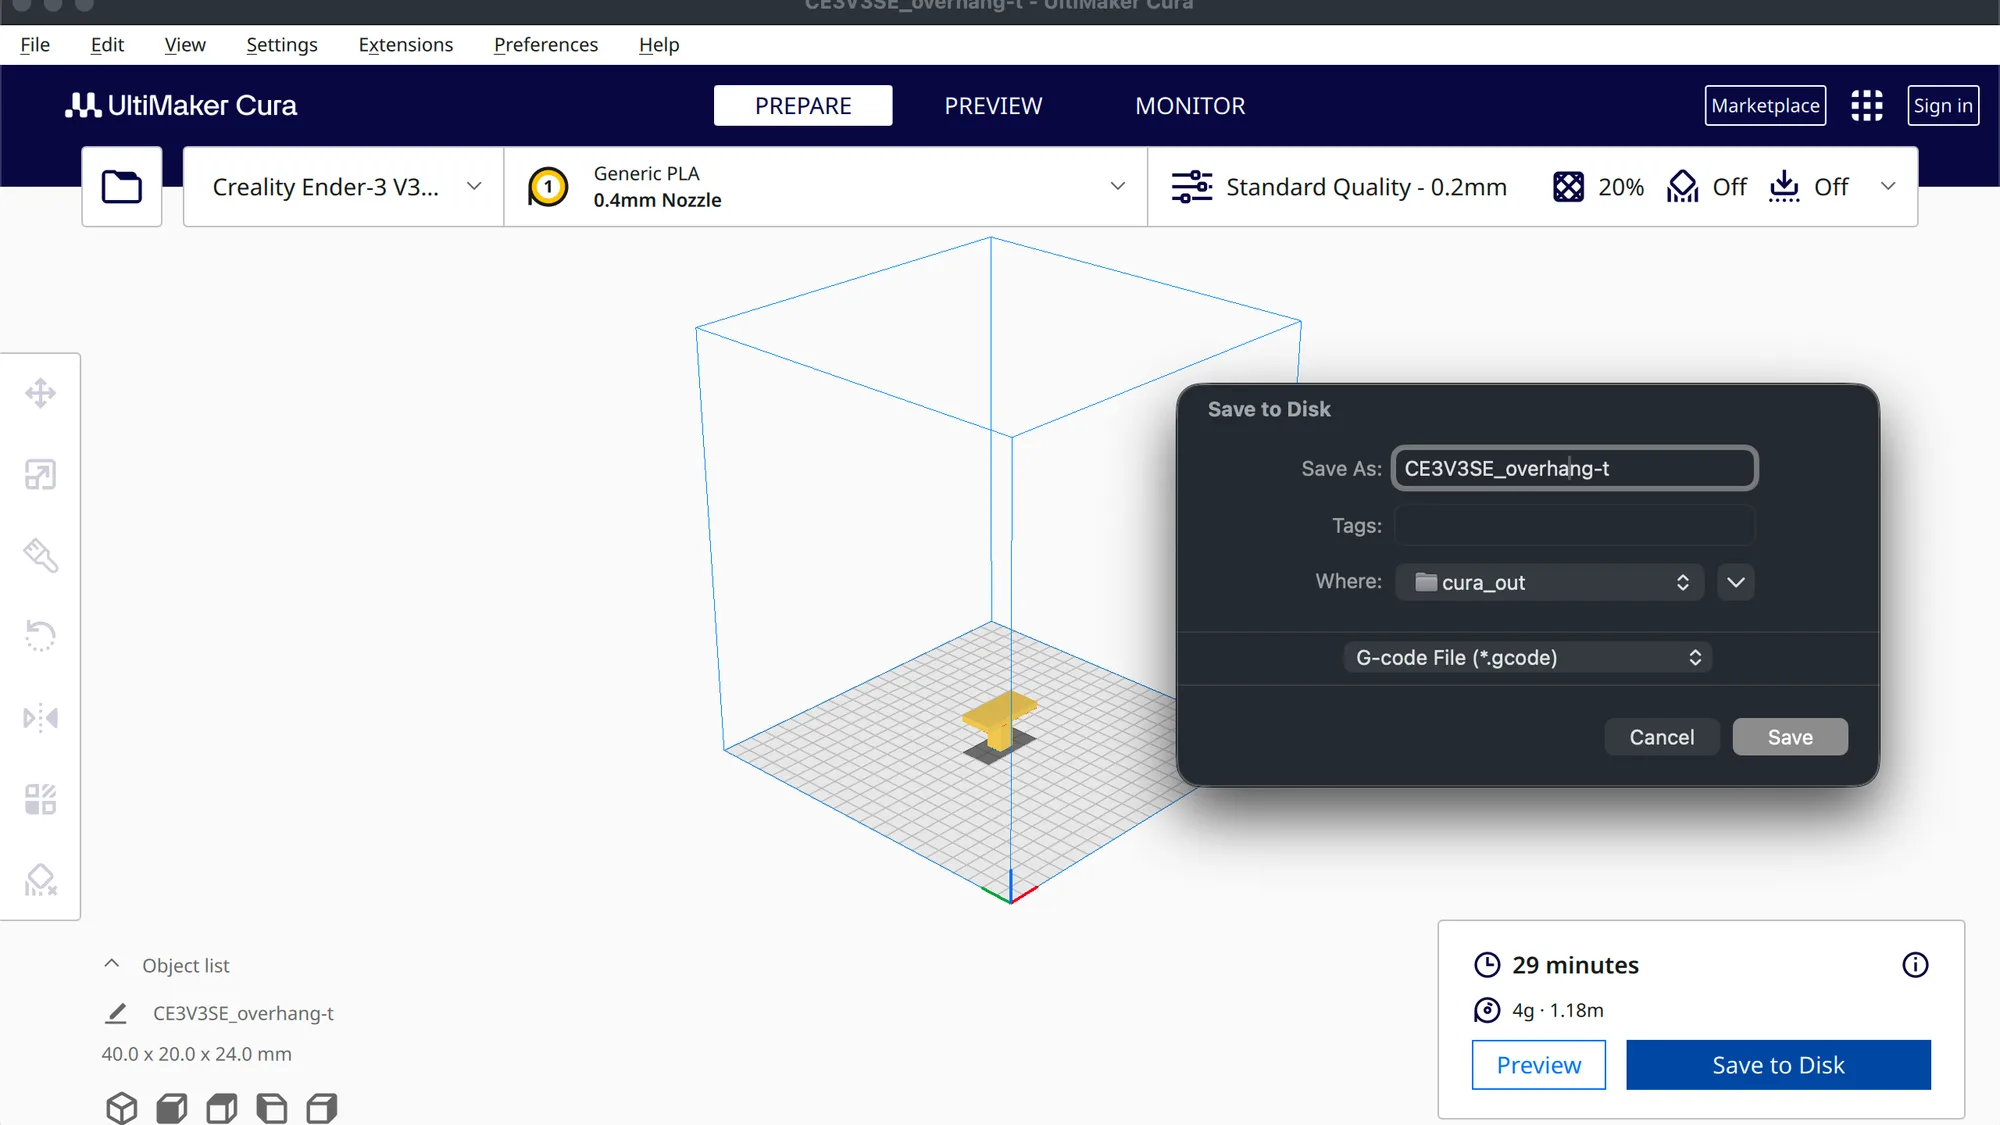
Click Save to Disk. A dialog titled Save to Disk opens with these fields: Save As, Tags, Where and a format drop-down. The suggested name was CE3V3SE_overhang-t, which is a short printer prefix plus the model name. The first time, the Where field pointed at our home folder, so look before you press Save. We typed a path with Cmd+Shift+G to pick a scratch folder, and the Where field then read cura_out.
Press Save and a File Saved notice appears near the bottom of the window with the full path and an Open Folder button. Our file landed as CE3V3SE_overhang-t.gcode, 222,281 bytes.
Which file formats does Cura offer?
The drop-down at the bottom of the dialog is the format list. We opened it and read every entry, in this order:
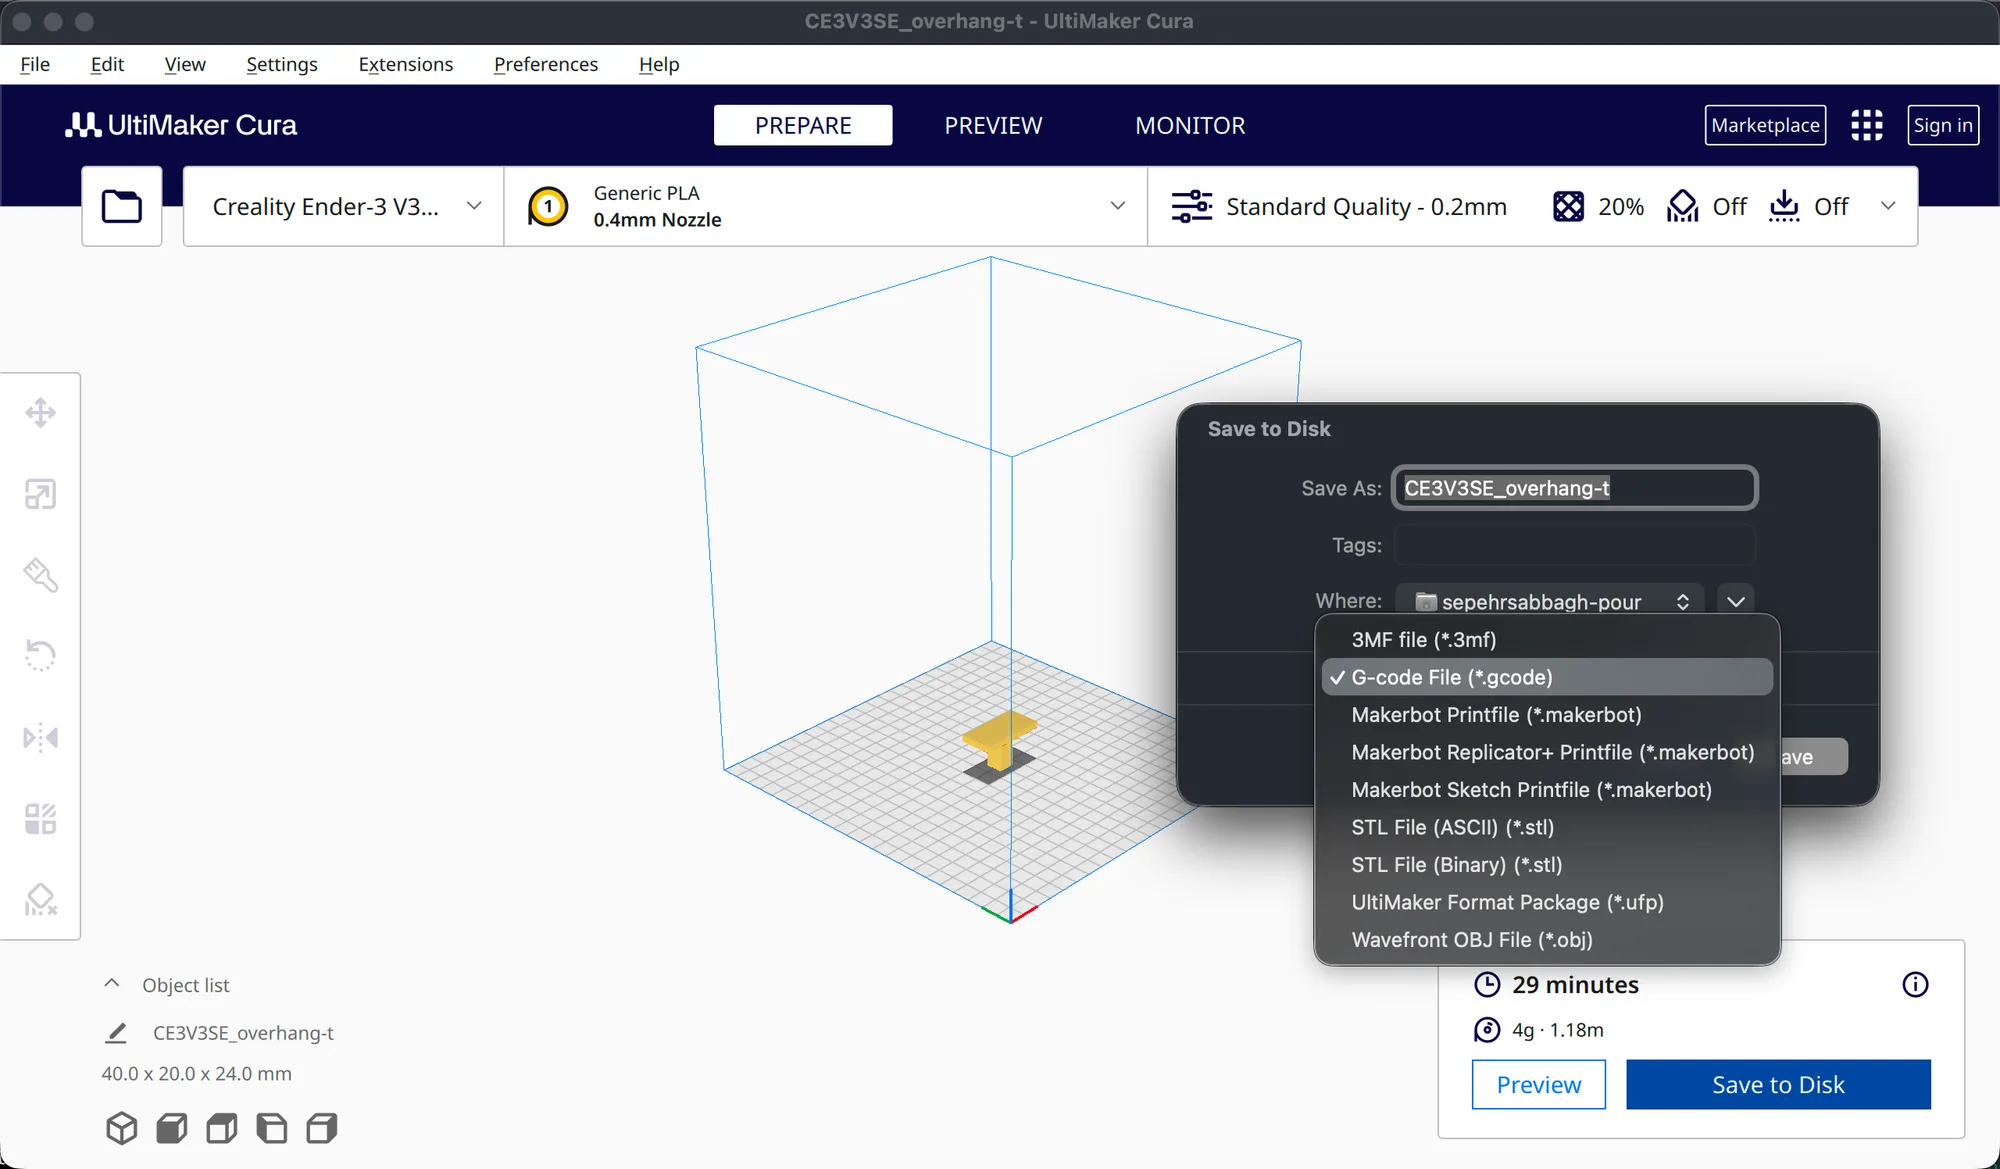
- 3MF file (*.3mf)
- G-code File (*.gcode), the default after a slice
- Makerbot Printfile (*.makerbot)
- Makerbot Replicator+ Printfile (*.makerbot)
- Makerbot Sketch Printfile (*.makerbot)
- STL File (ASCII) (*.stl)
- STL File (Binary) (*.stl)
- UltiMaker Format Package (*.ufp)
- Wavefront OBJ File (*.obj)
Some guides mention a compressed G-code option. It was not in our list and the list also has Makerbot and UltiMaker Format Package entries that a Creality printer does not need. For a Creality printer you want G-code File. If you are unsure how the three common formats differ, read STL vs 3MF vs G-code.
What is inside the G-code file?
We opened the file in a text editor. It had 8,239 lines. The first twelve are comment lines:
;FLAVOR:Marlin;TIME:1746, the slicer's estimate in seconds, which is 29 minutes;Filament used: 1.1819m;Layer height: 0.2;MINX:90.2,;MINY:94,;MINZ:0.2;MAXX:129.8,;MAXY:126,;MAXZ:24;TARGET_MACHINE.NAME:Creality Ender-3 V3 SE;Generated with Cura_SteamEngine 5.13.0
The bounding box lines match the 40 x 20 x 24 mm part sitting near the middle of the plate. Further down, line 37 reads ;LAYER_COUNT:120, the same 120 layers we saw on the slider. The file ends with a few cooldown commands and the comment ;End of Gcode. We searched the whole file for SETTING_, the marker some Cura builds use for an embedded settings block, and found nothing. So this G-code does not carry your profile with it. To keep the settings, save a project. For what the commands themselves mean, see what is G-code.
What does the File menu offer?
Open the File menu in the macOS menu bar. We read these entries in order: New Project..., Open File(s)..., Open Recent, Save Project... (shown with the shortcut Cmd+S), Save Universal Cura Project..., Export..., Export Selection..., Reload All Models and Quit. Only Save Project showed a shortcut. We did not try Save Universal Cura Project, so we cannot say what it writes.
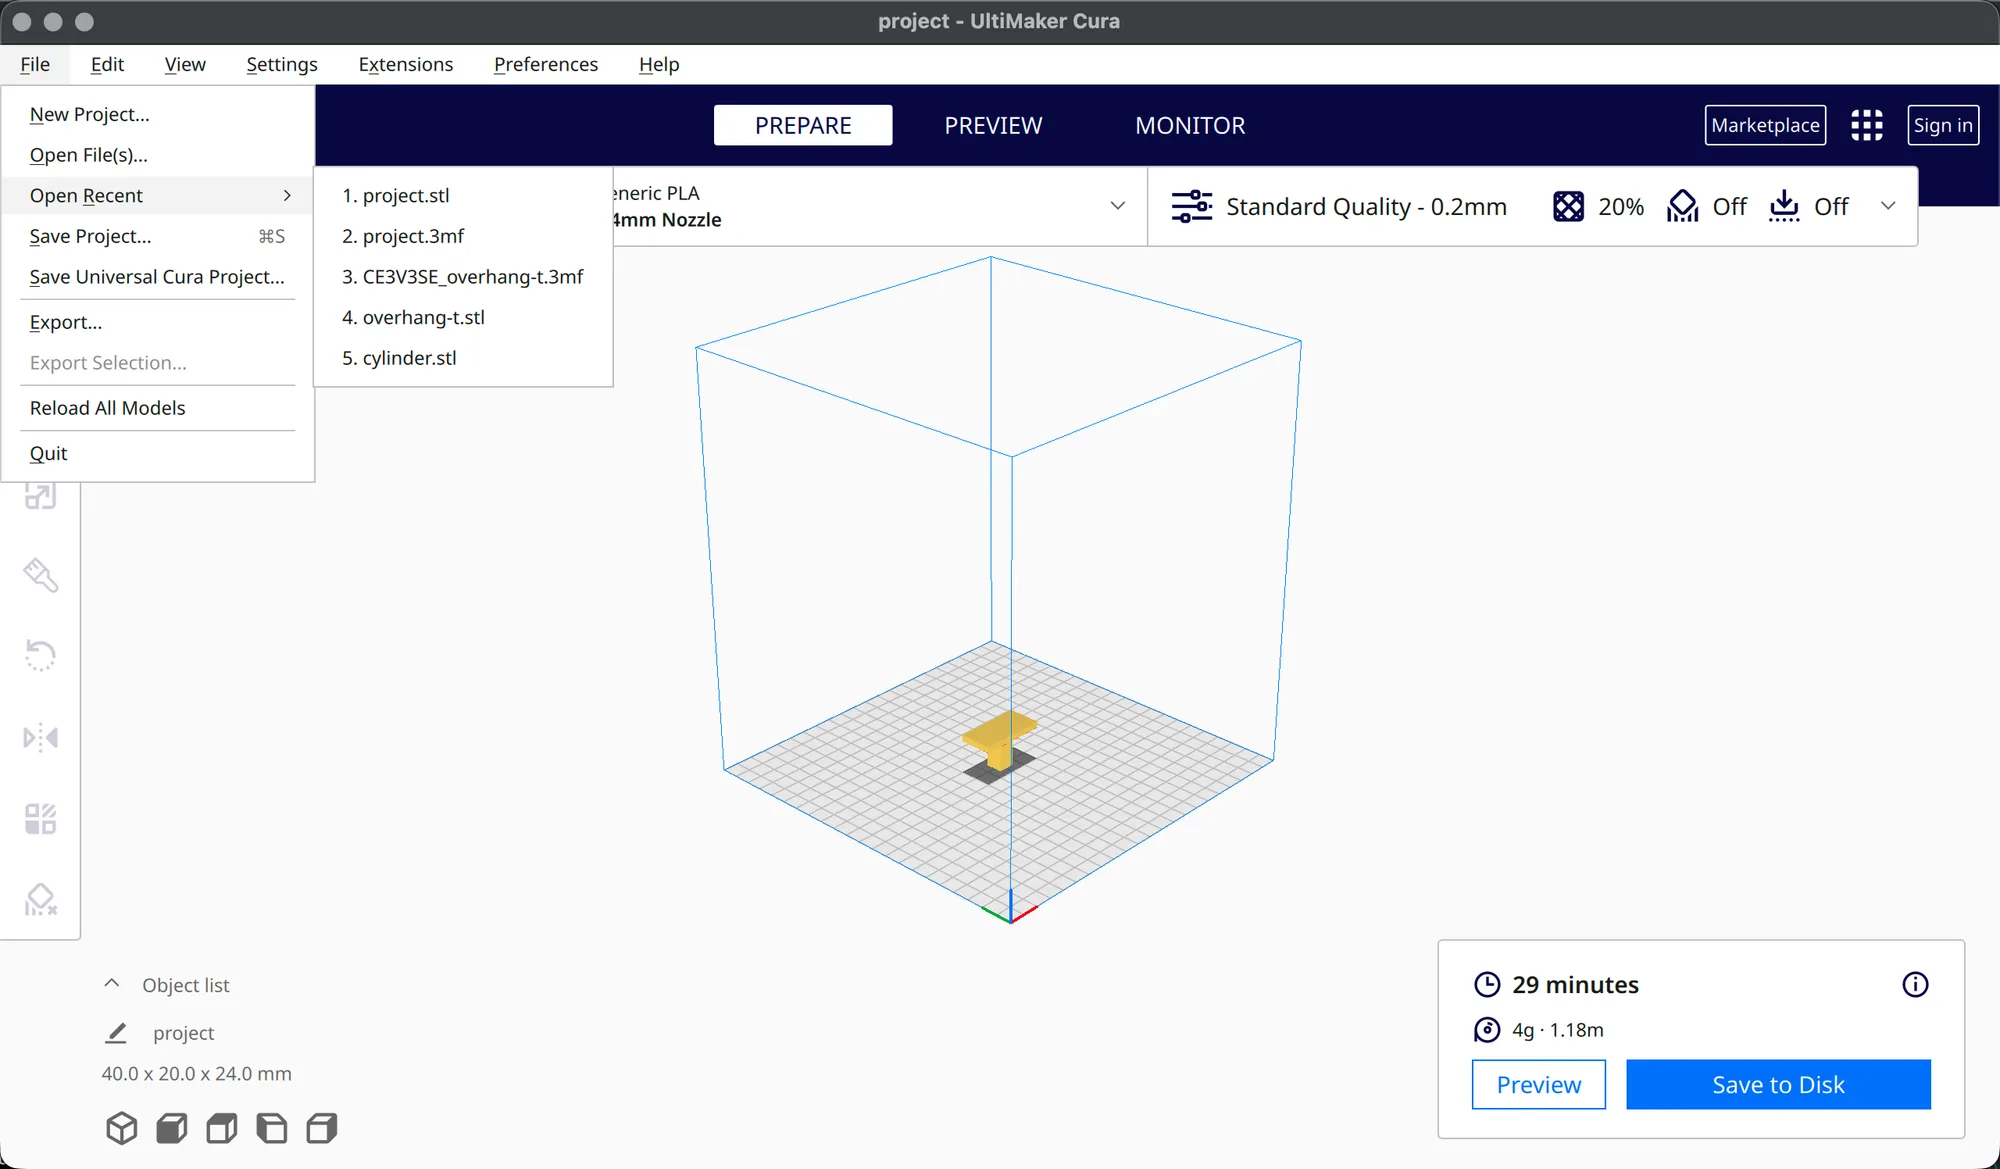
Open Recent listed our files, newest first: project.stl, project.3mf, CE3V3SE_overhang-t.3mf, overhang-t.stl and cylinder.stl. Notice that it records exports too, not only files you opened. Export Selection... was greyed out until we clicked the model, then it turned normal. We did not try it.
How do you save a Cura project?
Choose File > Save Project... or press Cmd+S. Cura first shows a Save Project window titled Summary - Cura Project. It lists the Printer settings (Creality Ender-3 V3 SE), Extruder 1 (0.4mm Nozzle, PLA) and Profile settings (Standard Quality, intent default). It has a checkbox named Don't show project summary on save again, which was already ticked in our copy, and Cancel and Save buttons.
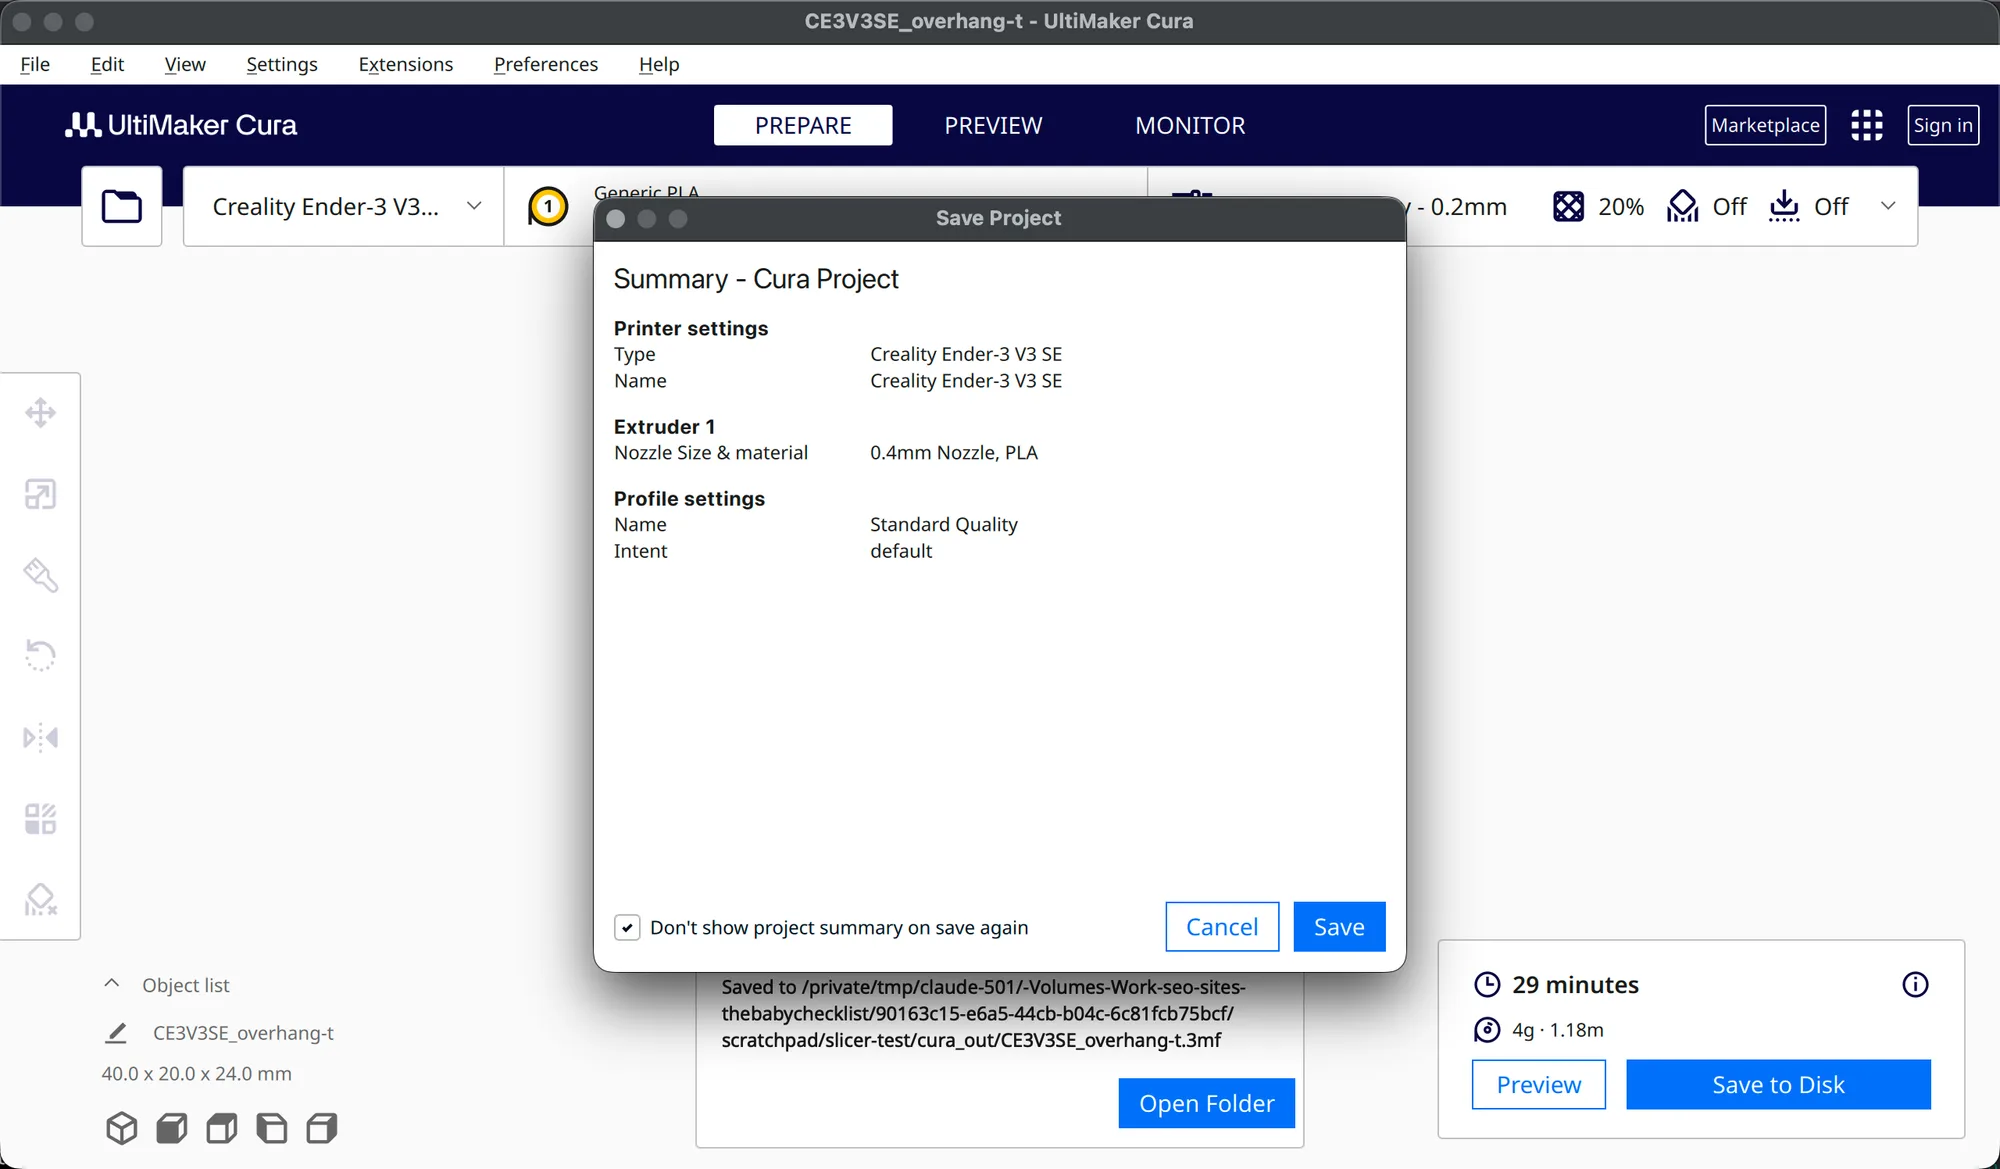
After Save, a dialog titled Save to Disk opens again, this time with no format drop-down, because a project is always 3MF. We named it project. Two things changed afterwards. The window title and the name under the object list both became project, so that is now the name Cura suggests for later saves. And the Save to Disk panel kept its slice result.
We unzipped the project file with unzip -l. It had 21 entries and was about 150 KB. Besides the model in 3D/3dmodel.model and a thumbnail, it holds a Cura/ folder with the printer definition (creality_ender3v3se.def.json), the material file (generic_pla_175.xml.fdm_material), several .inst.cfg setting files, preferences.cfg and version.ini. That is why a project reopens with your settings and a G-code file does not.
What does File > Export give you?
Choose File > Export.... It opens the same Save to Disk dialog, but the format starts on 3MF file (*.3mf), and the drop-down has the same nine entries. We saved a 3MF with it, and it was 58,603 bytes with only seven entries: the thumbnail, 3D/3dmodel.model, a texture and a few package files. There was no Cura/ folder, so it holds the model but not your settings. Choosing STL File (Binary) wrote a 1,284 byte file named project.stl, which is the bare mesh.
Use Export when you only want the shape, for example to send to someone else. Use Save Project when you want to come back to the same scene and settings. Use Save to Disk, the button, when you want the printer file. We did not send any of these files to a printer.
How should you name and keep your files?
A tidy habit is one folder per part, with the project and the G-code beside each other. Because the G-code carries no settings, we suggest naming the G-code after the profile too, for example overhang-t_0.2mm.gcode, and keeping the project of the same name. Remember that the suggested name changes with the job name, so check it each time. For a quick comparison with another slicer's flow, see Cura for beginners.
We left Cura in the PREPARE tab in Recommended mode, with overhang-t loaded and no dialogs open. The next lesson covers materials and profiles (cura-materials-and-profiles), which is not published yet.
Next lesson: Cura Material Profiles: Choose, Add and Manage Them.