The Cura preview is where you check a slice before you save it. This lesson walks through the View type and Color scheme menus, the Line Type legend, the layer slider and the play button. We tested everything in UltiMaker Cura 5.13.0 on macOS with the overhang-t test part.
How do you open Preview in Cura?
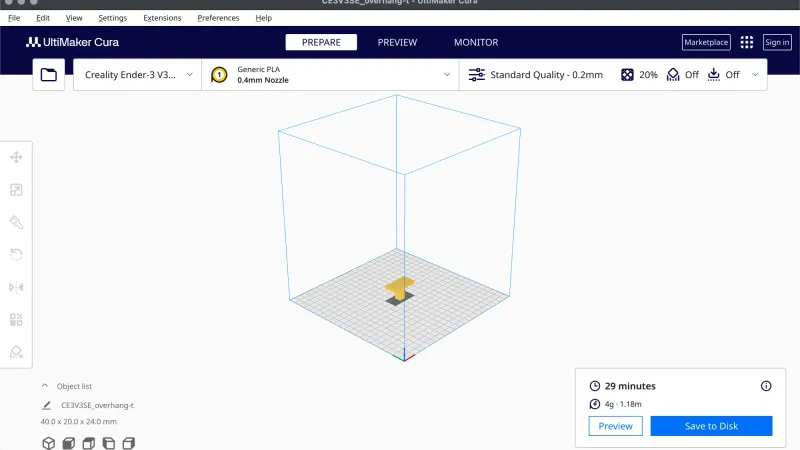
Load a model as in the import lesson, then press Slice at the bottom right. When it finishes the panel shows the time and material estimate with a Save to Disk button. Click PREVIEW in the header, between PREPARE and MONITOR. For overhang-t at Standard Quality 0.2 mm, 20% Cubic infill and no support, the panel read 29 minutes and 4 g, 1.18 m. Those are slicer estimates, not print results.
Before you slice, Preview has nothing to show, because the layers do not exist until the slicer has made them. If you change a setting, slice again. Our slider topped out at layer 120, which matches a 24 mm part cut into 0.2 mm layers. For what a slicer is doing here, see what is a slicer.
What does the View type menu offer?
The top left of Preview has a drop-down labelled View type. It starts on Layer view. Open it and the only other entry is X-Ray view. Some older guides mention a Simulation view. We looked for it and it is not in this version, so on 5.13.0 the animated look comes from the play button covered below.
Next to it, Color scheme is available in Layer view. X-Ray view hides it, along with the layer slider.
Which colour schemes does Cura have?
Open the Color scheme box and a panel appears with a second drop-down. It lists, in order: Material Color, Line Type, Speed, Layer Thickness, Line Width and Flow. We switched through all six on overhang-t.
- Material Color paints everything in the material colour. Our Generic PLA part came out yellow, so it is the closest to a photo.
- Line Type colours by what each line is for. It is the default and the most useful.
- Speed shows a gradient bar from 10.45 to 180.00 mm/s. The stem was blue, the underside of the top bar green, and the top of the bar olive.
- Layer Thickness showed 0.20 to 0.20 mm and painted the whole part one green, because every layer is 0.2 mm. It becomes interesting with variable layer height, as in the layer height guide.
- Line Width ran from 0.00 to 0.40 mm, and our part was solid orange, the top of the scale. That fits a 0.4 mm nozzle.
- Flow ran from 0.00 to 14.40 mm³/s. The stem was blue, the lower band of the bar cyan and the top of the bar green.
The Speed, Layer Thickness, Line Width and Flow views keep the Travels, Helpers, Shell, Infill and Starts checkboxes. Material Color does too.
What do the Line Type colours mean?
With Line Type chosen, the panel lists a legend. We read it entry by entry.
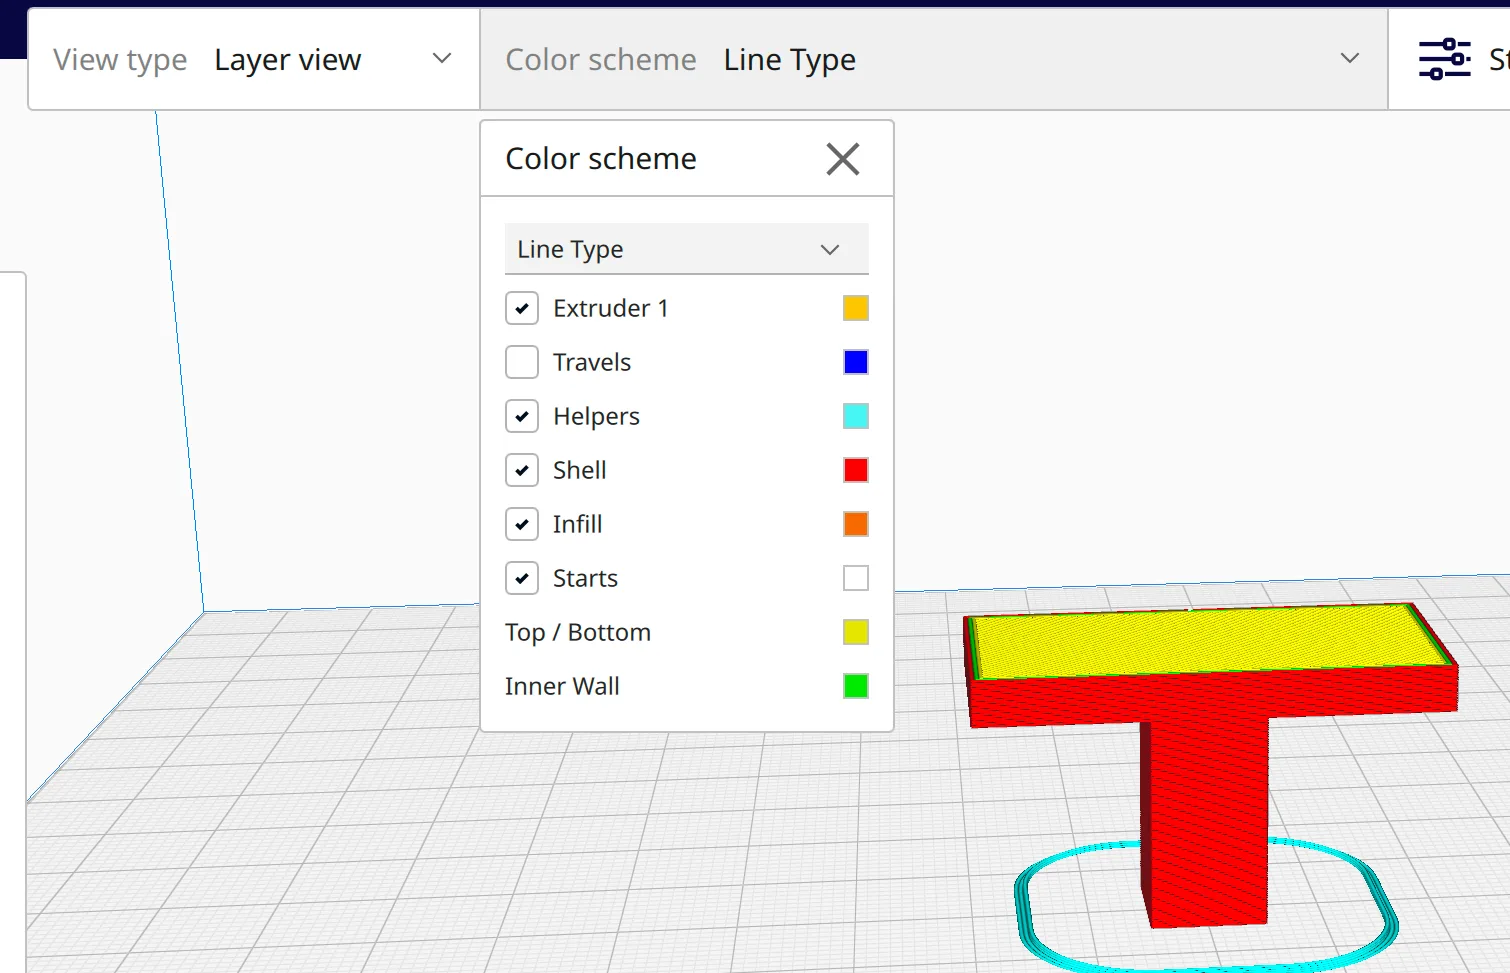
- Extruder 1, ticked, amber swatch. This is the toggle for the whole extruder.
- Travels, blue, unticked by default. These are the moves where the nozzle does not extrude.
- Helpers, cyan. This covers support, skirt and brim, as we saw in the adhesion lesson.
- Shell, red. The outer walls of the part.
- Infill, orange. The inner pattern from infill explained.
- Starts, white. Where each line begins.
- Top / Bottom in yellow and Inner Wall in green. These two have a colour swatch but no checkbox.
Untick a box and that line type disappears. We ticked Travels and a faint blue line appeared from the part to the skirt. We unticked Infill and the orange pattern vanished from the cut layers.
How does the layer slider work?
The vertical slider on the right has two round handles and a box beside the top one. The box shows two numbers: a height in millimetres and a layer number. At the top of the range ours read 24.00mm and 120.
To jump to a layer, click the layer number box, select the text, type a number and press Return. We typed 60 and the box changed to 12.00mm. The part stopped halfway up the stem, and everything above turned grey, so you still see the shape of the rest. At layer 60 the orange infill was visible inside the red walls.
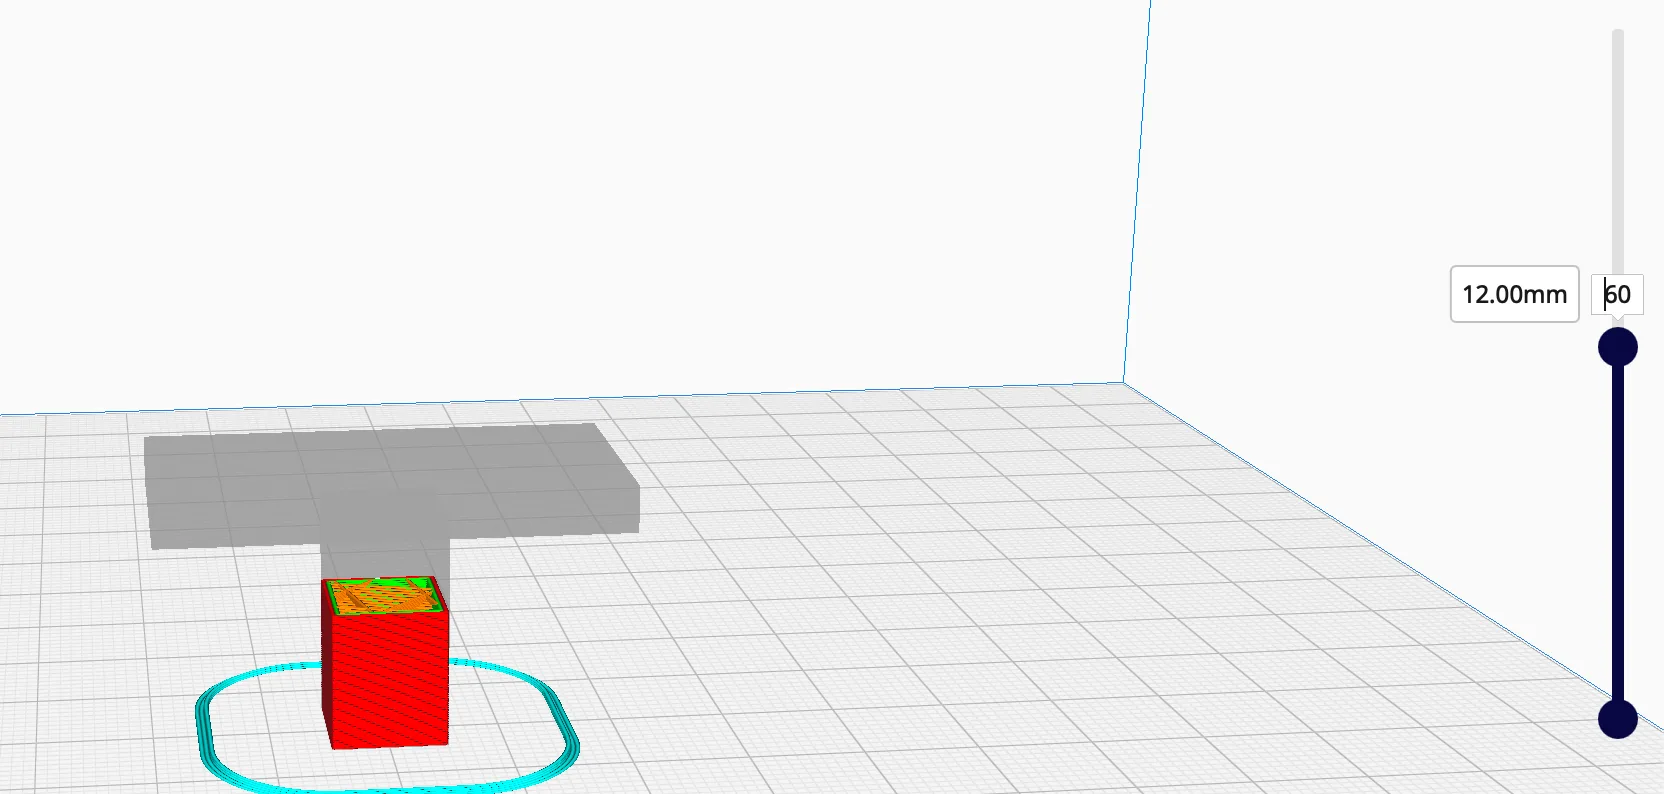
The lower handle sets the first visible layer. Dragging it up to layer 21 showed 4.20mm, and the layers below it went grey too. Together the two handles let you look at any band of layers. We also set the top box to 101, which read 20.20mm. That showed the layers just under the overhang bar, where the yellow top and bottom skin spreads sideways from the stem.
The row along the bottom has a play triangle and a horizontal slider. Press play and a translucent nozzle model moves along the top visible layer, and the button turns into a pause icon. Press it again to stop. We did not time it or use it as a print simulation. It is useful for seeing the order of walls and infill within one layer.
What does X-Ray view show?
Switch View type to X-Ray view. The colour scheme box and the layer slider both disappear, and the model turns into a dark blue, see-through shape. On overhang-t we saw a lighter blue patch where the stem meets the bar. We did not need it for this part. It is a view of the model as a whole, not of the toolpath, so it does not help you read walls or infill.
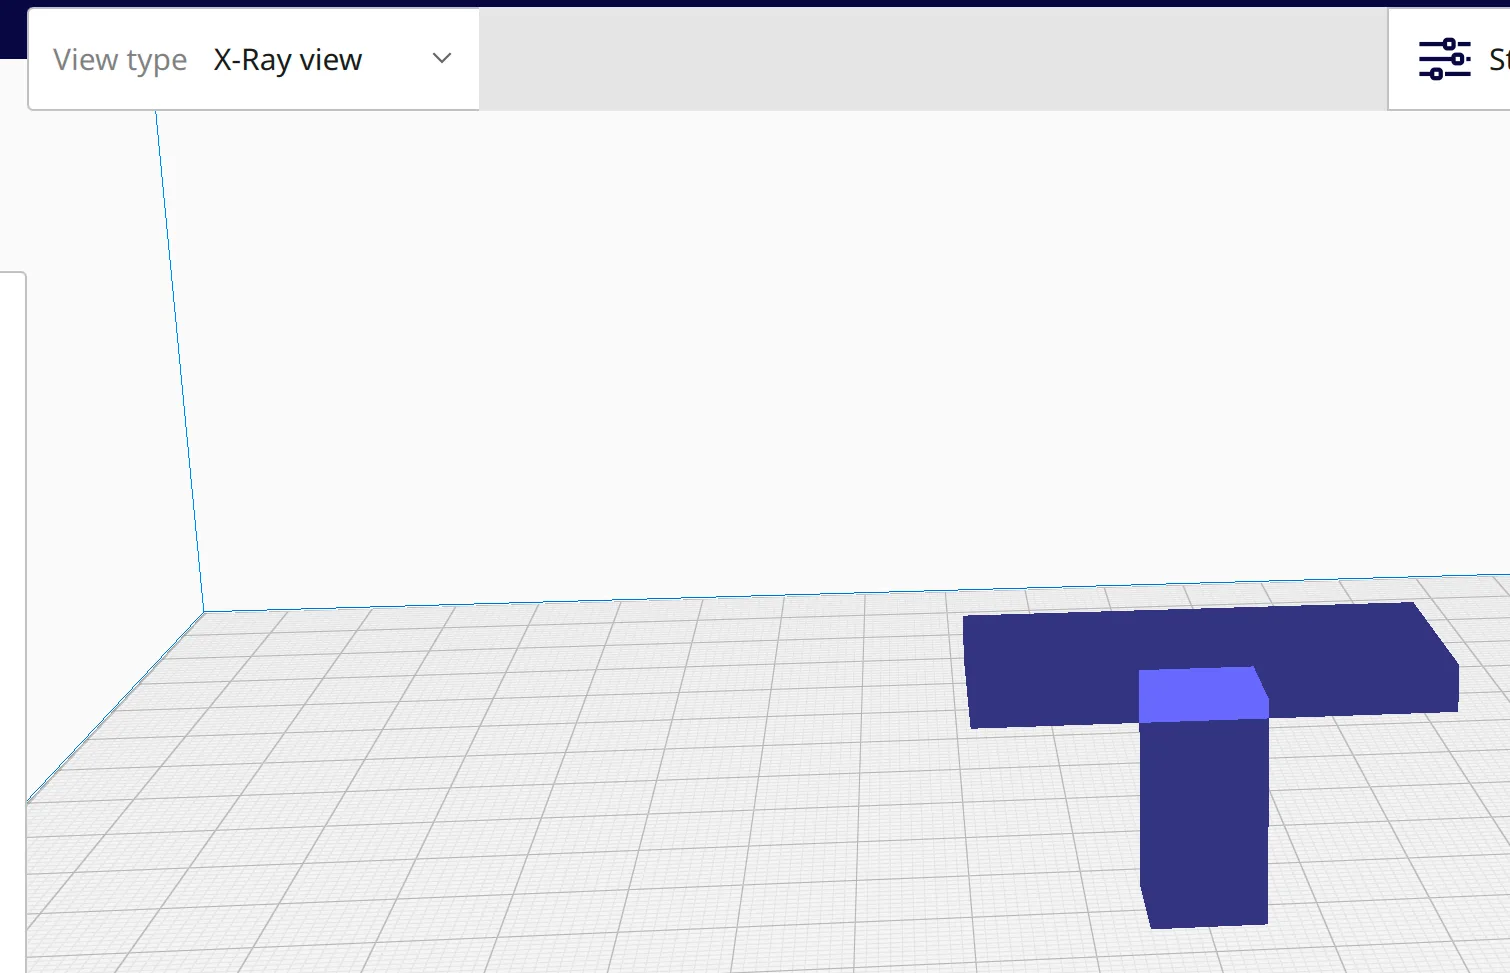
Switch back to Layer view when you want to check the layers themselves.
How do you move the camera in Preview?
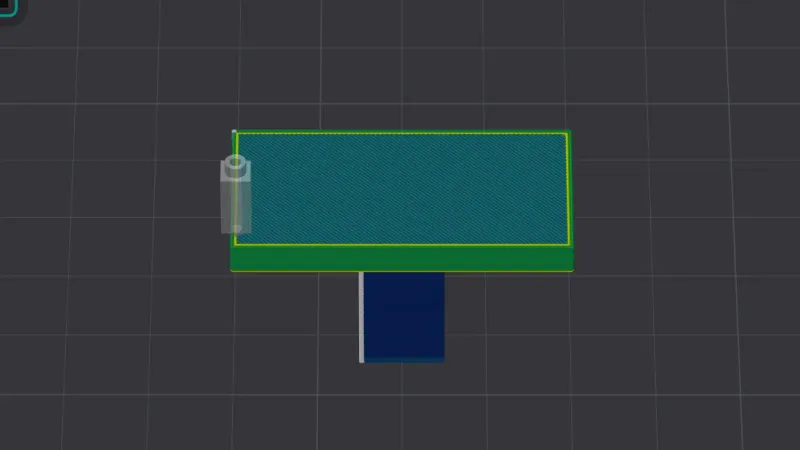
Bottom left of the window are five camera buttons. Hover each and the tooltips read 3D View, Front View, Top View, Left View and Right View. Top View showed the 40 x 20 mm footprint of the bar on the plate. The mouse wheel zooms, and we found it zooms toward the centre of the window, not toward the pointer. Holding Shift and dragging with the left button panned the view. We did not test rotating with the right mouse button in this lesson.
How can Preview show missing supports?
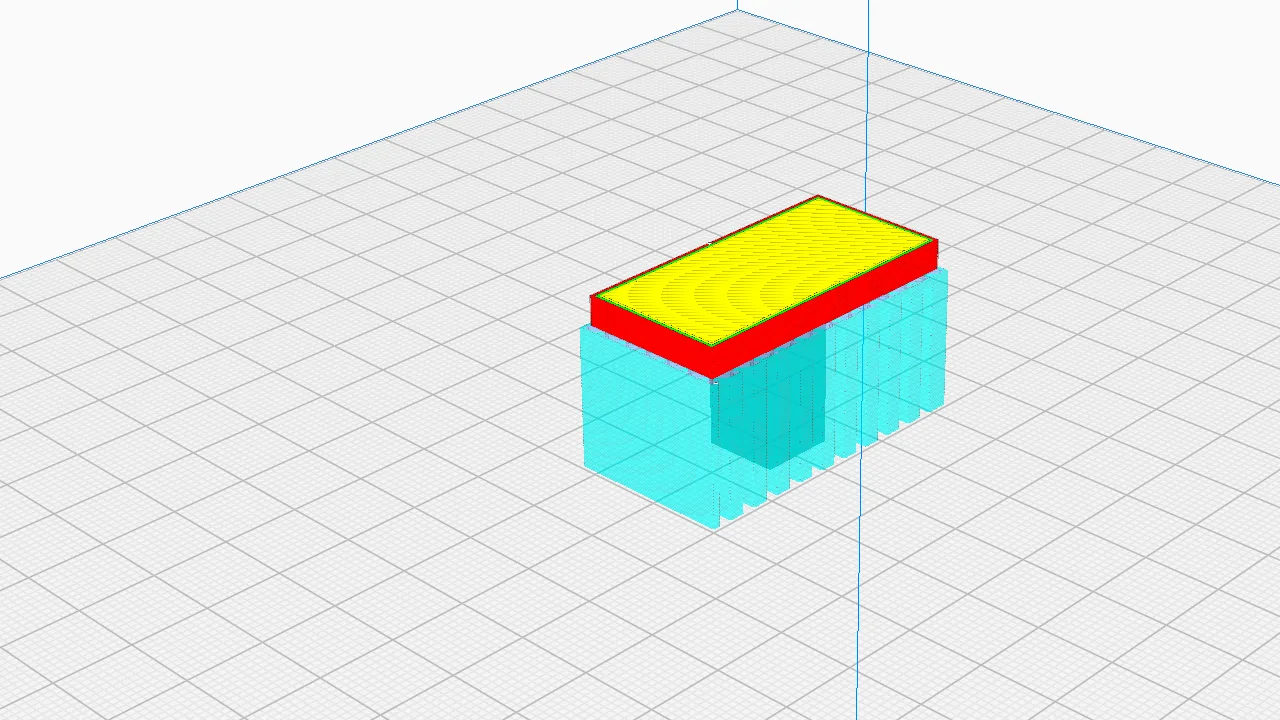
Preview is the quickest way to confirm support is where you expect it. Overhang-t has a 40 mm bar sitting on a narrower stem. With support off, Preview showed the bar's red walls with nothing under it, and the slicer estimate was 29 minutes, 4 g and 1.18 m. We then went back to PREPARE, opened the print settings and turned the Support switch on, as in the supports lesson. After slicing again, the bar sat on a block of cyan Helpers lines and the estimate rose to 45 minutes, 9 g and 2.94 m.
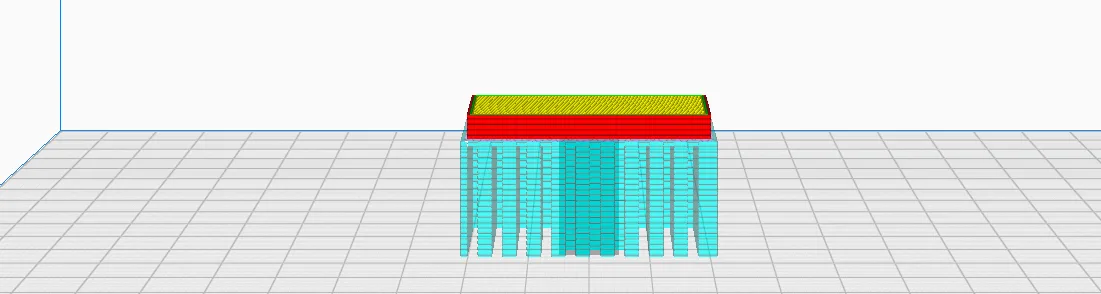
That jump is the price of the support, and it is why you should check Preview before saving. For when to use supports, read supports explained. If the cyan is missing in the right place, change the setting and slice again. We reset Support to Off and left Cura on the PREPARE tab at the end.
The next lesson covers saving and exporting the sliced file (cura-save-and-export), which is not published yet.
Next lesson: Cura Export Gcode: Save to Disk, Projects and Exports.