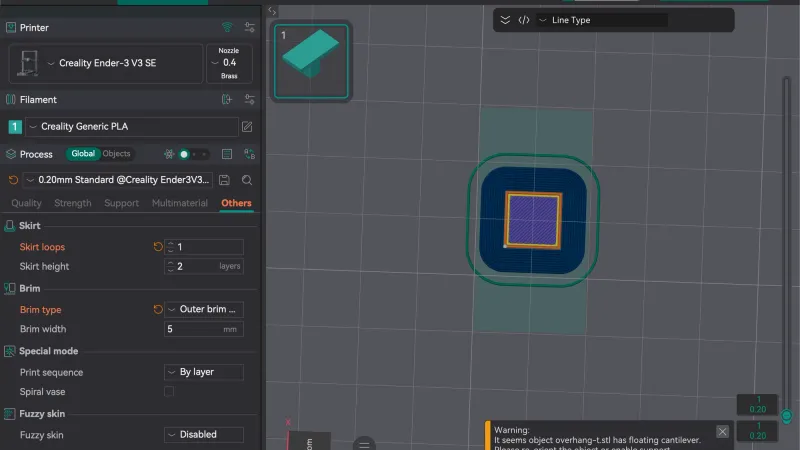
Cura brim and adhesion settings decide what is printed on the build plate before your part starts. This lesson shows what the Adhesion switch really changes, how Skirt, Brim, Raft and None differ, and where the seam settings live. We tested it in UltiMaker Cura 5.13.0 on macOS with the overhang-t test part.
What does the Adhesion switch do in Recommended mode?
Open the print settings bar at the top right of the Prepare stage, as in the supports lesson. Scroll to the bottom of the Recommended list. Under Support there is a row called Adhesion with a single switch. It started Off, and the bar at the top right showed the adhesion icon as Off. Click the switch and the bar changes to On.
Unlike Support, the switch adds nothing underneath it. We looked for extra drop-downs and found none. Hover the label and the tooltip says: "Enable printing a brim or raft. This will add a flat area around or under your object which is easy to cut off afterwards. Disabling it results in a skirt around object by default."
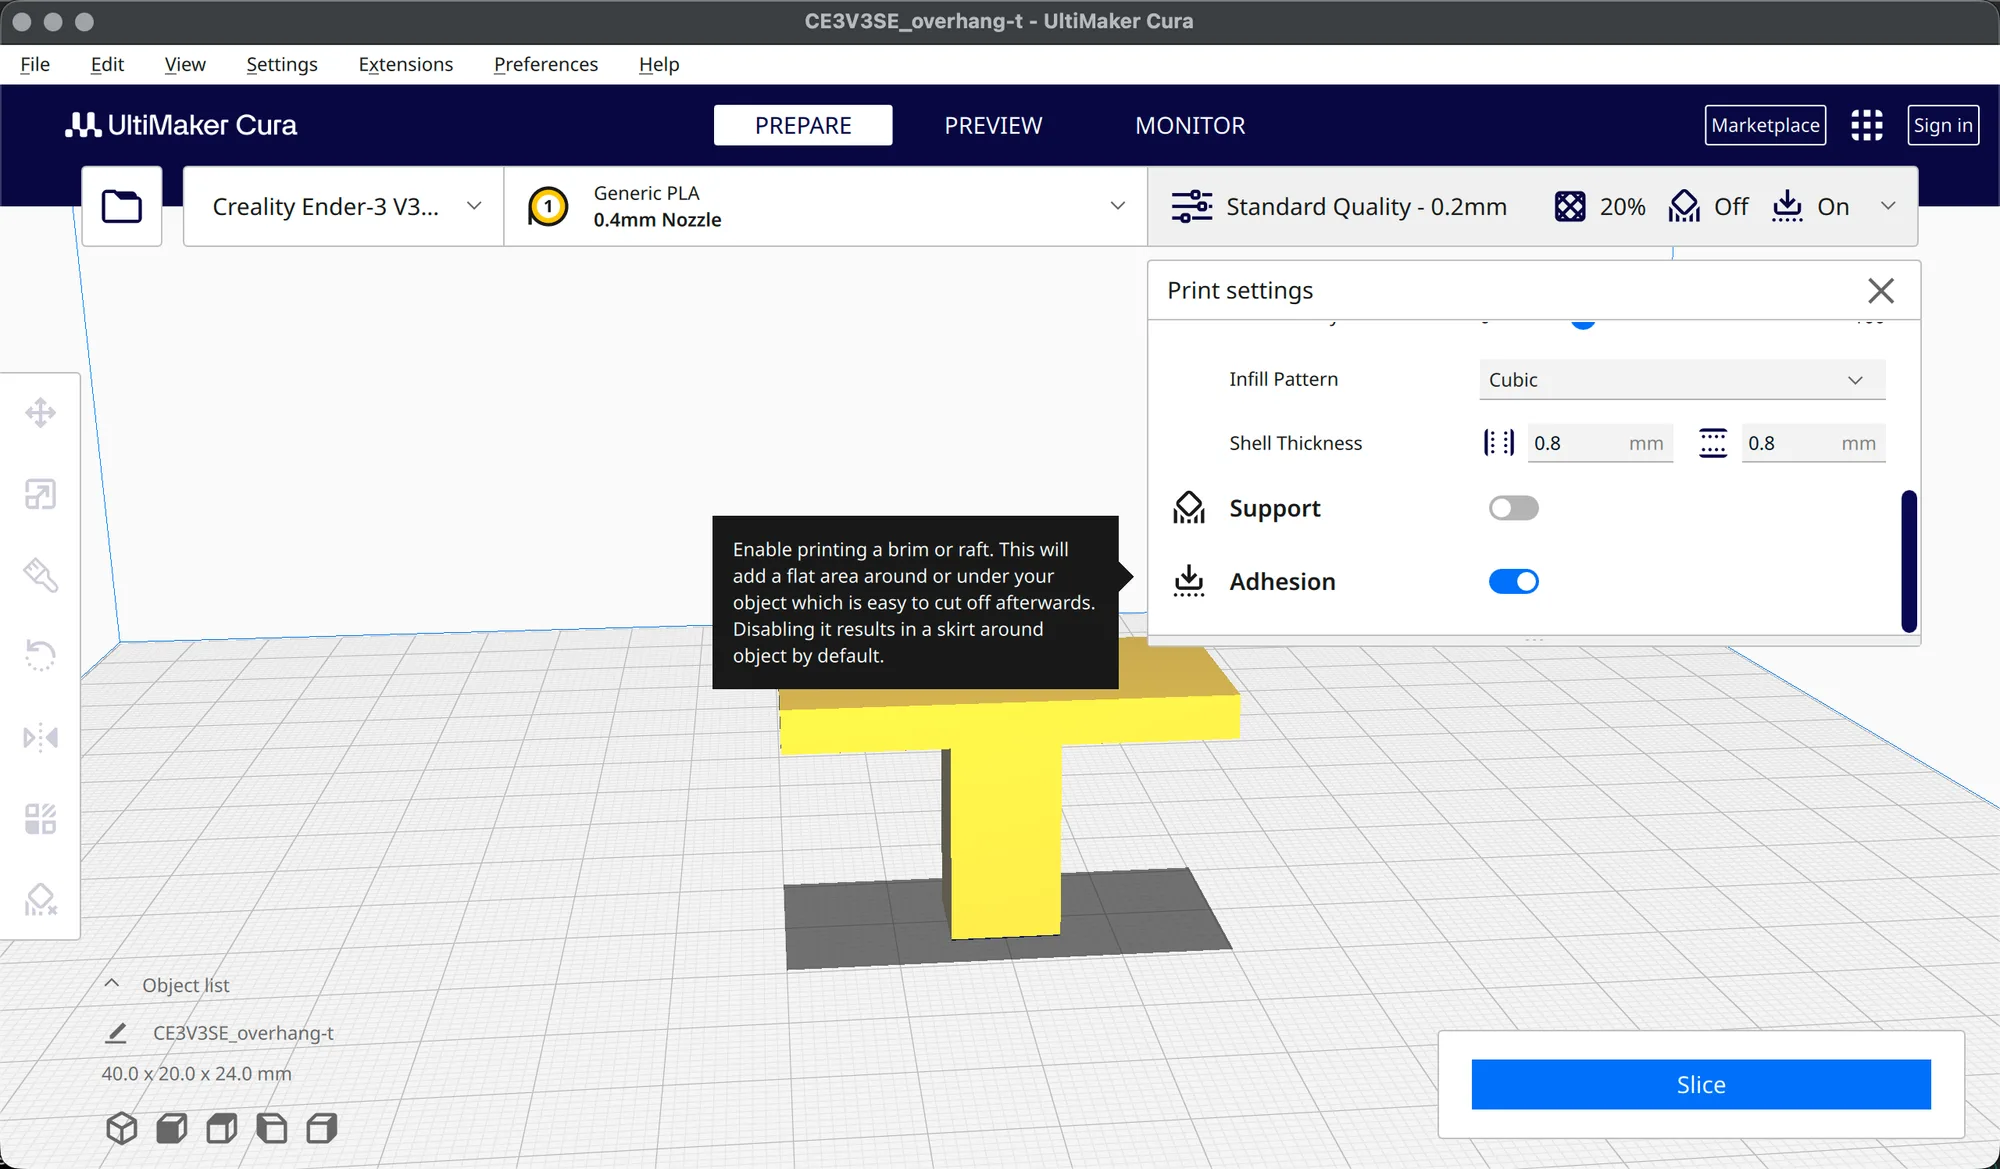
Scroll back to the top of the panel and a yellow notice reads that the Recommended settings for Standard Quality were altered, with a reset arrow. That is Cura telling you the switch changed a real setting behind the scenes. The next section shows which one.
What does the Adhesion switch actually set?
Click Show Custom, type adhesion type into the search box and read the row. With the switch Off, Build Plate Adhesion Type is Skirt. With the switch On it is Brim, shown in italics with a reset arrow beside it because it no longer matches the profile. Clicking that arrow returned it to Skirt, so Skirt is the profile default on our Creality Ender-3 V3 SE setup.
So the switch is a two position shortcut: Skirt when Off, Brim when On. It cannot pick Raft or None. For those, use the drop-down in Custom mode, covered in the Custom settings lesson.
Which adhesion types does Cura offer in Custom mode?
Open the Build Plate Adhesion category, or search for the type, and click the drop-down. The options are Skirt, Brim, Raft and None, in that order. The tooltip reads: "Different options that help to improve both priming your extrusion and adhesion to the build plate. Brim adds a single layer flat area around the base of your model to prevent warping. Raft adds a thick grid with a roof below the model. Skirt is a line printed around the model, but not connected to the model." For the theory behind each, see brim vs raft vs skirt.
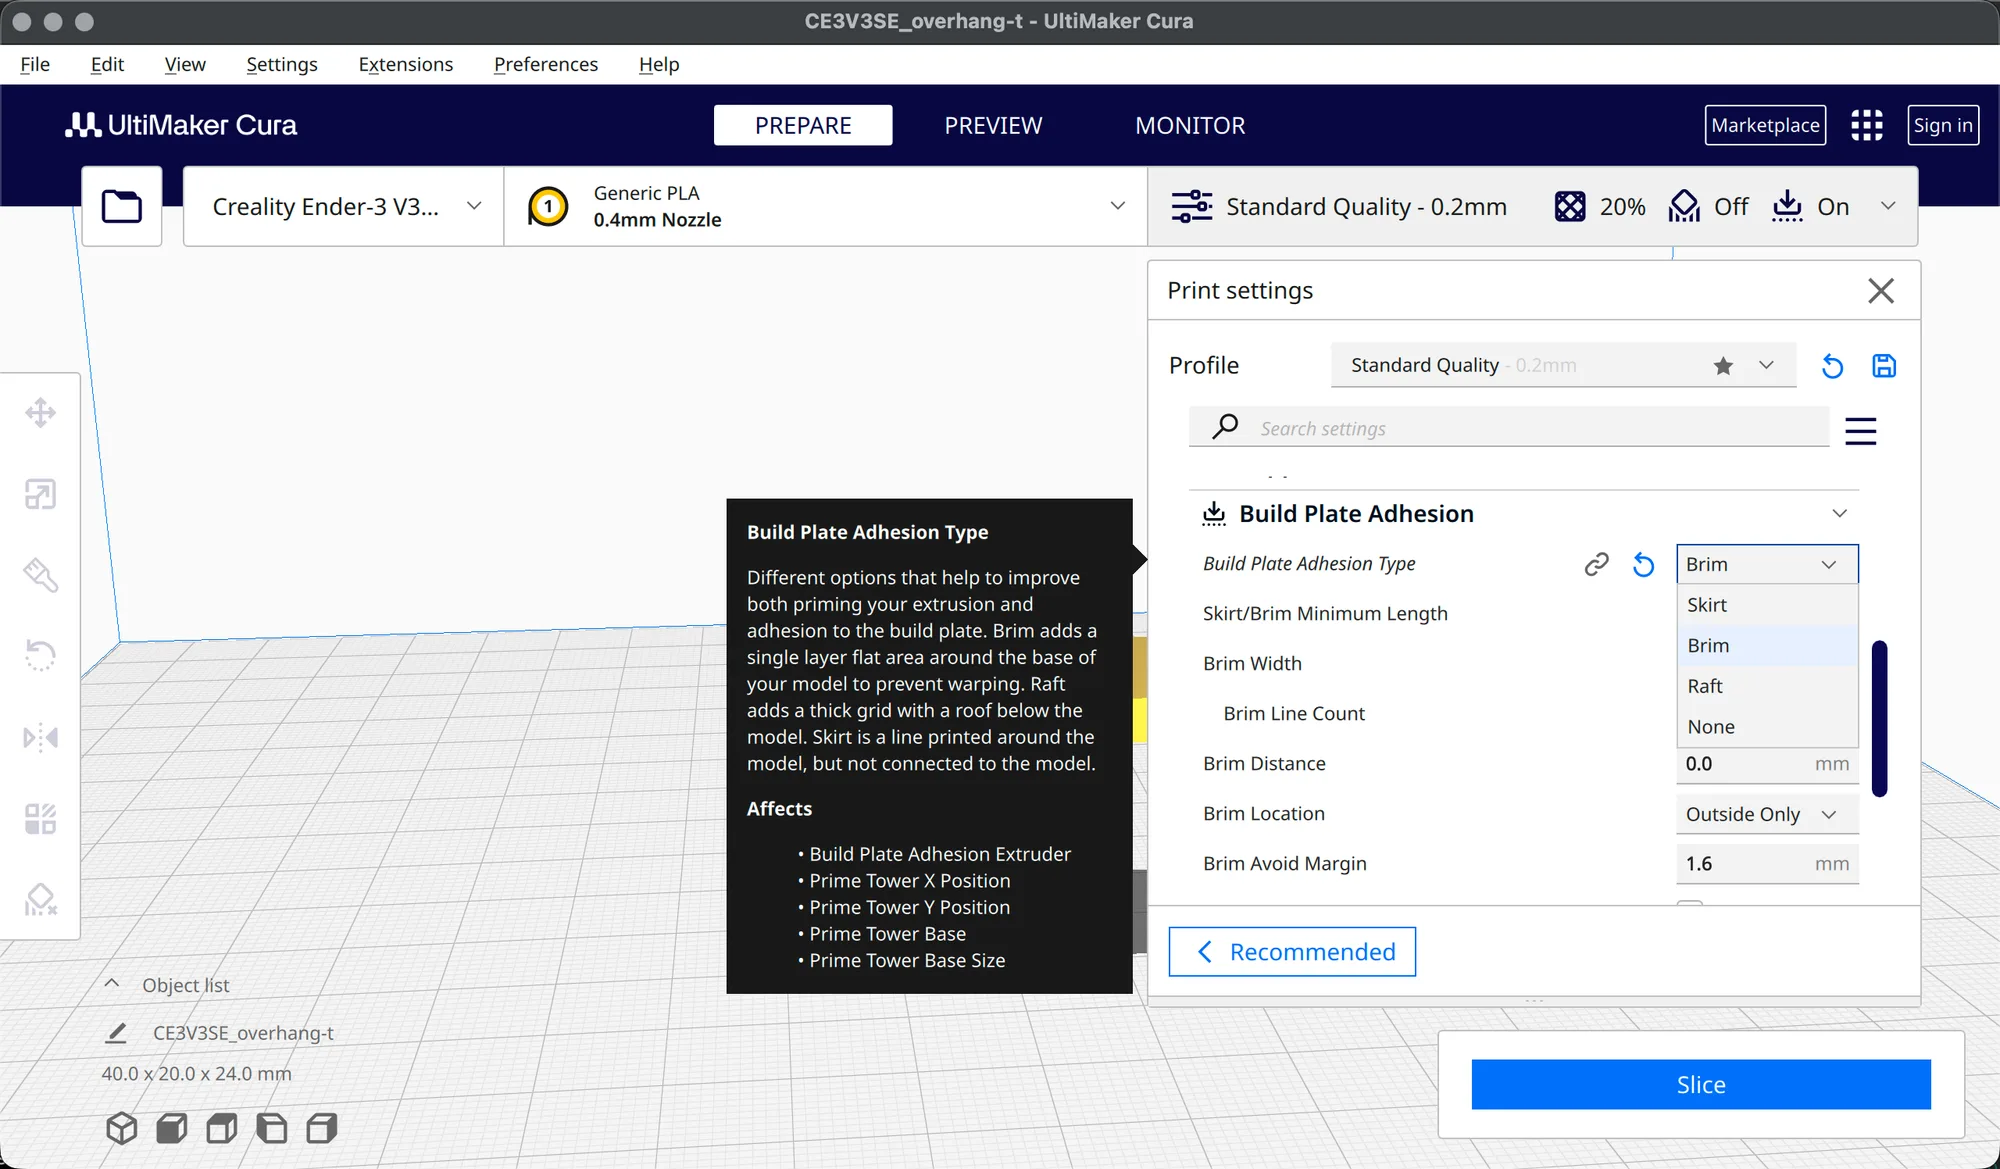
Choosing None collapsed the category to a single row, and the bar at the top right showed Off. Choosing Skirt also showed Off. Brim and Raft both showed On.
Which settings does each type add?
The category changes shape with the type. Here is what we read, with the values on our Standard Quality 0.2 mm profile. We did not record the setting visibility level, so you may see fewer rows.
- Skirt: Skirt Line Count 3, Skirt Height 3, Skirt Distance 10.0 mm and Skirt/Brim Minimum Length 250.0 mm. The Skirt Line Count tooltip says multiple skirt lines help prime the extrusion better for small models, and that setting it to 0 disables the skirt.
- Brim: Skirt/Brim Minimum Length 250.0 mm, Brim Width 8.0 mm, Brim Line Count 20, Brim Distance 0.0 mm, Brim Location Outside Only, Brim Avoid Margin 1.6 mm and Smart Brim, ticked.
- None: no extra rows.
The Skirt/Brim Minimum Length tooltip explains that if all skirt or brim lines together do not reach the length, more lines are added until they do, and that a line count of 0 makes the minimum ignored. Brim Line Count warns that more lines enhance adhesion but reduce the effective print area. Brim Avoid Margin removes brim near other models that you want left brimless. We did not find a setting called Brim Only on Outside in this version. The equivalent here is Brim Location, and we left it on Outside Only. We also did not look for a Brim Replaces Support row. The support brim we saw earlier is Enable Support Brim in the Support category.
What are the Raft settings in Cura?
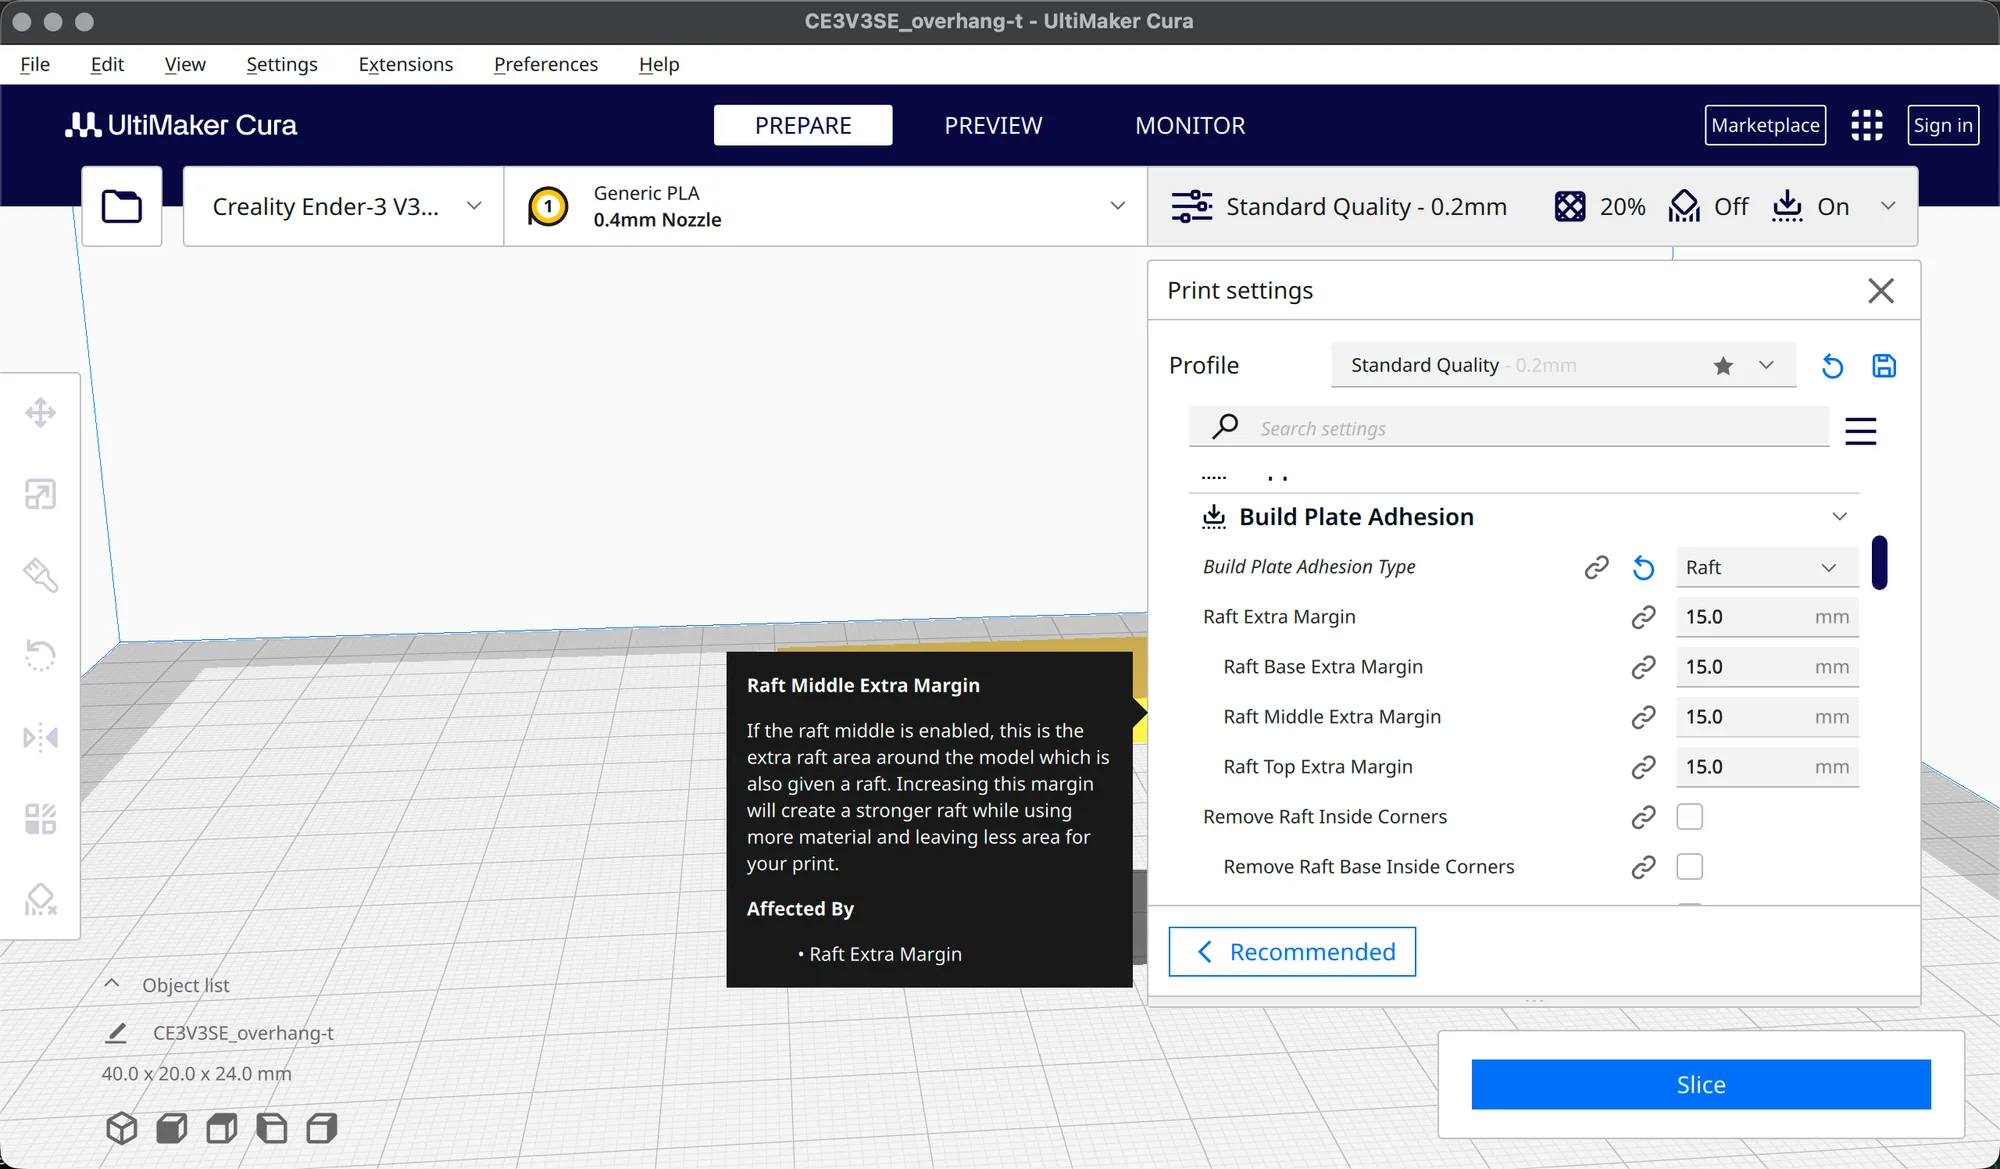
Pick Raft and the category grows a long list. The first rows are Raft Extra Margin 15.0 mm with Base, Middle and Top versions, Remove Raft Inside Corners (unticked, with Base, Middle and Top versions) and Raft Smoothing 5.0 mm. Further down we read Raft Air Gap 0.3 mm, Initial Layer Z Overlap 0.15 mm, Raft Base Thickness 0.24 mm, Raft Base Line Width 0.8 mm, Raft Base Line Spacing 1.6 mm, Raft Middle Layers 1, Raft Middle Thickness 0.3 mm, Raft Top Layers 2, Raft Top Layer Thickness 0.2 mm, Raft Wall Count 1 and Raft Print Speed 90.0 mm/s. Each group has Base, Middle and Top rows with a link icon, which shows they follow the parent value.
The Raft Middle Extra Margin tooltip says the margin is the extra raft area around the model, and that a bigger margin makes a stronger raft that uses more material and leaves less area for your print. The Raft Air Gap row is the gap between the raft and the first layer of the part. That gap is what makes a raft easier to peel off, though we did not print one to test it.
How do skirt, brim and raft look in Preview?
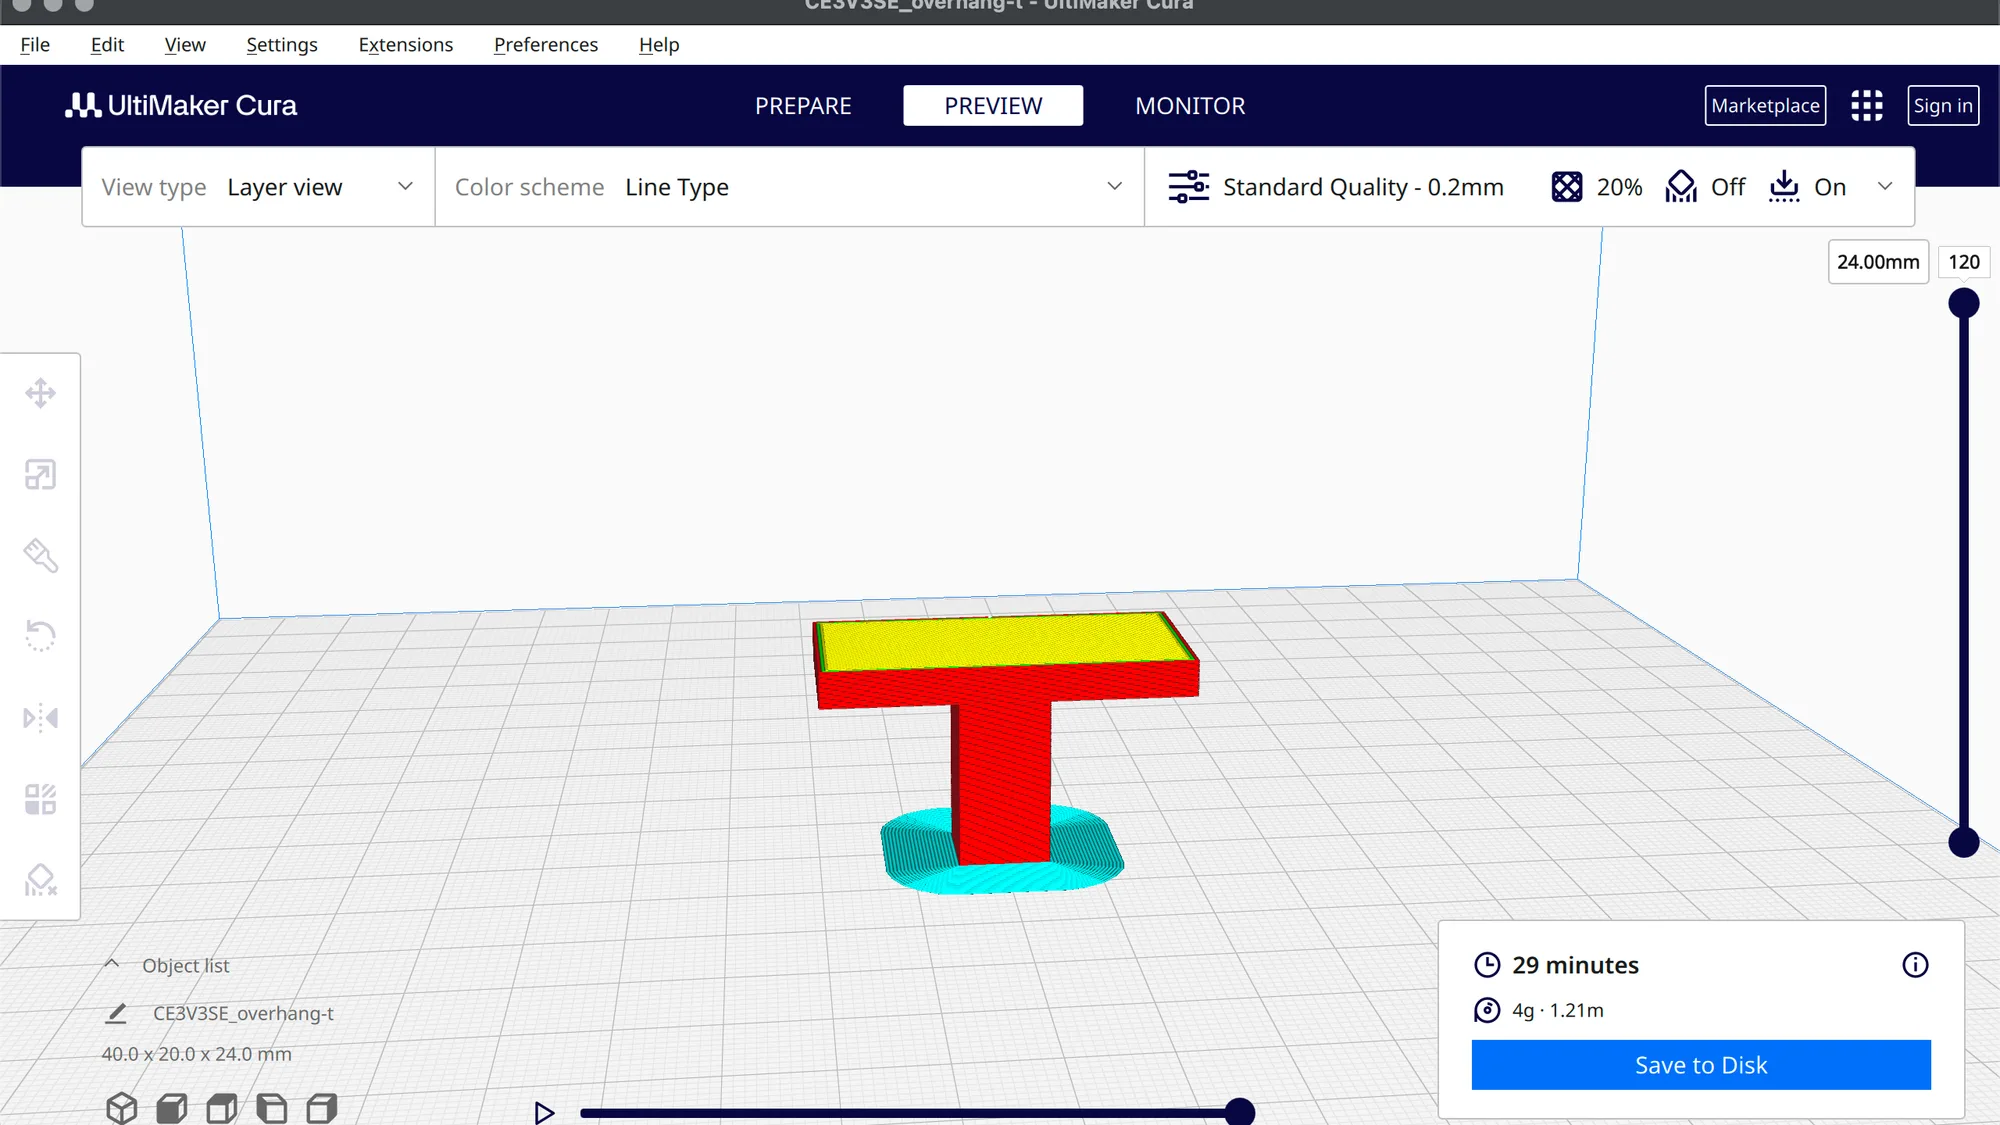
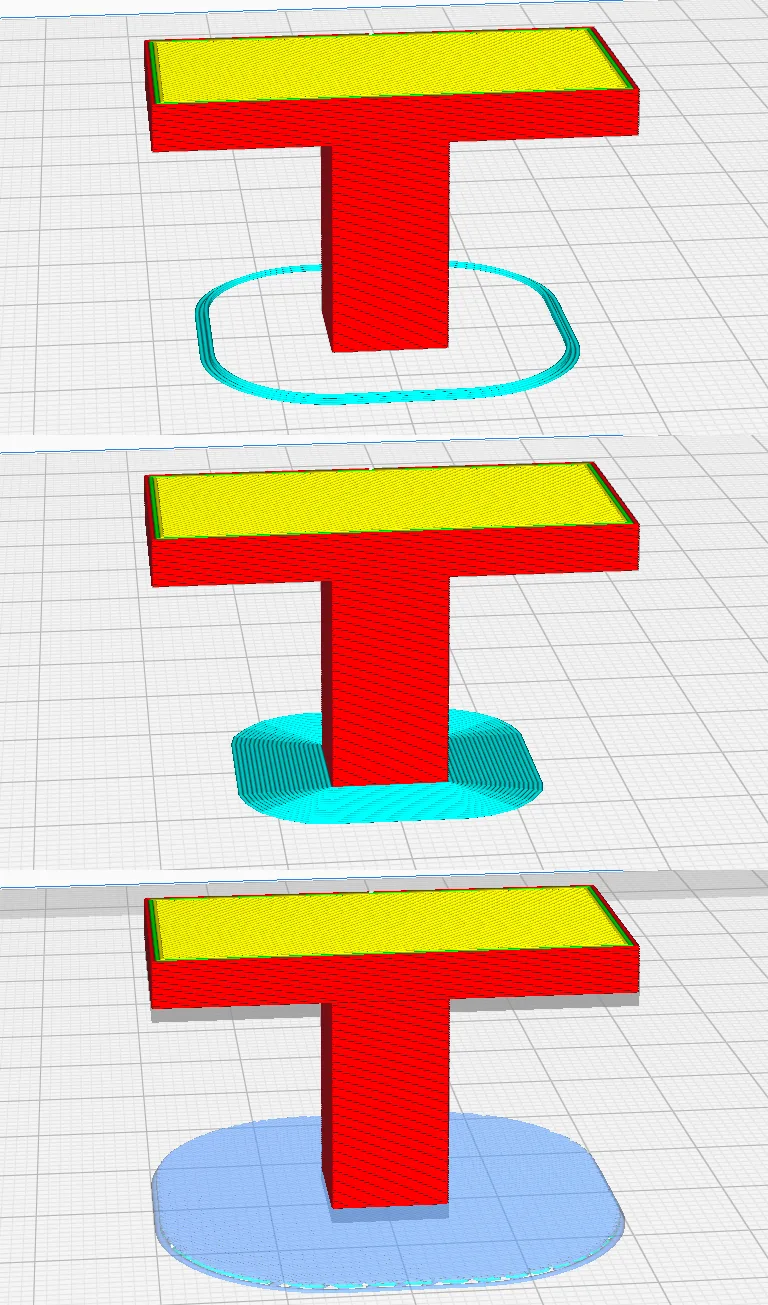
Slice, then click Preview with the Line Type colour scheme. The adhesion structure is painted in the Helpers colour, a cyan. With Skirt we saw a thin cyan ring on the plate, with a clear gap to the part. With Brim there was a solid cyan collar touching the base of the stem. With Raft the colour was a pale, translucent blue slab, much larger than the part, and the layer slider topped out at 124 against 120 for the others, so the raft added four layers before the part started. That fits one middle layer and two top layers on top of the base layer.
How much do skirt, brim and raft change the estimate?
We sliced overhang-t with Standard Quality 0.2 mm, 20% Cubic infill and no support, changing only the adhesion type. These are slicer figures, not print results.
| Adhesion type | Slicer time | Material |
|---|---|---|
| None | 28 minutes | 3 g, 1.16 m |
| Skirt | 29 minutes | 4 g, 1.18 m |
| Brim | 29 minutes | 4 g, 1.21 m |
| Raft | 31 minutes | 5 g, 1.61 m |
The skirt cost about 0.02 m of filament over None, the brim 0.05 m, and the raft 0.45 m, which is the biggest jump. The part is small, so the minutes barely move. A larger part or a bigger brim width would show more. Choosing Skirt gave the same numbers as the original Adhesion Off slice in the supports lesson, which fits the Off state being a skirt.
Where are the seam settings in Cura?
The seam is where each layer starts and stops, which is why it can show as a line up the side of a print. Search for seam and open the Walls category. The first rows we found were Outer Wall Wipe Distance 0.0 mm, Z Seam Alignment, Z Seam On Vertex (unticked), Z Seam Position, Z Seam X 110.0 mm, Z Seam Y 220.0 mm and Z Seam Relative (unticked). Our profile showed Z Seam Alignment on User Specified and Z Seam Position on Back, so the seam sits at the back of the part. For a refresher on the idea, read seam position explained.
The Z Seam Alignment drop-down offers User Specified, Shortest, Random and Sharpest Corner. Its tooltip says that when paths in consecutive layers start at the same point a vertical seam may show, and that aligning near a user specified location makes the seam easiest to remove. Random hides the start inaccuracies, and Shortest is quicker. Z Seam Position then offers Back Left, Back, Back Right, Right, Front Right, Front, Front Left, Left and Middle. The tooltip warns that Middle differs depending on Z Seam Relative.
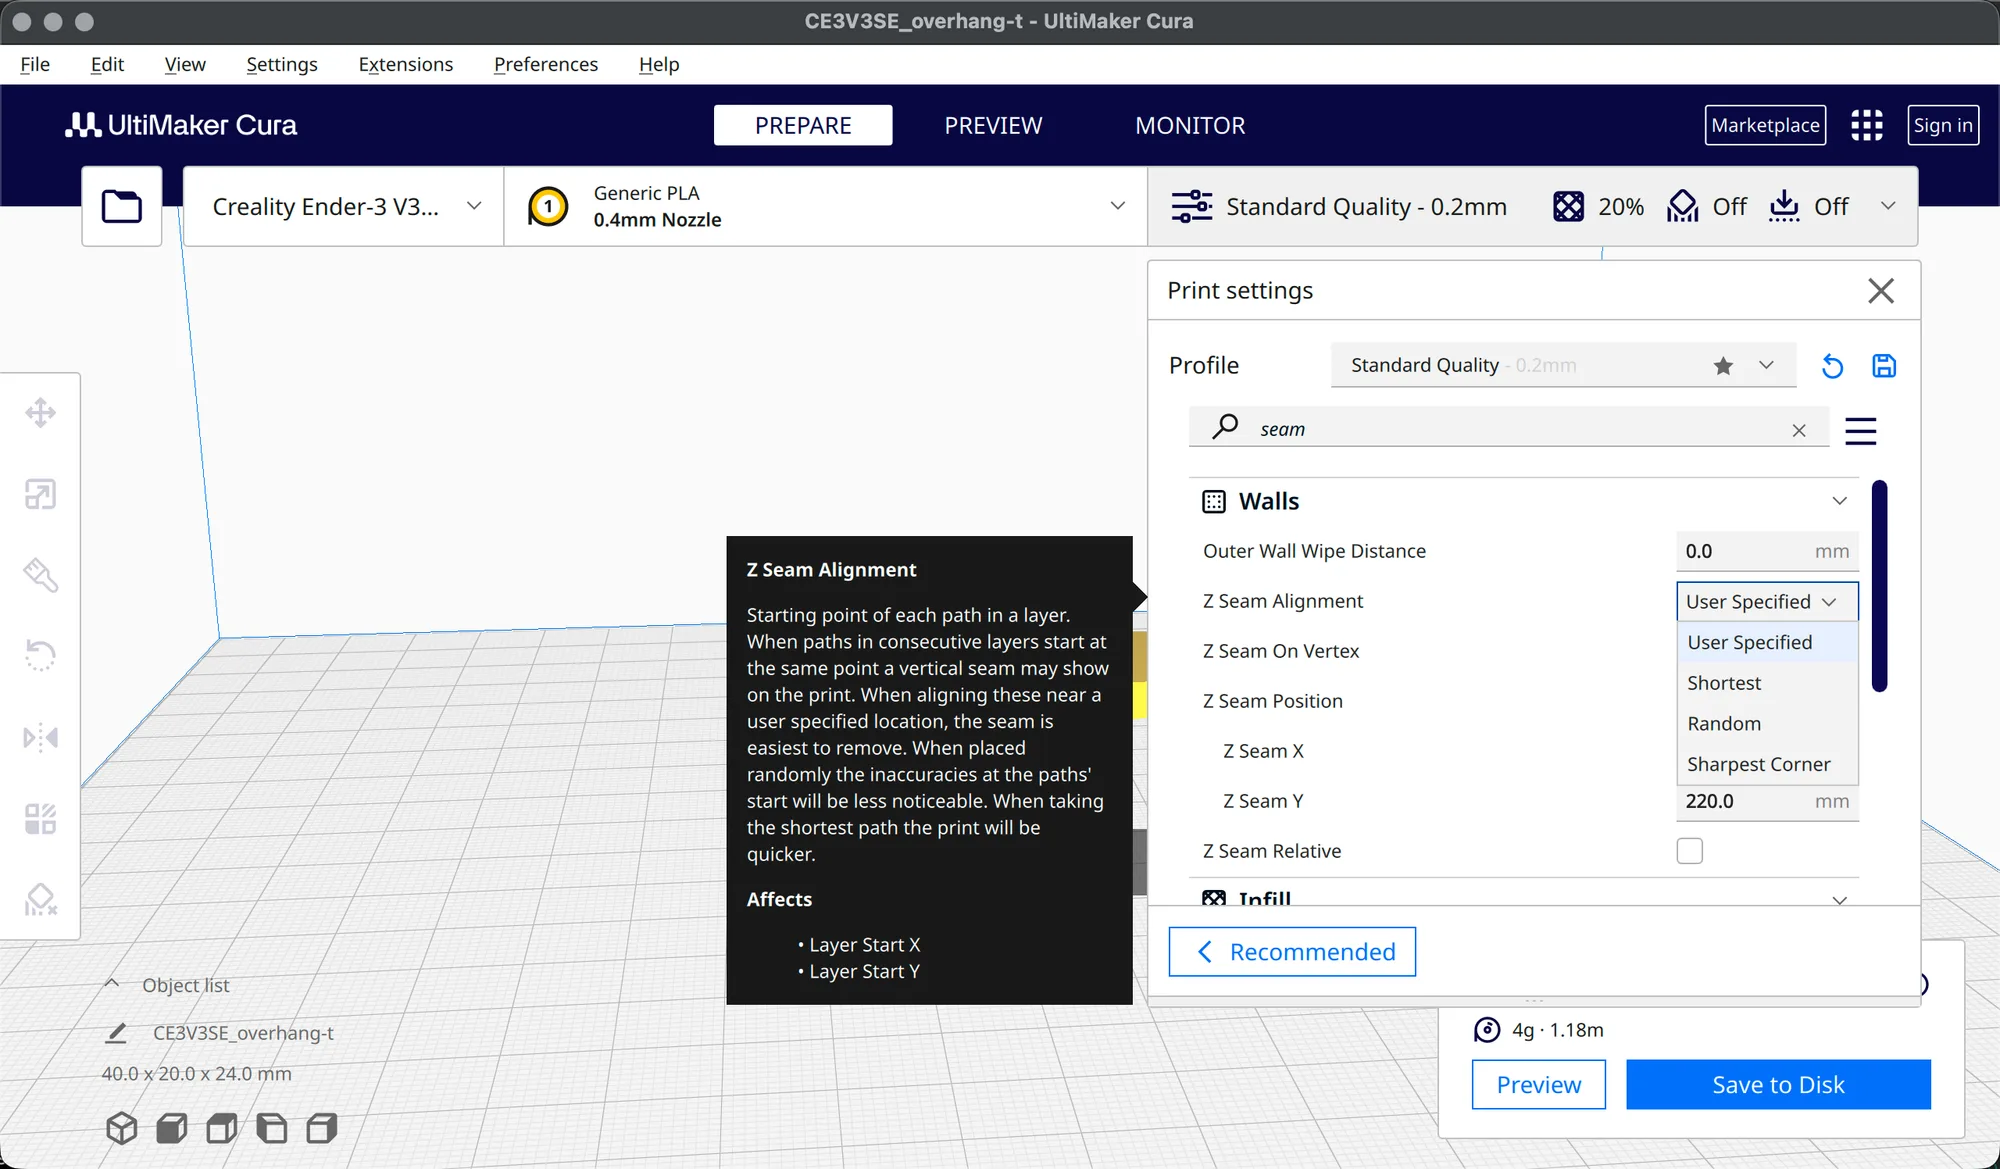
When we switched to Sharpest Corner, the Z Seam On Vertex, Z Seam Position, X, Y and Relative rows disappeared and a new row Seam Corner Preference appeared, set to Smart Hiding. Its options are Hide Seam, Expose Seam, Hide or Expose Seam (the label is cut off in the narrow field) and Smart Hiding. The tooltip says Hide Seam makes the seam more likely on an inside corner, Expose Seam on an outside corner, and Smart Hiding allows both but chooses inside corners more often. When Alignment was User Specified, a search for seam corner showed no such row. We reset the alignment afterwards with its arrow, and the adhesion type too, then left Cura in Recommended mode with Adhesion Off. The next lesson is Cura preview and layers (cura-preview-and-layers), which is not published yet.
Next lesson: Cura Preview: Layer View, Colours and Slider Explained.