The first layer decides whether a print sticks, and the seam decides where the layer changes leave a mark. This lesson, tested in OrcaSlicer 2.4.2 on macOS, shows the skirt and brim settings on the Others tab, how to read them in Preview, and how to set the seam.
Where are the skirt and brim settings in OrcaSlicer?
Start on the Prepare tab in Simple mode with the Creality Ender-3 V3 SE, Creality Generic PLA and the 0.20mm Standard Process preset, with one overhang-t part loaded. Our previous lesson on supports used the same part. Open the Others tab in the Process panel. In Simple mode it has a Skirt group with two fields and a Brim group with two fields, followed by Special mode and Fuzzy skin groups that this lesson does not use.
The values we found in the preset:
- Skirt loops: 0
- Skirt height: 2 layers, greyed out while Skirt loops is 0
- Brim type: No-brim
- Brim width: 5 mm, greyed out while Brim type is No-brim
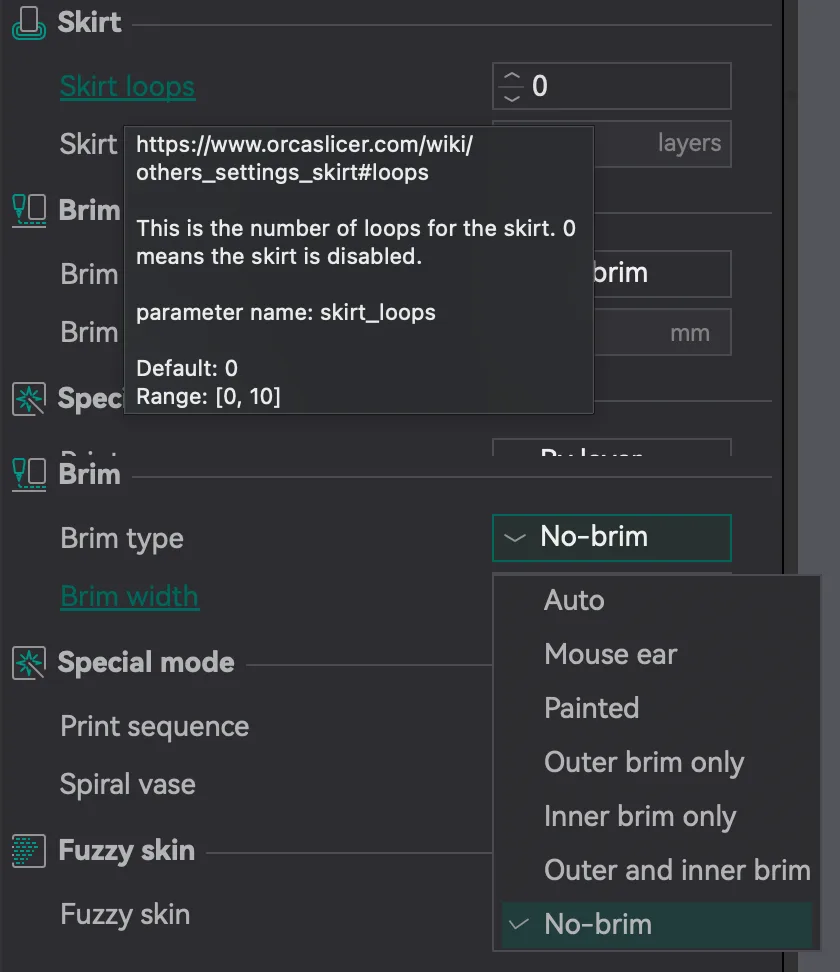
Hover over a label for two or three seconds to read its tooltip. What we read:
- Skirt loops: "This is the number of loops for the skirt. 0 means the skirt is disabled." Parameter
skirt_loops, default 0, range 0 to 10. - Skirt height: "Number of skirt layers: usually only one". Parameter
skirt_height, default 2 layers. - Brim type: "This controls the generation of the brim at outer and/or inner side of models. Auto means the brim width is analyzed and calculated automatically." Parameter
brim_type. - Brim width: "This is the distance from the model to the outermost brim line." Parameter
brim_width, default 5mm, range 0mm to 100mm.
Skirt distance and Brim object gap are not shown in Simple mode. We did not switch to Advanced mode in this lesson, so we cannot tell you where they appear or what they default to. Our lesson on Advanced mode covers how the modes differ.
What is the difference between a skirt and a brim in OrcaSlicer?
A skirt is one or more loops printed near the part but not touching it. A brim is a flat set of lines that touches the part and widens its first layer. Our brim vs raft vs skirt guide explains when each is worth using. Here we only show how OrcaSlicer builds them.
Click the Brim type drop-down. It has seven entries:
- Auto
- Mouse ear
- Painted
- Outer brim only
- Inner brim only
- Outer and inner brim
- No-brim, the current value
We tried one combination. We typed 1 into Skirt loops and pressed Tab, which made Skirt height active, and chose Outer brim only, which made Brim width active at 5 mm. The labels and the preset name turned orange, which is how OrcaSlicer marks a changed value. We did not test Auto, Mouse ear, Painted or the inner brim options.
How do you see the skirt and brim in Preview?
Click Slice plate. It may need a second click, because the first only starts the slice. Then, in Preview, drag the upper handle of the vertical layer slider down to layer 1, which is 0.20 mm. The Line Type legend at the top of the 3D view can be collapsed with the arrow at its top left, which clears the part from behind it. Zoom in with the mouse wheel over the part.
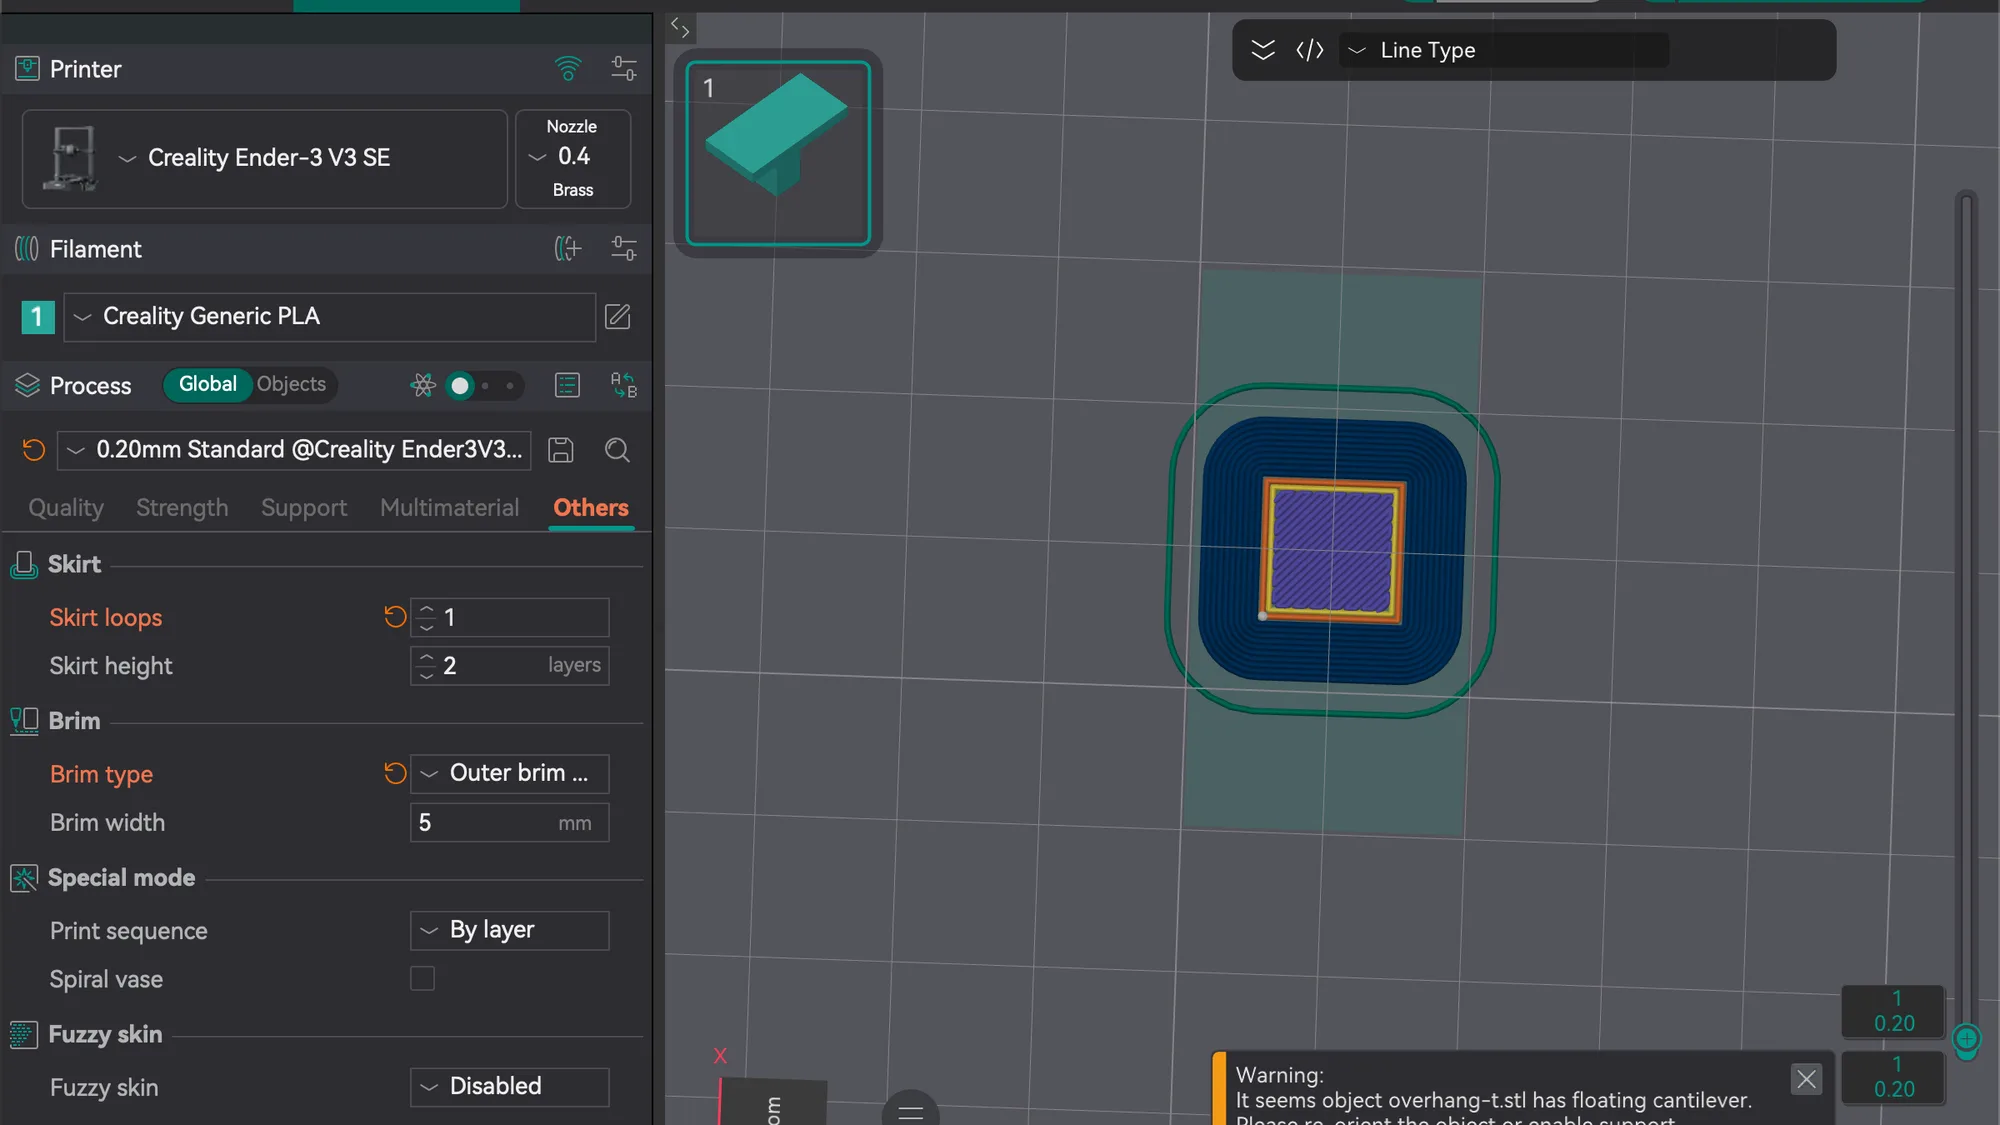
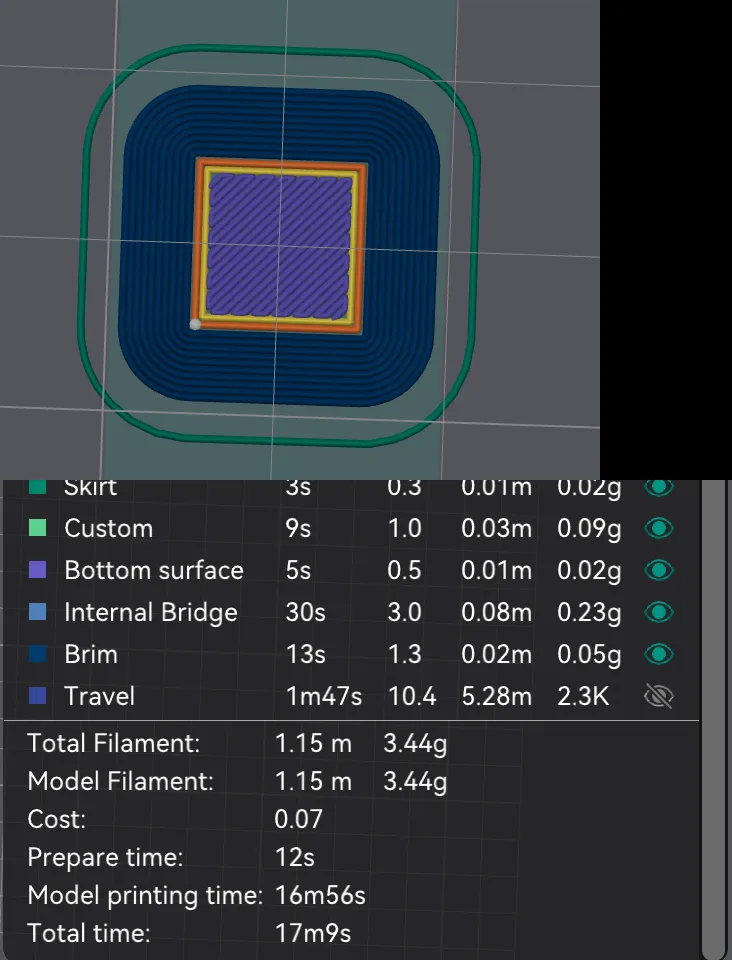
On layer 1 we saw, from the inside out:
- the part's walls in orange and yellow, with the solid fill in purple
- a wide band of dark blue lines around the walls, which is the brim
- a single thin green loop further out, which is the skirt, with a clear gap between it and the brim
- a small white dot on the wall, which is the seam, covered below
The view cube read Bottom for the whole session, because the 3D view we started from was a bottom view. Our previous lesson used the number key 2 to reach the bottom view.
How much does a brim add to the estimate?
We sliced the same part three times and read the Total estimation block. Support was off every time. These are slicer estimates for one test part, not print results.
| Setting | New rows in Line Type | Filament | Total time |
|---|---|---|---|
| Skirt loops 0, No-brim | none | 3.37 g | 16m54s |
| Skirt loops 1, No-brim | Skirt: 2s, 0.01 g | 3.38 g | 16m55s |
| Skirt loops 1, Outer brim only, 5 mm | Skirt: 3s, 0.02 g. Brim: 13s, 0.05 g | 3.44 g | 17m9s |
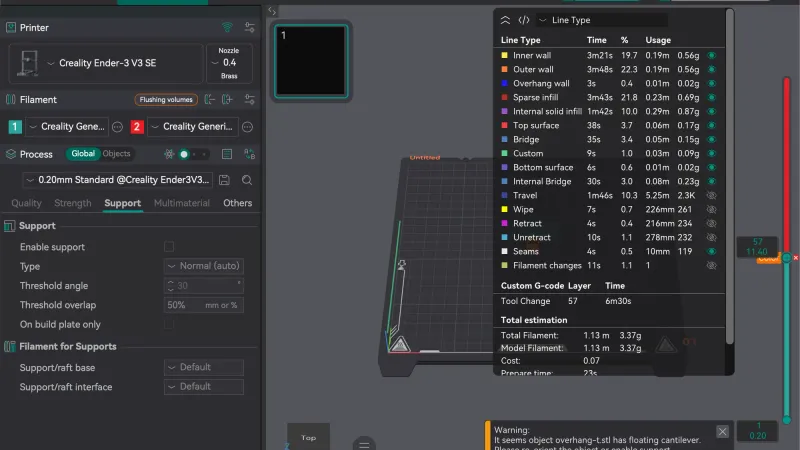
The skirt row read 2s in one slice and 3s in the next, so the readout rounds. The brim and skirt together added about 15 seconds and 0.07 g for this small part. The estimate says nothing about adhesion, so for what a brim does to a real print see brim vs raft vs skirt.
How do you set the seam position in OrcaSlicer?
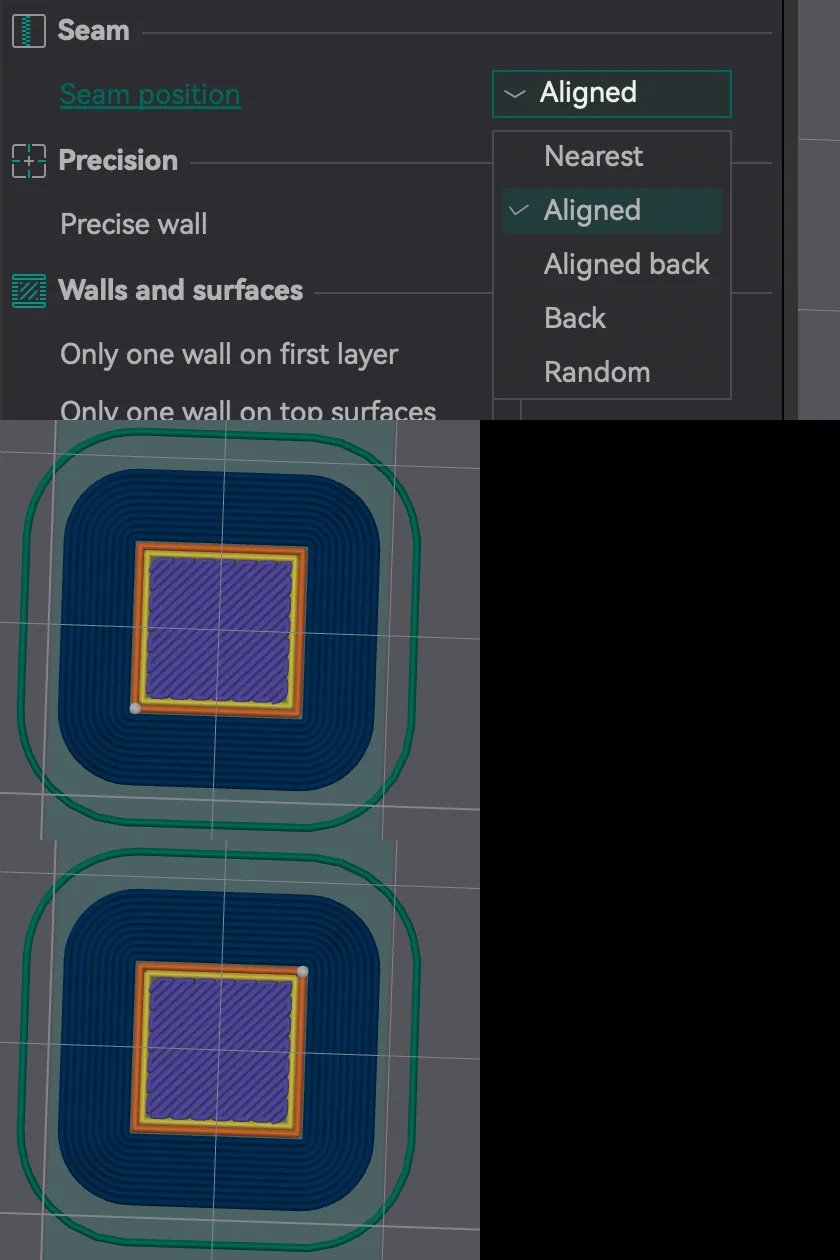
The seam is where each outer wall loop starts and ends. Open the Quality tab. Under the Seam heading is one field, Seam position, set to Aligned. Its tooltip reads "This is the starting position for each part of the outer wall." with the parameter name seam_position. The drop-down has five entries: Nearest, Aligned, Aligned back, Back and Random.
In Preview the seam is the small white dot, and the Line Type table has a Seams row that can be switched on or off with its eye icon. With Aligned, the dot on layer 1 sat at one corner of the part. We changed Seam position to Back, sliced again, and the dot on layer 1 moved to a different corner. We did not test Nearest, Aligned back or Random. Our seam position explained guide covers what each option is for.
How does Seam painting work in OrcaSlicer?
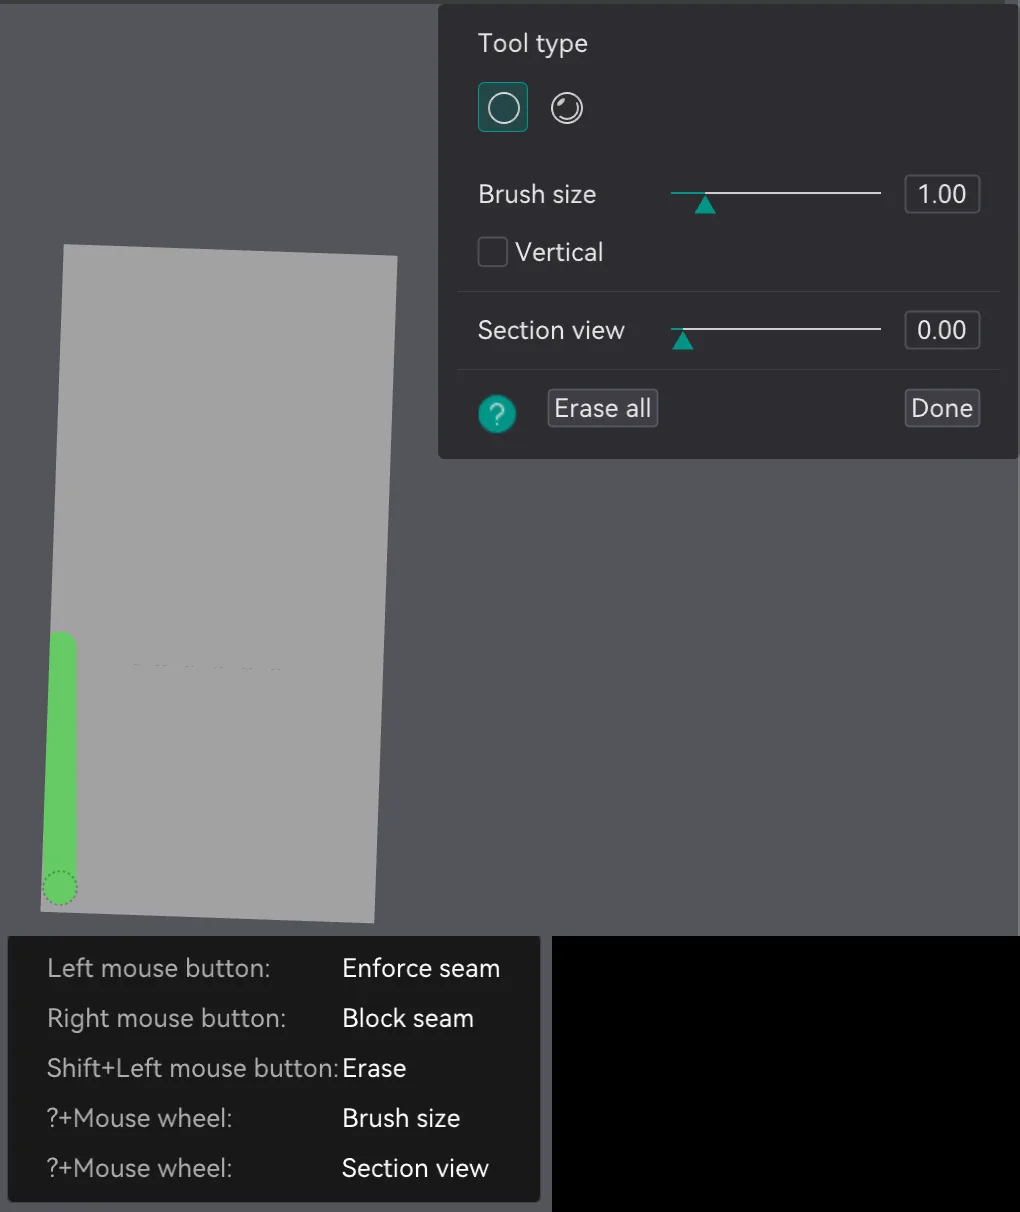
Seam painting lets you choose seam spots by hand. In Prepare, select the part and click the Seam painting icon in the top toolbar, or press P. Its tooltip reads "Seam painting [P]". A panel opens at the right of the 3D view with these controls:
- Tool type, two icons, with the first selected
- Brush size, a slider set to 1.00
- Vertical, an unticked checkbox
- Section view, a slider set to 0.00
- Erase all and Done
Click the question mark button for a help card:
- Left mouse button: Enforce seam
- Right mouse button: Block seam
- Shift+Left mouse button: Erase
- Mouse wheel with a modifier key: Brush size, and Section view
As in the supports tool, the card shows a question mark where the modifier key name should be, so we did not test the wheel shortcuts. We held the left button and dragged along one edge of the bar's underside, which left a green stroke. That confirms how to enforce a seam. We then clicked Done and sliced, but our Preview did not redraw when we moved the layer slider, so we cannot say how the stroke changed the seam. Treat the result as something to check in your own Preview.
For tidy walls, the walls and perimeters explained guide shows what the seam sits on.
How do you reset the brim, skirt and seam settings?
We opened Seam painting again, clicked Erase all (it greyed out once the stroke was gone), and clicked Done. Then we clicked the reset arrow beside the preset name. Skirt loops went back to 0, Brim type to No-brim and Seam position to Aligned, and the orange marks cleared from the tab names. The what is a slicer guide explains why a preset keeps a saved state. The next lesson, orca-slicer-preview-and-layers, covers the Preview tab and its layer slider in more detail.
Next lesson: Orca Slicer Preview: Read Layers, Colours and Stats.