Orca Slicer filament settings control the temperatures, fan and flow a slicer uses for each material. This lesson, tested in OrcaSlicer 2.4.2 on macOS, picks a preset, reads its Material settings, adds a second filament and a colour change in Preview, then compares the slicer estimate. We only sliced. We did not print.
How do you choose a filament preset in OrcaSlicer?
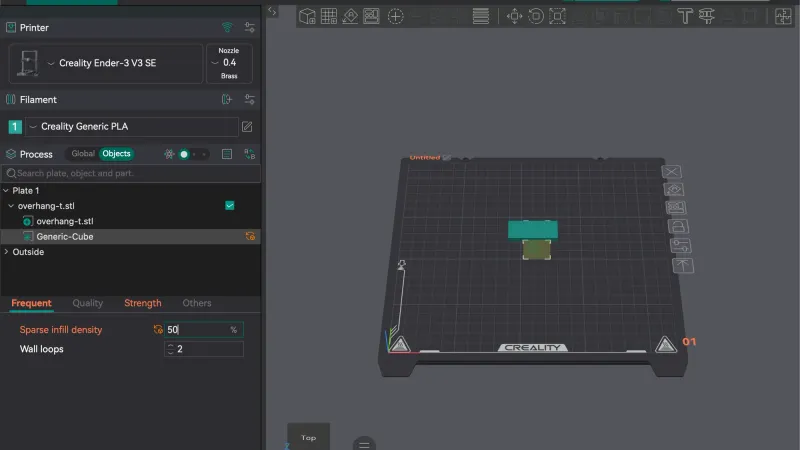
We began from the setup in our previous lesson on per object settings: Simple mode, Creality Ender-3 V3 SE, Creality Generic PLA, 0.20mm Standard and our overhang test part (40 x 20 x 24 mm) on the plate. In the Filament section of the left panel, filament 1 sits in a drop-down box that reads Creality Generic PLA. We clicked it.
The list had a heading System presets, a Generic row with an arrow, and a last row, --Add/Remove filament --. Hovering Generic opened a sub menu of eight presets: Creality Generic PLA (ticked), PLA High Speed, PLA Matte, PLA Silk, PETG, ABS, TPU and ASA. That is not every filament OrcaSlicer knows. It is the set that was ticked during the setup wizard.
Why is my filament missing from the Orca Slicer list?
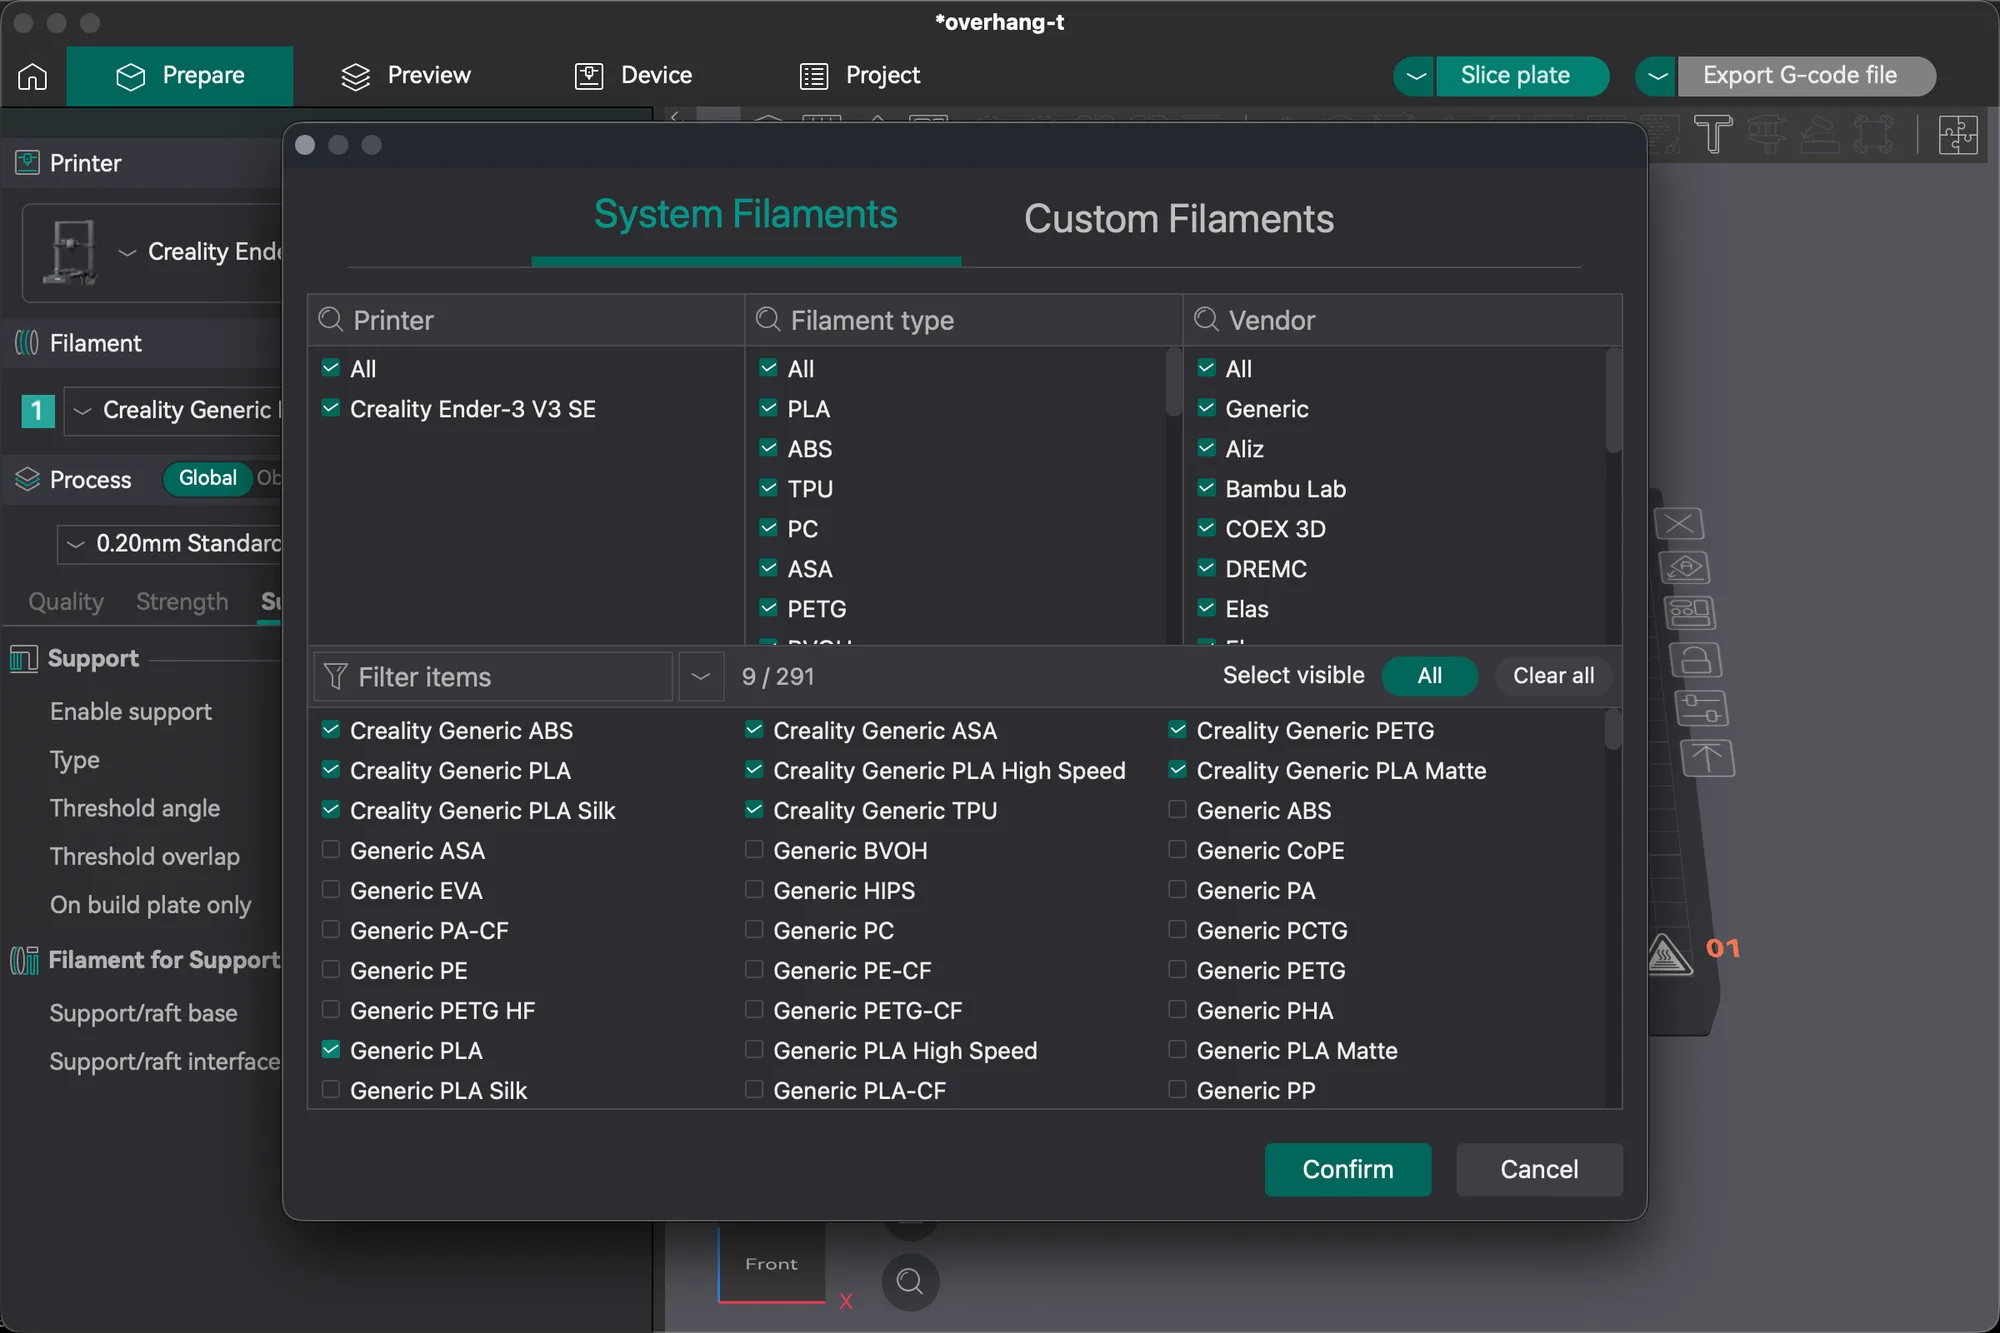
Because it is not ticked. We clicked --Add/Remove filament -- and a window opened with two tabs, System Filaments and Custom Filaments. It has three filter columns (Printer, Filament type and Vendor), a Filter items box, a counter that read 8 / 291, the buttons All and Clear all, and Confirm and Cancel at the bottom.
We ticked Generic PLA and the counter went to 9 / 291. After Confirm, the sub menu listed Generic PLA as a ninth entry. We unticked it again at the end of the test.
What do the filament settings tabs show?
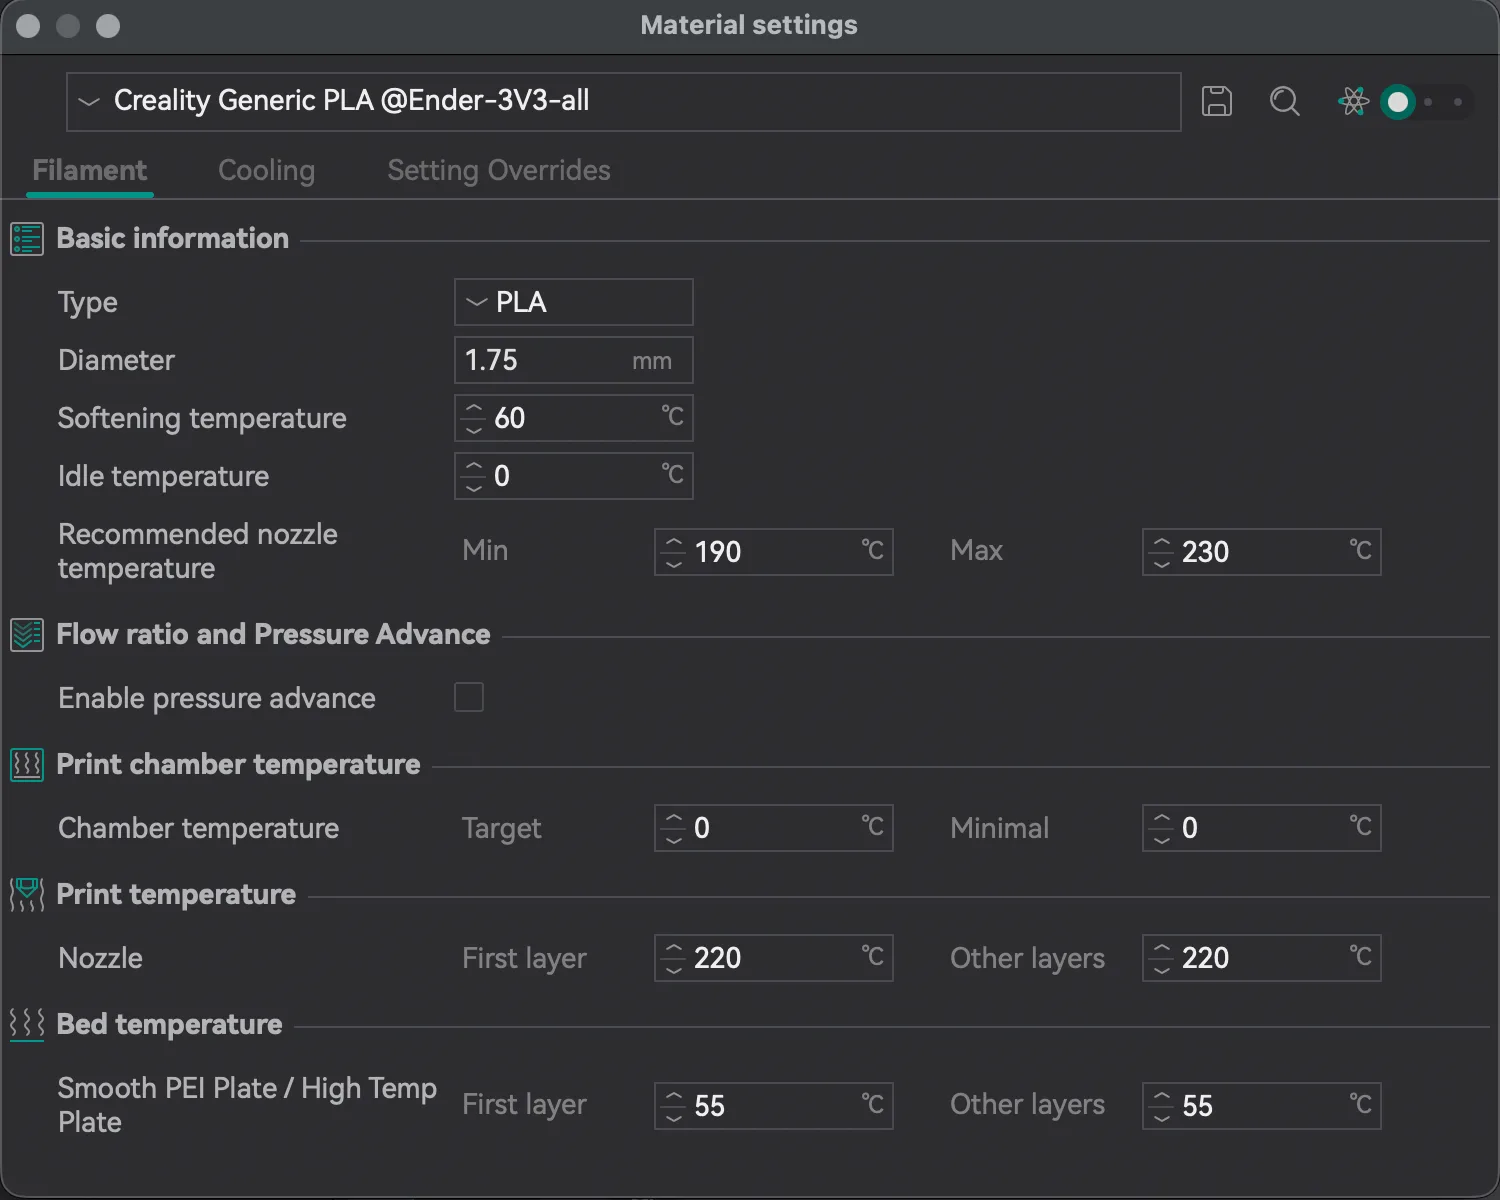
Next to the filament drop-down there is a small pencil icon. We clicked it and a window titled Material settings opened, with the preset name Creality Generic PLA @Ender-3V3-all and three tabs: Filament, Cooling and Setting Overrides.
The Filament tab, in Simple mode, showed these values for this preset:
- Basic information: Type PLA, Diameter 1.75 mm, Softening temperature 60 C, Idle temperature 0 C, Recommended nozzle temperature Min 190 and Max 230.
- Flow ratio and Pressure Advance: only an unticked Enable pressure advance box. We did not see a flow ratio field in Simple mode, so if you need it, try Advanced mode.
- Print chamber temperature: Target 0 and Minimal 0.
- Print temperature, Nozzle: First layer 220 C and Other layers 220 C.
- Bed temperature, Smooth PEI Plate / High Temp Plate: First layer 55 C and Other layers 55 C.
Hovering the first layer nozzle box showed the tooltip Nozzle temperature for printing the first layer with this filament and the parameter name nozzle_temperature_initial_layer[0]. These are defaults from the preset, not a recommendation for your spool. Check the temperature range printed on it.
The Cooling tab held No cooling for the first 1 layers, then Part cooling fan: Min fan speed threshold 100 % at layer time 100 s, Max fan speed threshold 100 % at 8 s, and four tick boxes. Keep fan always on, Slow printing down for better layer cooling and Force cooling for overhangs and bridges were ticked. Don't slow down outer walls was not. The Setting Overrides tab had a Retraction section with Length (1.2 mm) and Z-hop height (0.4 mm), each behind an unticked box, so the filament does not override the printer until you tick one. For what those two numbers do, see retraction settings explained.
How do you add a second filament and assign it to an object?
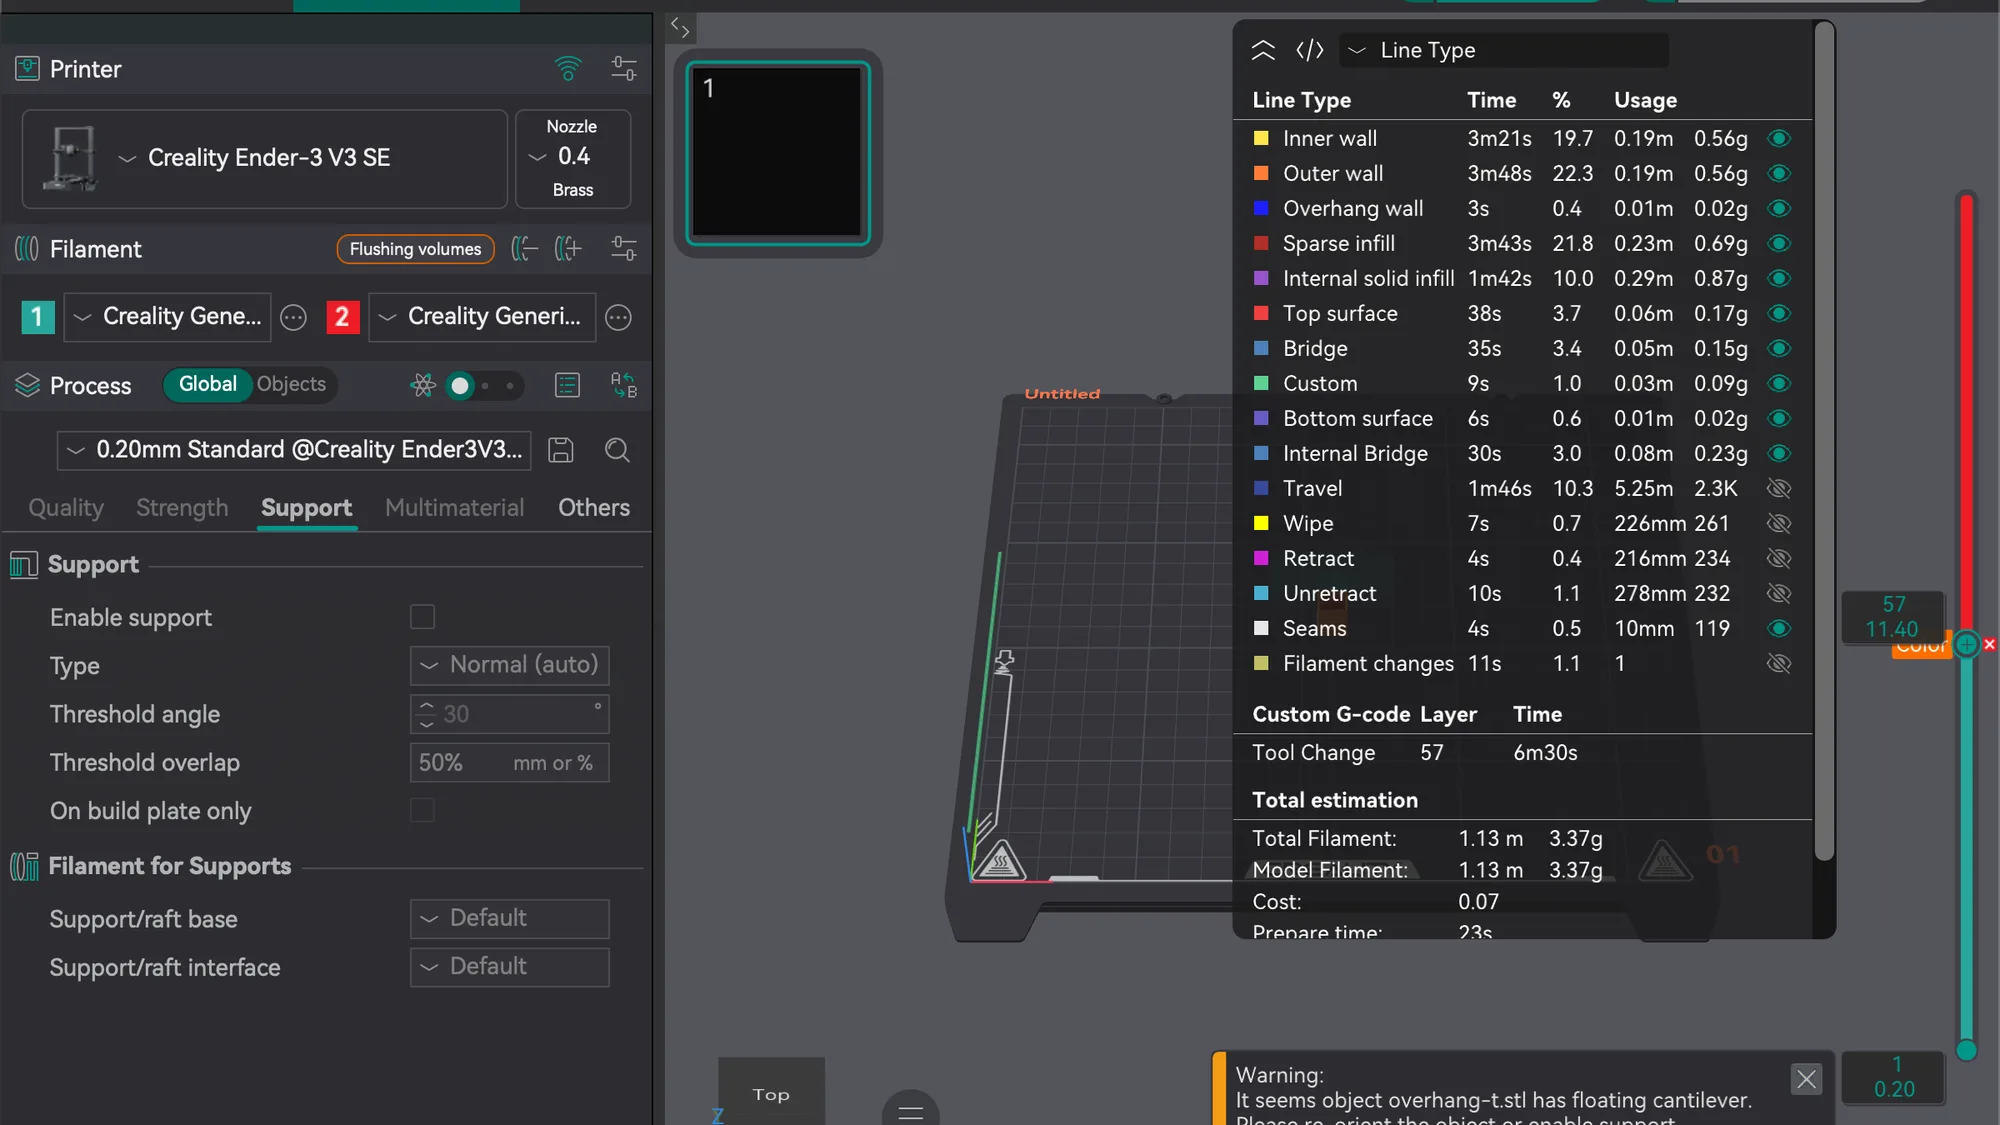
In the Filament header, two icons sit beside a slider icon. Hovering the right hand icon showed the tooltip Add one filament. We clicked it. A second row appeared, numbered 2 with a Creality Generi... drop-down, and a Flushing volumes button appeared in the header. Hovering the left hand icon showed Remove last filament.
Clicking the number 2 swatch opened the macOS Colors window, which let us choose a colour, and we set it to red. To assign the filament, we switched the Process panel to Objects as in the previous lesson and double clicked the number box on the object row. A small list of 1 and 2 dropped down. Choosing 2 turned the row red and the model on the plate red. Choosing 1 turned it back.
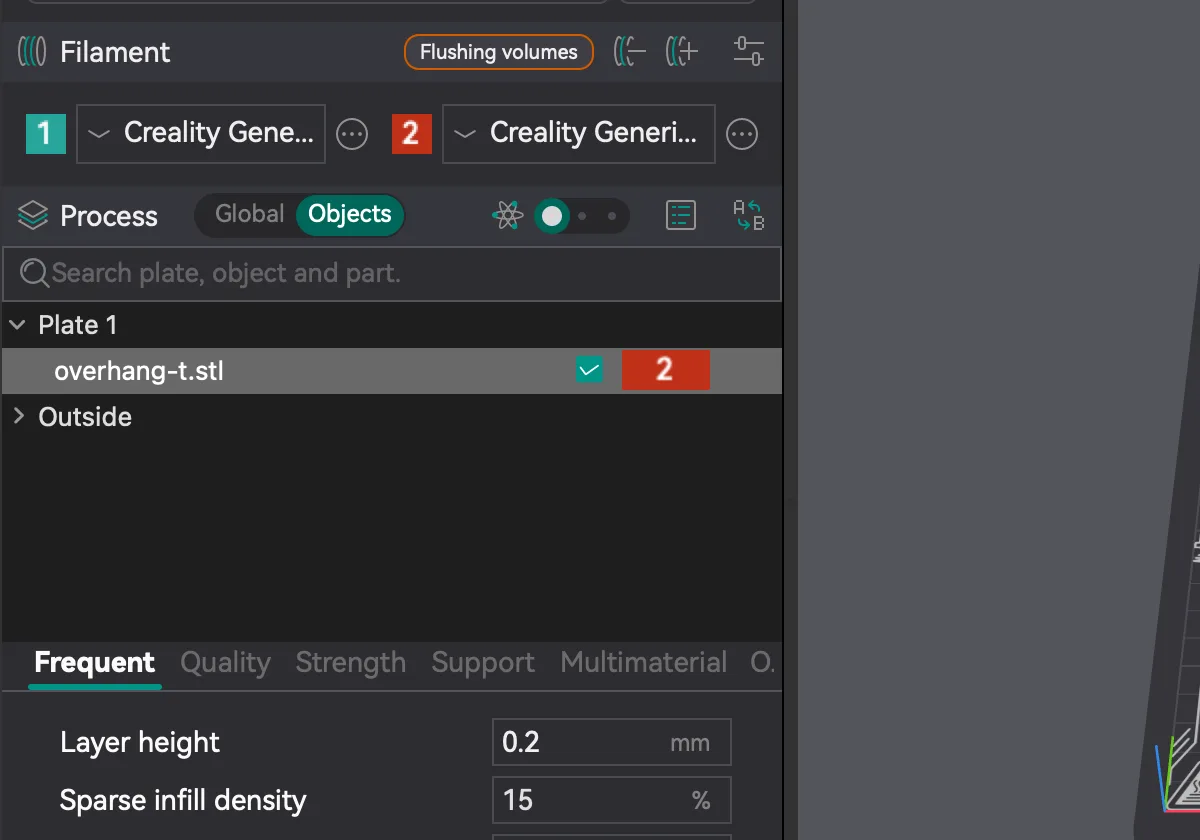
With two filaments loaded and the object still on filament 1, the slice showed a Filament changes line of 1 and a total of 17m5s, against 16m54s with a single filament. We did not look into why. We also did not test assigning one part of an object to a different filament.
How do you add a colour change in Preview?
With one filament, we clicked the plus icon on the vertical layer slider and nothing was added. With two filaments loaded, a right click on the plus icon (the top slider thumb) gave a menu: Add Pause, Add Custom G-code, Jump to layer and Change Filament. With one filament the menu had the first three but not Change Filament.
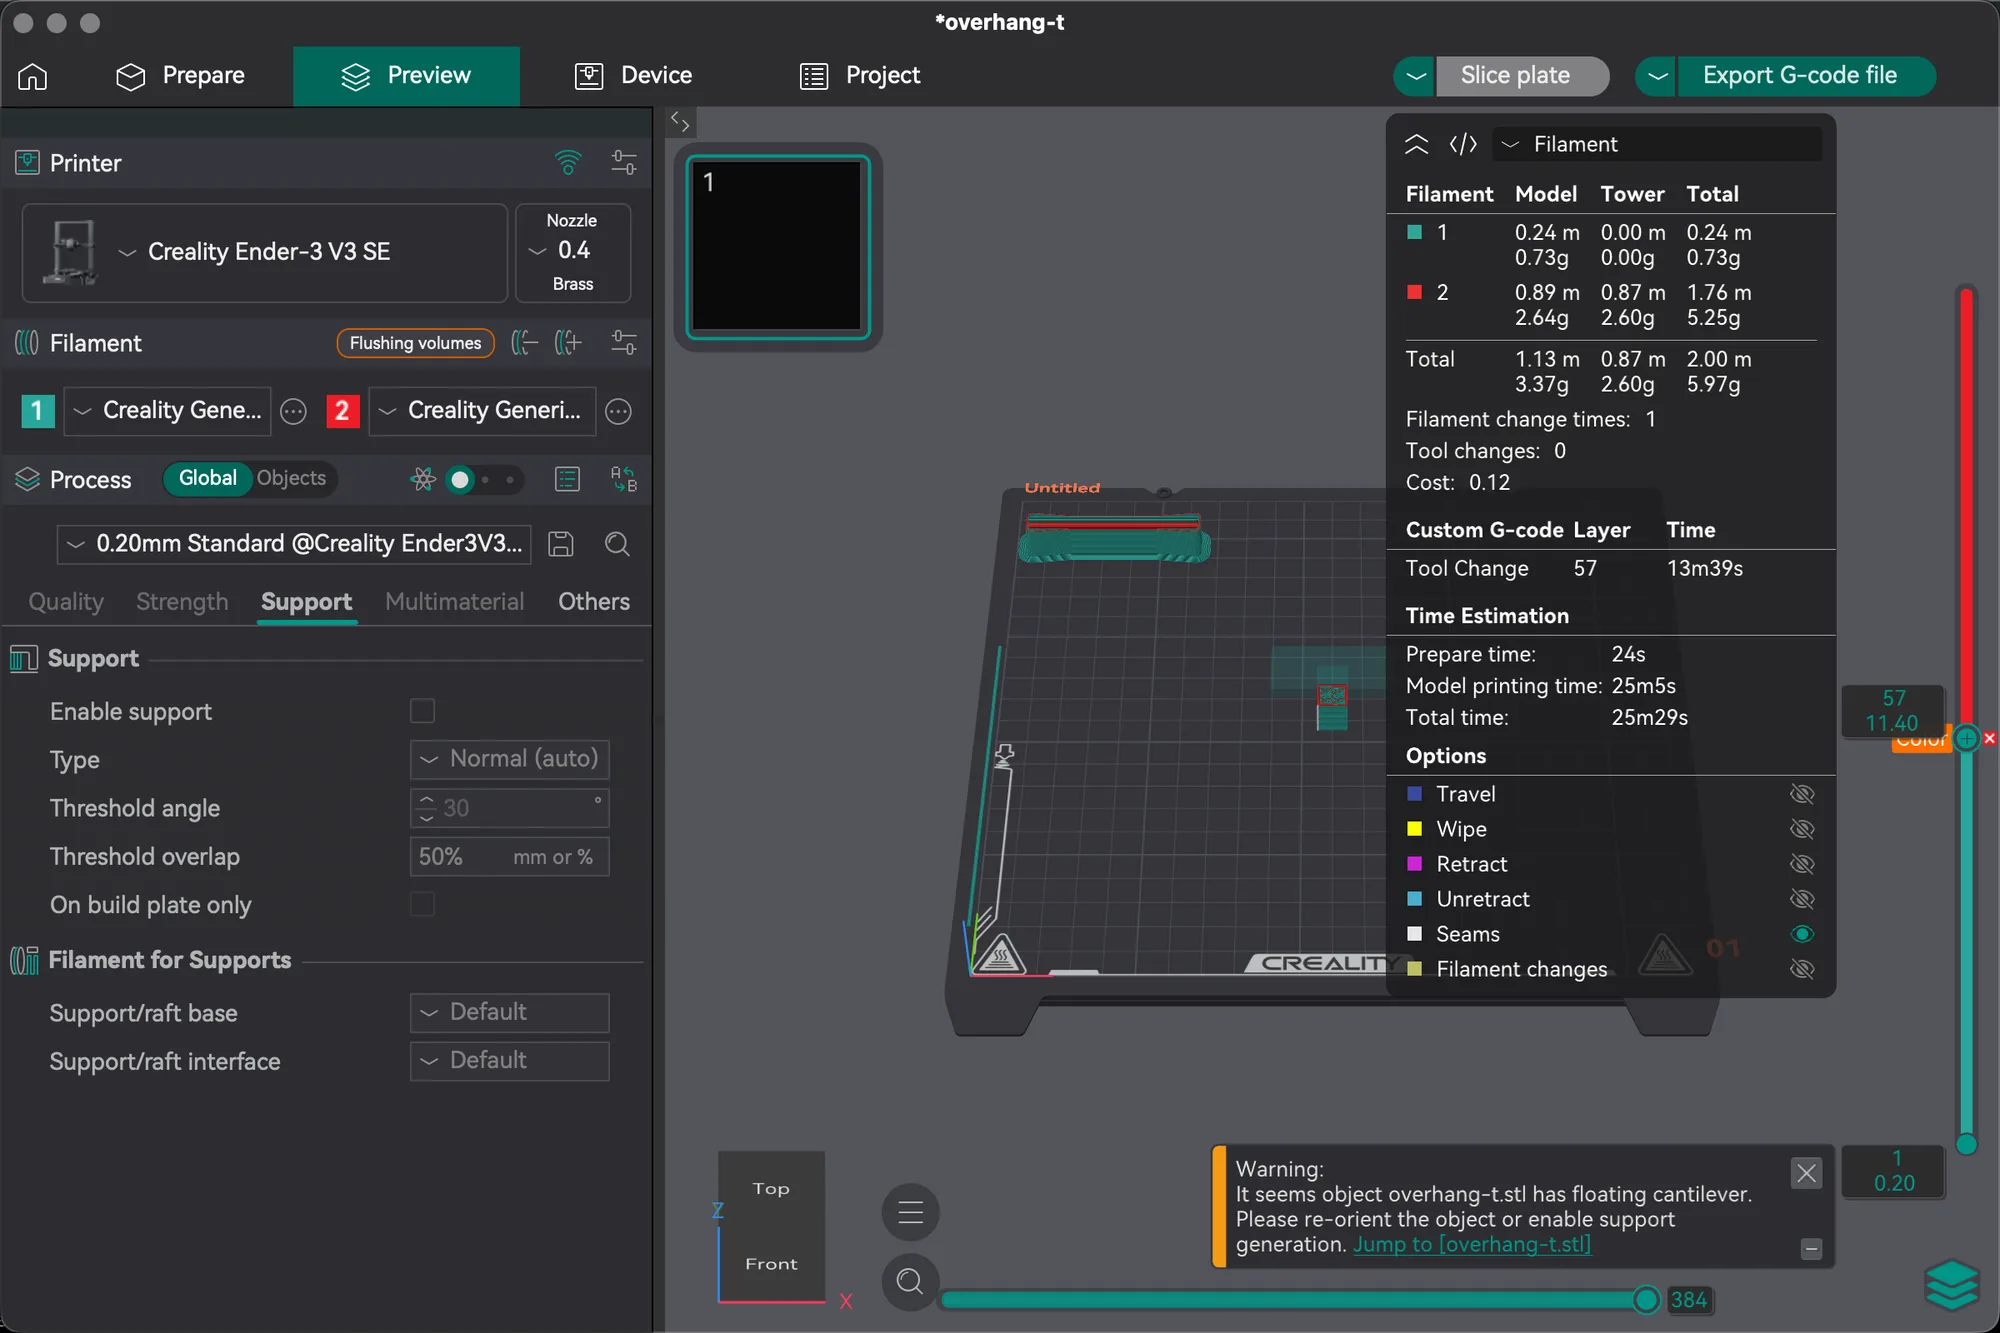
We moved the top thumb to layer 57 (11.40 mm), opened Change Filament, and chose Filament 2. An orange Color tag with a small red cross appeared beside the thumb and the slider above it turned red. The legend gained a Custom G-code table with Tool Change at layer 57. The Slice plate button was live again, so we sliced once more. The red cross deletes the change.
We then pressed C to open the G-code window, a read only view. Near the start of layer 57 it showed the comment ; CP TOOLCHANGE UNLOAD among the moves. We did not see an M600 line, and for this printer profile the slicer seems to do the swap itself. For what G-code is, see what is G-code. We did not scroll the whole file, so do not rely on this for your own printer.
How much does a colour change change the slicer estimate?
We sliced the same part three times with the same process preset. The numbers come from the Total estimation block and the Filament legend in Preview.
| Slicer estimate | One filament | Two filaments, none used | Colour change at layer 57 |
|---|---|---|---|
| Total time | 16m54s | 17m5s | 25m29s |
| Prepare time | 12s | 23s | 24s |
| Total filament | 1.13 m, 3.37 g | 1.13 m, 3.37 g | 2.00 m, 5.97 g |
| Prime tower filament | none | none | 0.87 m, 2.60 g |
| Cost | 0.07 | 0.07 | 0.12 |
The colour change added a prime tower of 0.87 m of filament 2 and added about 8m24s of estimated time over the two filament slice without it. That is an estimate for one small part. A taller object or a profile with other purge settings will differ. After the test we deleted the change, removed filament 2 and re-sliced with a single Creality Generic PLA. Compare this with the print speed trade offs in print speed vs quality. The next lesson, orca-slicer-review, is the hands on review.
Next lesson: Orca Slicer Review: Hands On With Version 2.4.2.