Orca Slicer per object settings let one object, or one region inside it, use different values from the rest of the plate. This lesson, tested in OrcaSlicer 2.4.2 on macOS, switches to Objects, adds a Cube modifier with higher infill and compares the slicer estimate. We only sliced. We did not print.
What is the Global and Objects switch in OrcaSlicer?
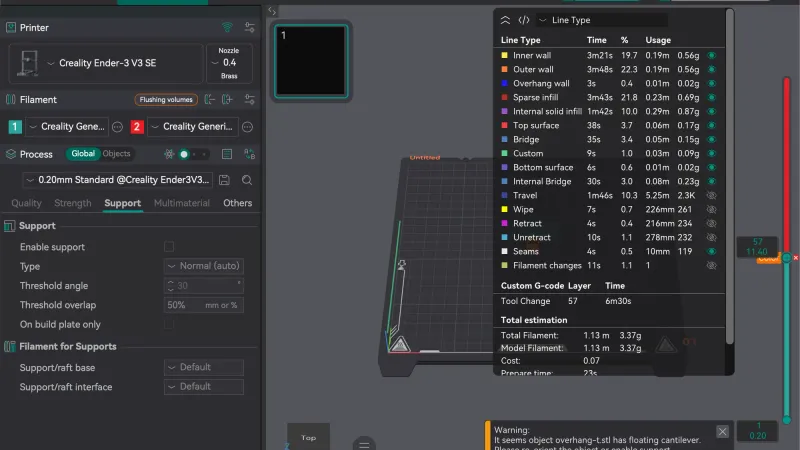
In the Process section of the left panel, next to the word Process, there are two pill buttons named Global and Objects. We began from the setup in our previous lesson on variable layer height: Simple mode, Creality Ender-3 V3 SE, Creality Generic PLA, 0.20mm Standard, with our usual overhang test part (overhang-t.stl, 40 x 20 x 24 mm, 5200 mm3, 24 triangles) on the plate.
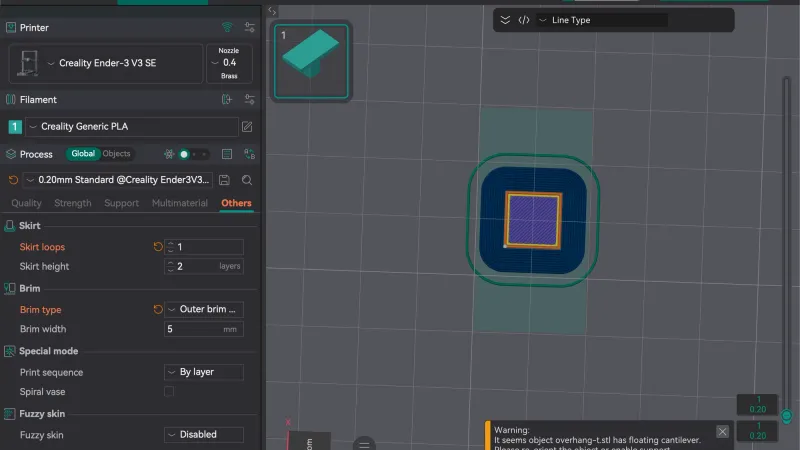
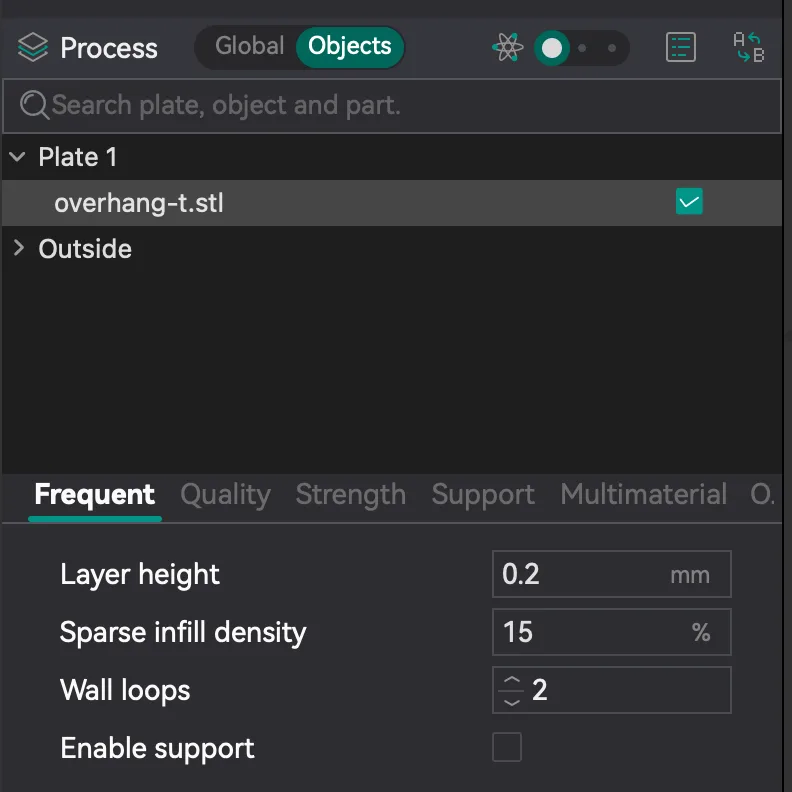
With Global selected, the panel shows the preset and its tabs: Quality, Strength, Support, Multimaterial and Others. Everything you change there applies to the whole plate. We clicked Objects and the layout changed. The preset drop-down and tabs were replaced by a search box that reads Search plate, object and part., an object tree and a smaller settings area underneath.
The tree began with Plate 1, then our object overhang-t.stl with a tick box, and a collapsed row named Outside. With the object selected, the settings area had one tab called Frequent and others labelled Quality, Strength, Support, Multimaterial and a cut off Others. Under Frequent we read Layer height 0.2 mm, Sparse infill density 15 %, Wall loops 2 and an unticked Enable support. Those are the same values as the global preset, which is how you can tell nothing is overridden yet.
What is in the right click menu for an object?
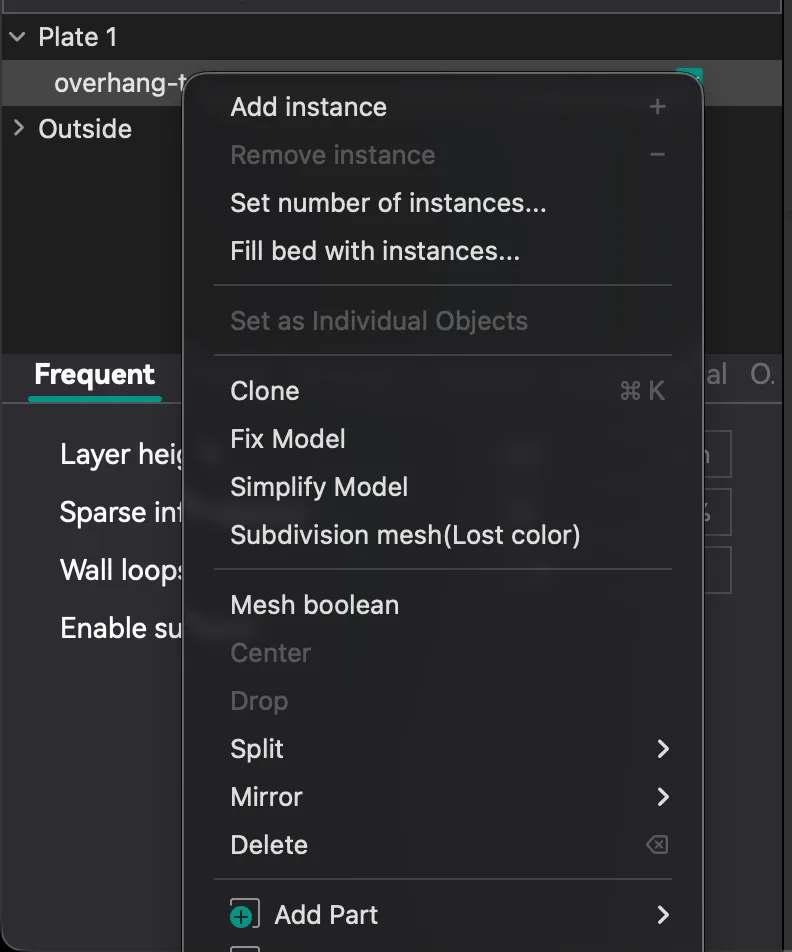
We right clicked overhang-t.stl in the object list. The menu is long, and on our screen the bottom of it ran past the edge of the display, so we also read it after moving the window up. In order, we saw:
- Add instance, Remove instance (greyed out), Set number of instances... and Fill bed with instances...
- Set as Individual Objects (greyed out)
- Clone with the shortcut Cmd K, Fix Model, Simplify Model and Subdivision mesh(Lost color)
- Mesh boolean, Center and Drop (both greyed out), Split, Mirror and Delete
- Add Part, Add Negative Part, Add Modifier, Add Support Blocker and Add Support Enforcer, each with a sub menu arrow, then Height Range Modifier
- Printable (ticked, shortcut V) and Auto Drop (ticked)
- Edit Process Settings, Copy Process Settings, Paste Process Settings (greyed out) and one more entry whose text began Edit in Parameter Table before the screen edge cut it off
We only used Add Modifier in this test. We did not try Edit Process Settings, Height Range Modifier or the blockers, so we do not describe what they do. Our lesson on supports explained covers why blockers and enforcers exist.
How do you add a modifier in OrcaSlicer?
A modifier is a shape that does not print. Where it overlaps the object, it can carry its own settings. We hovered Add Modifier in the menu and a sub menu opened with: Load..., Cube, Cylinder, Sphere, Cone, Disc, Torus, Text and SVG. We chose Cube.
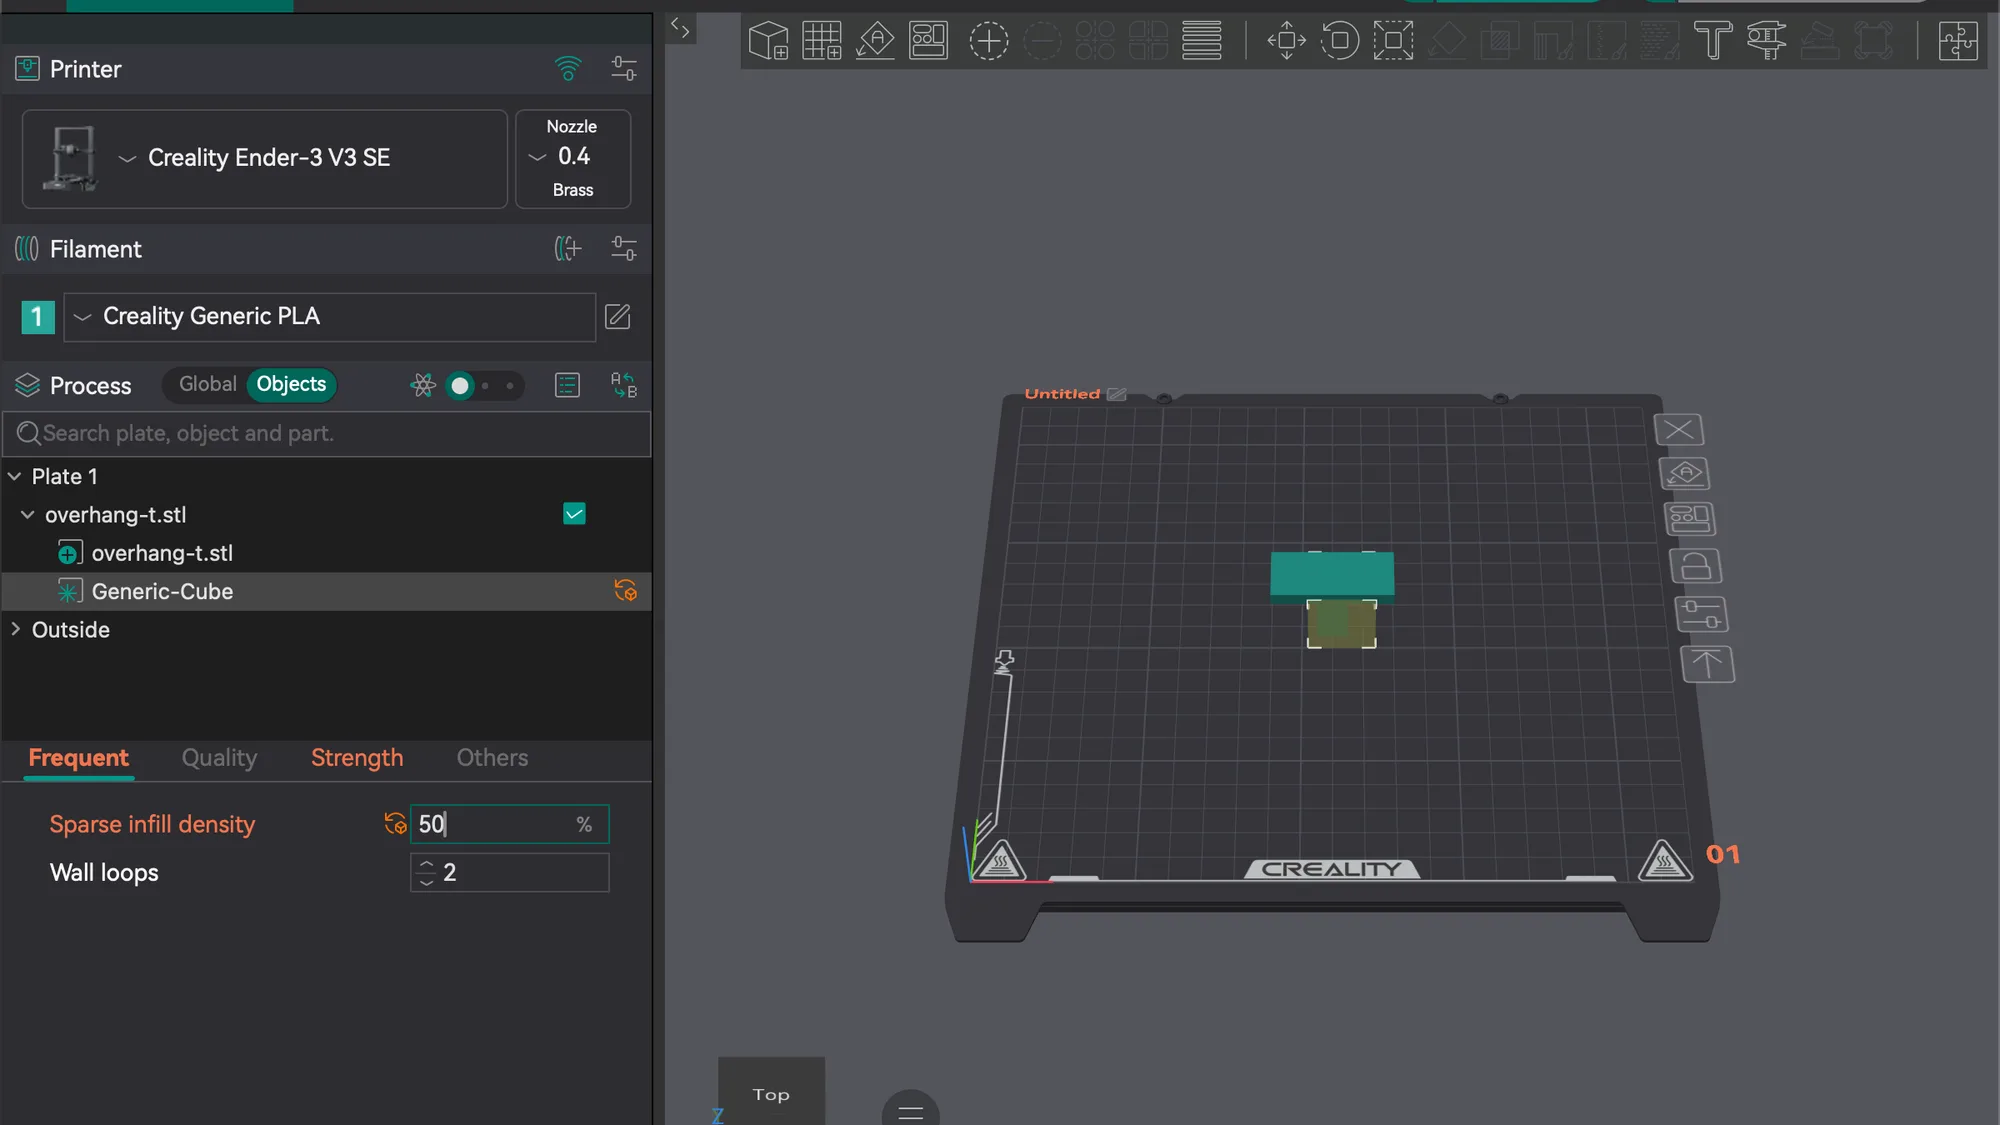
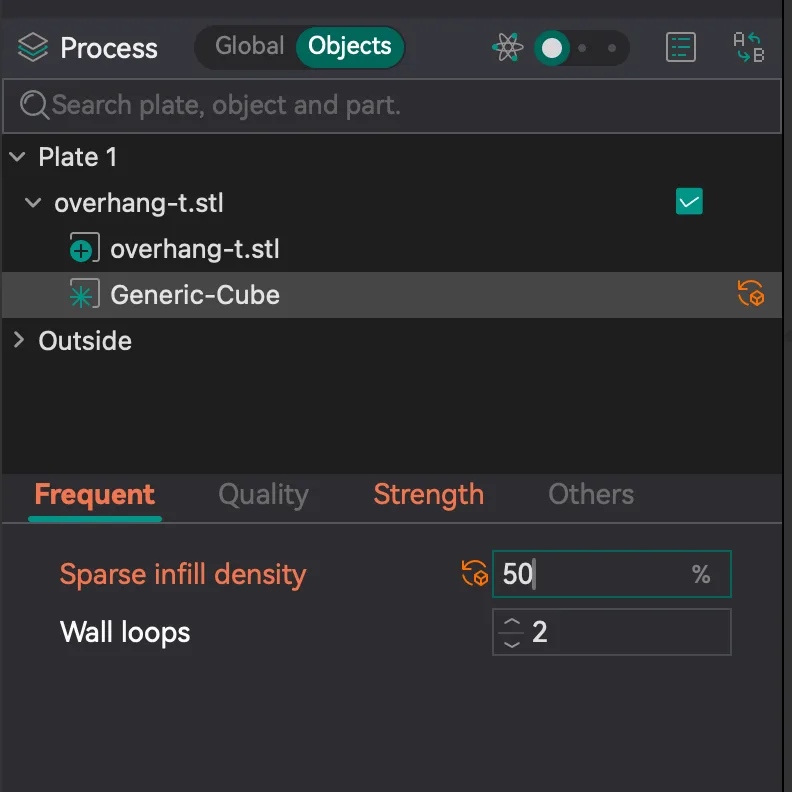
A dialog titled Add Modifier appeared with the message Switch to per-object setting mode to edit modifier settings., a Don't show again tick box and an OK button. We were already in Objects mode, so we pressed OK. The tree now showed overhang-t.stl expanded, with a child row overhang-t.stl (the part itself) and a new child row named Generic-Cube.
The cube first appeared beside the part, a pale yellow box on the plate. We dragged it in the 3D view until it sat over the stem of the part. We judged the overlap by eye in a perspective view, so treat our placement as rough. With Generic-Cube selected, the settings area changed to four tabs, Frequent, Quality, Strength and Others, and Frequent listed only Sparse infill density (15 %) and Wall loops (2).
How do you override infill inside the modifier?
We clicked the Sparse infill density box, replaced 15 with 50 and pressed Return. Three things changed at once. The label turned orange, a small orange reset icon appeared to its left, and the Generic-Cube row in the list gained an orange icon at its right edge. The Frequent and Strength tab names also turned orange. That is how Objects mode shows you which values differ from the global preset. Clicking the reset icon later returned the field to 15 and removed the orange.
For background on what the number means, see infill explained. Raising it inside a small zone adds strength only where you put the cube, instead of paying for dense infill through the whole part.
How much does a modifier change the slicer estimate?
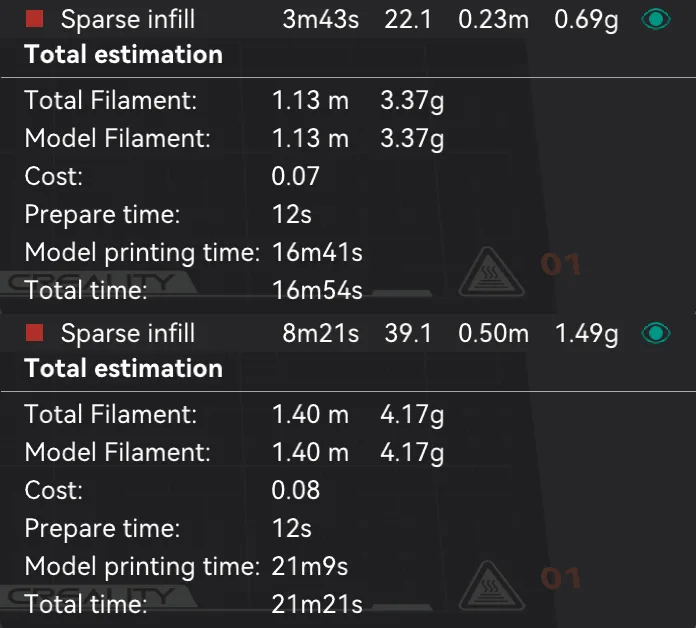
We sliced the plate twice with the same preset: once with the modifier overriding infill at 50 %, and once after resetting the override to 15 %, which equals the global value. The numbers come from the Line Type legend and the Total estimation block in Preview.
| Slicer estimate | Global 15% infill | Cube modifier at 50% |
|---|---|---|
| Layers (upper slider label) | 120 | 120 |
| Sparse infill time | 3m43s | 8m21s |
| Sparse infill filament | 0.23 m, 0.69 g | 0.50 m, 1.49 g |
| Model printing time | 16m41s | 21m9s |
| Total time | 16m54s | 21m21s |
| Total filament | 1.13 m, 3.37 g | 1.40 m, 4.17 g |
| Cost | 0.07 | 0.08 |
The estimated total rose by 4 minutes 27 seconds and the filament by 0.27 m, about 0.80 g. The layer count did not change, because the modifier only altered infill. These come from one small part and one cube we placed by eye, so do not treat them as typical. The Sparse infill row is where most of the change shows.
One practical point: overrides live on the object or modifier, so another object on the plate keeps the global value. If you want to change layer height for a whole part instead, our layer height explained guide gives the background. The Frequent tab of the object itself also had a Layer height box, but we did not test overriding it. The next lesson, orca-slicer-multi-colour-and-filaments, covers loading more than one filament.
Next lesson: Orca Slicer Filament Settings and Colour Changes.