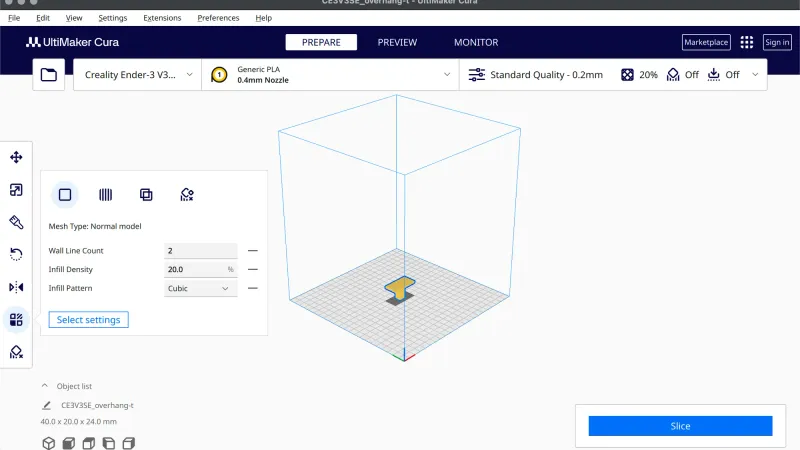
The Cura recommended settings panel is the short list most people use every day. This lesson, tested in UltiMaker Cura 5.13.0 on macOS, walks through each control, names the real options we saw, and records the slicer's own time and material estimates for six combinations on one model.
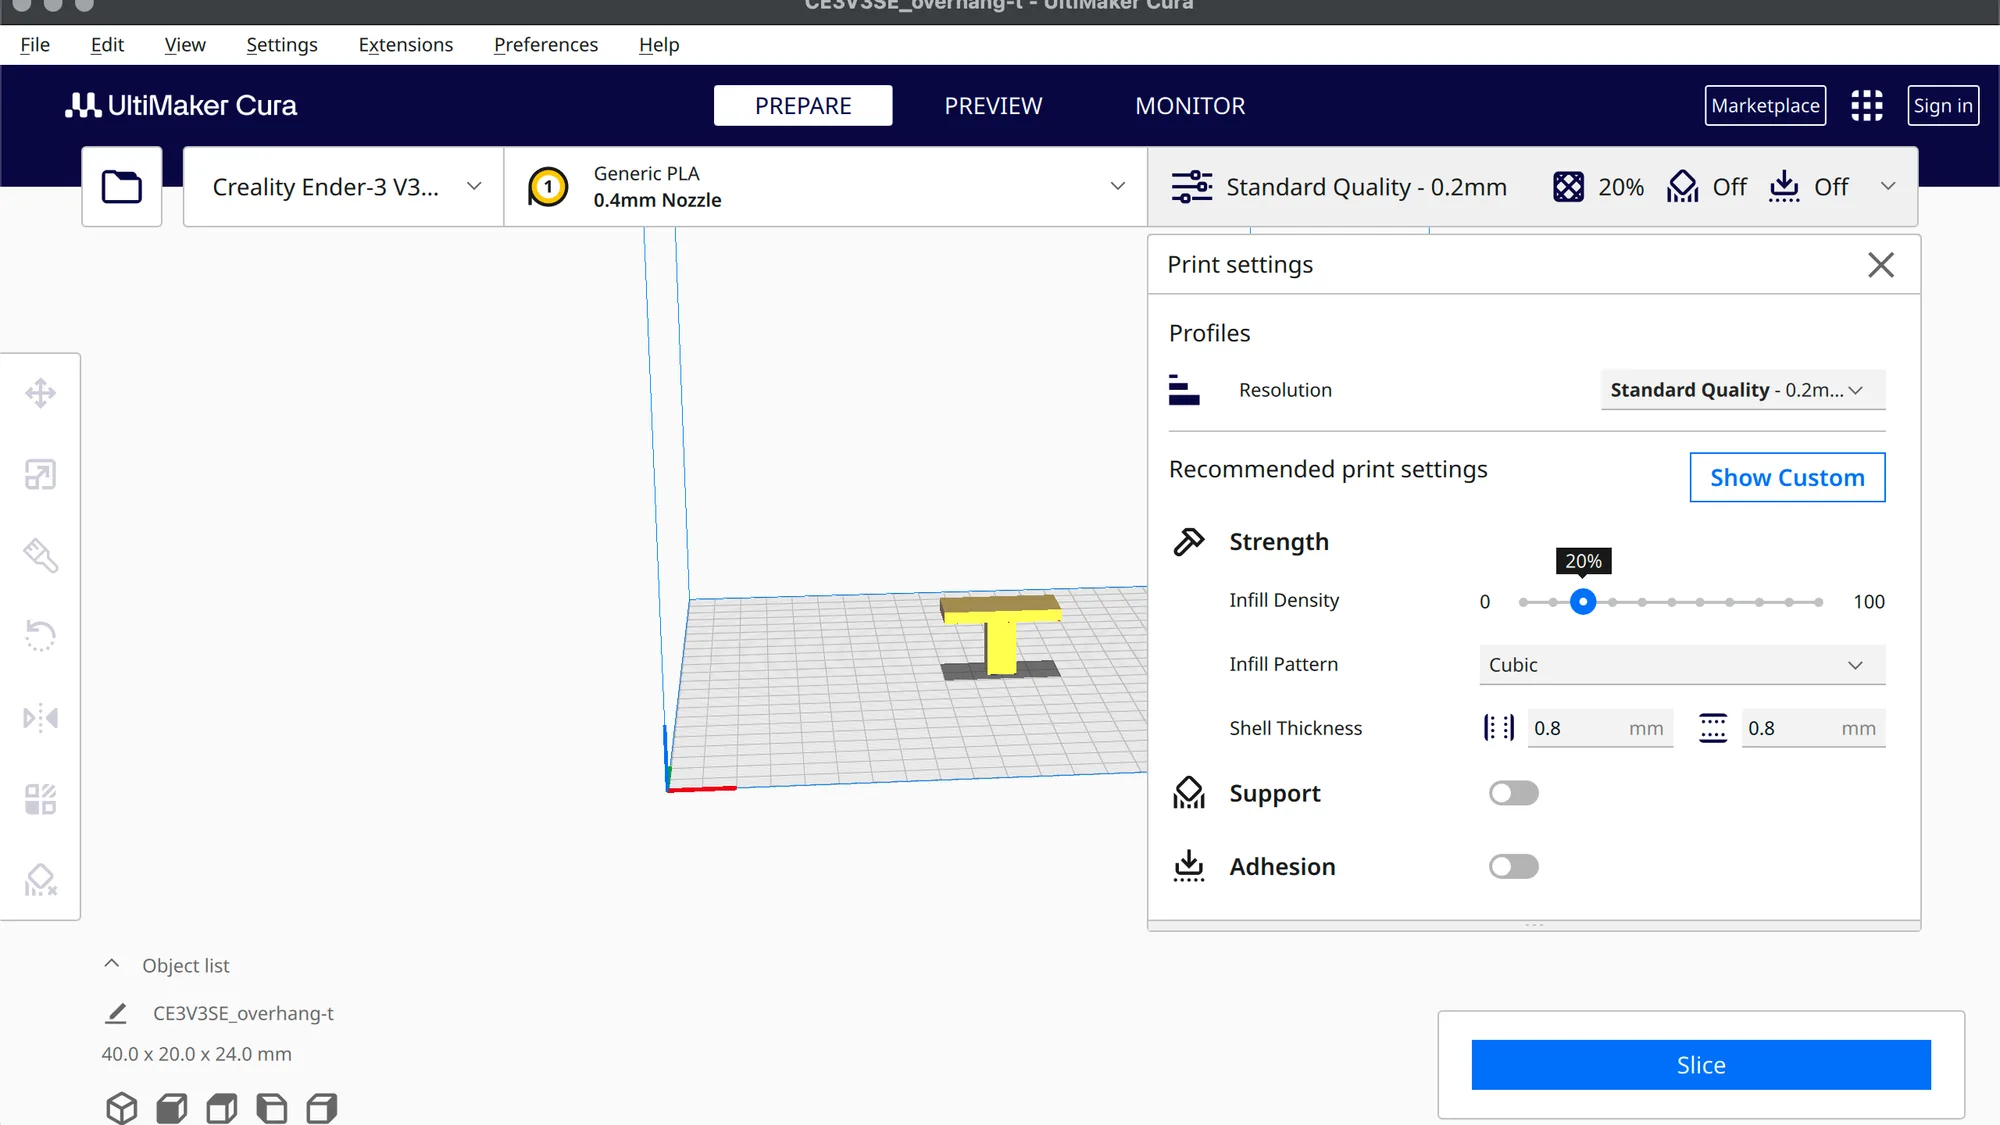
How do you open the recommended settings in Cura?
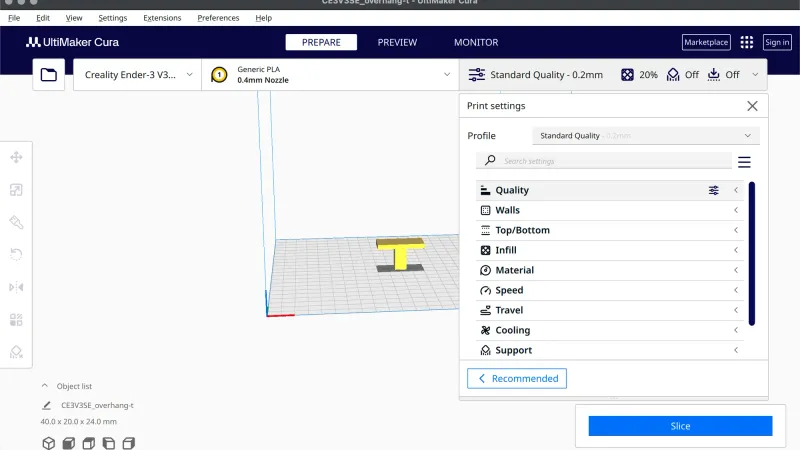
Stay in the Prepare stage. The bar at the top right shows the active profile, here Standard Quality, 0.2mm, followed by three small icons: infill (20%), support (Off) and adhesion (Off). Click the bar and a panel titled Print settings drops down. Our first click only highlighted the bar, so click a second time if nothing opens. The panel has a Resolution row at the top, a Recommended print settings heading with a Show Custom button, and the controls below. The X at the top right closes it. If the panel looks different, read the Cura interface tour. If the part is not on the plate yet, start with importing and positioning a model.
We used overhang-t.stl, a T shaped test part that measures 40.0 x 20.0 x 24.0 mm in the Object list. Its flat top overhangs the stem, so it is a good part for the support test later.
What are the Resolution profiles in Cura?
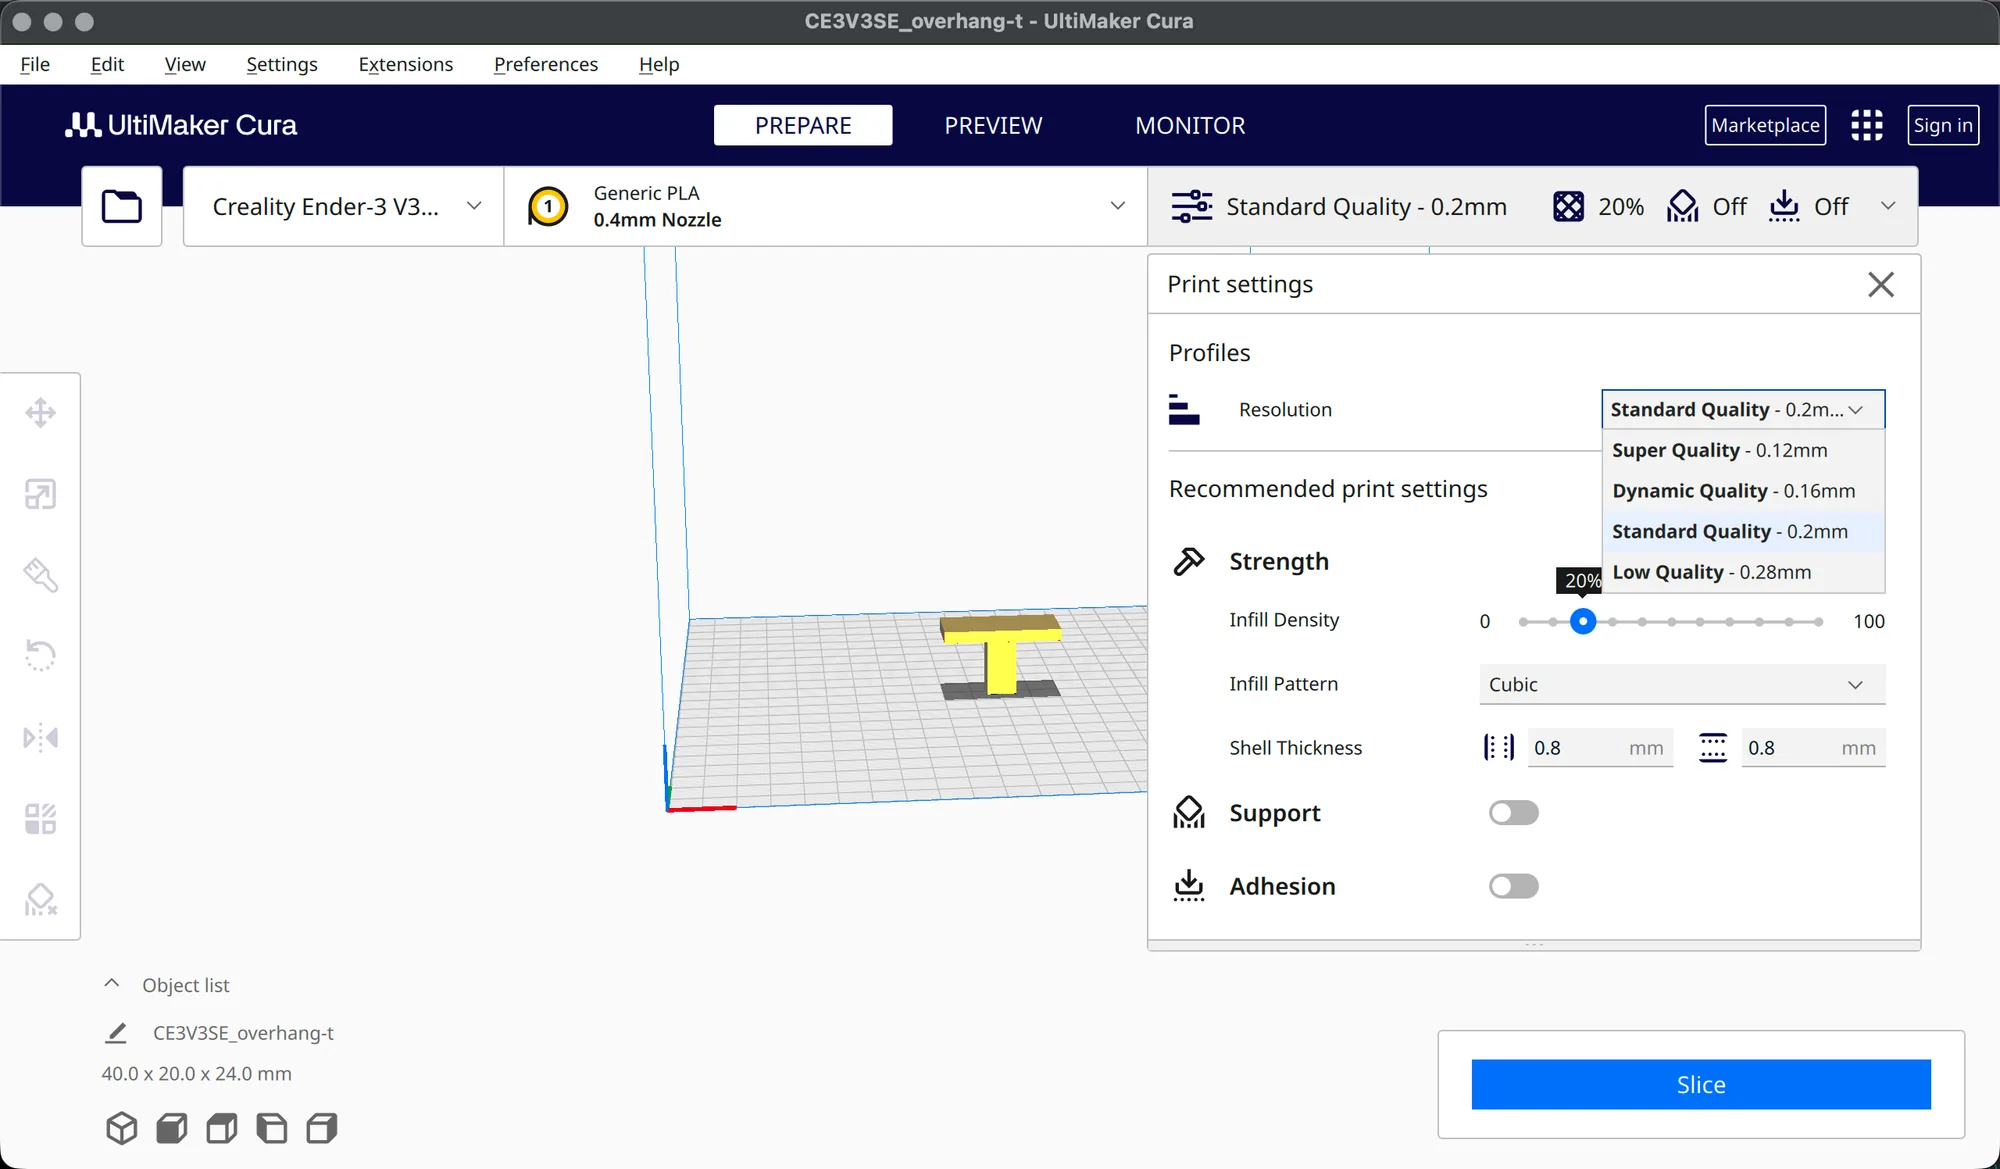
Click the Resolution drop-down. For our printer, material and 0.4 mm nozzle it listed four profiles, each showing a bold name and a layer height:
- Super Quality, 0.12mm
- Dynamic Quality, 0.16mm
- Standard Quality, 0.2mm (the one in use)
- Low Quality, 0.28mm
Another printer or material may list other profiles, so treat these as what Cura 5.13.0 showed for ours. Picking an entry changes the label in the top bar at once. The slicer result is cleared, so the blue Slice button comes back and you slice again. For what layer height does to a part, see layer height explained.
What do Infill Density and Infill Pattern do?
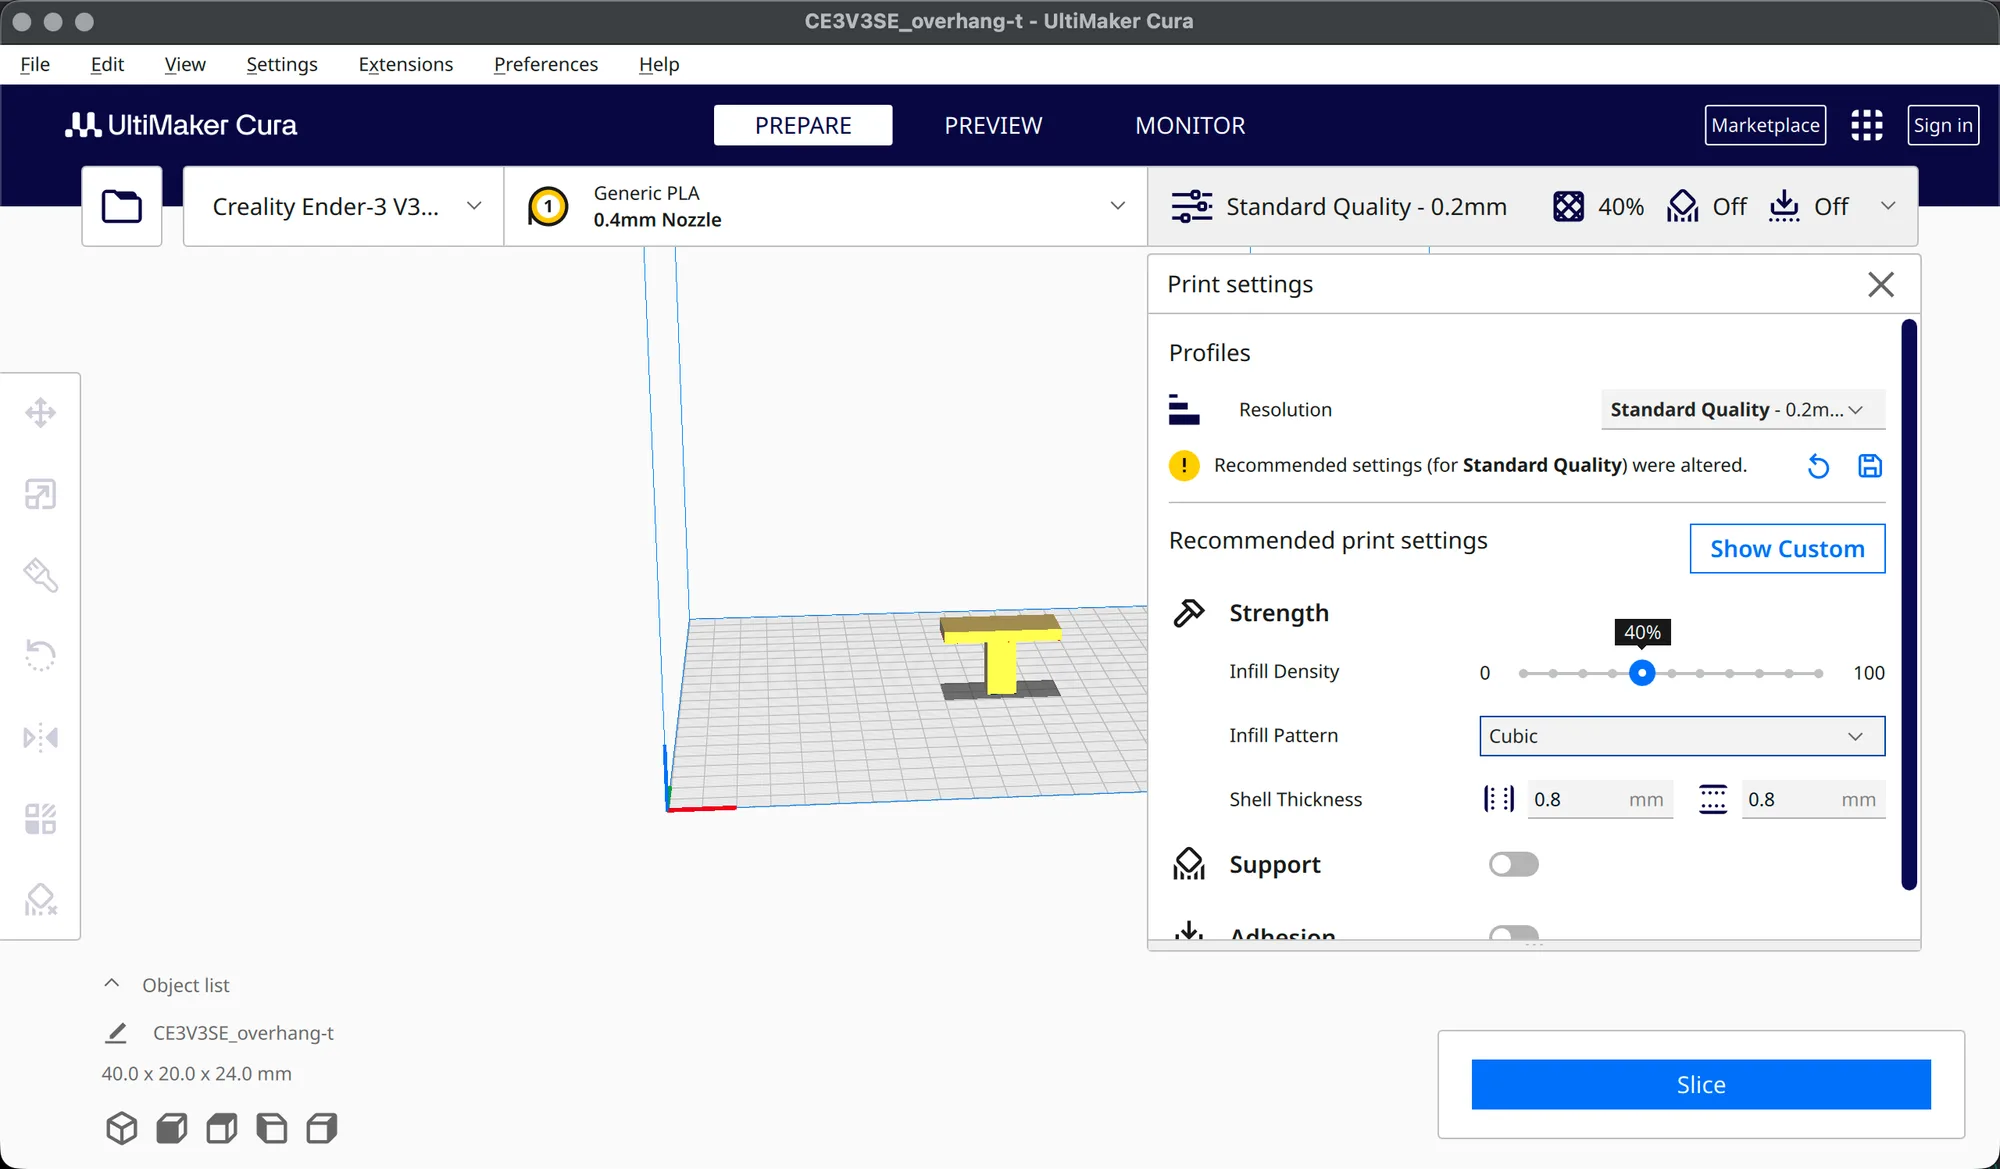
Infill Density is a slider from 0 to 100 with ticks every 10. A black label above the handle shows the current value. We clicked the 40 tick and the handle jumped to 40%, and the top bar icon changed to 40% too. Fill is the interior of the part, so density trades material and time against internal support. See infill explained for the theory.
Infill Pattern is a drop-down set to Cubic. It lists, in this order: Lines, Tri-Hexagon, Cubic Subdivision, Octet, Quarter Cubic, Concentric, Zig Zag, Cross, Cross 3D, Gyroid, Lightning, Honeycomb, Octagon, Grid, Cubic and Triangles. Hovering the label shows a tooltip that suggests Line, Zig Zag or Lightning for quick non-functional prints, Grid, Triangle or Tri-Hexagon for functional parts under little stress, and Honeycomb, Cubic and related patterns for strong 3D prints. We did not slice every pattern, so we make no claim about which is best.
What does Shell Thickness mean in Cura?
Shell Thickness shows two numeric fields in mm, both reading 0.8 for this profile. Hovering the label gave this tooltip: "Defines the thickness of your part side walls, roof and floor." The first field has an icon of vertical dotted lines and the second an icon of horizontal dotted lines, so they appear to be the side wall thickness and the top and bottom thickness, though the icons showed no tooltips of their own. We left both at 0.8. For the wall idea, read walls and perimeters explained.
How do Support and Adhesion work in the recommended panel?
Both are switches, not tick boxes. Support was off. Its tooltip reads "Generate structures to support parts of the model which have overhangs. Without these structures, these parts would collapse during printing." When we switched it on, two drop-downs appeared beneath it:
- Support Structure: Normal or Tree. The default was Normal.
- Placement: Touching Buildplate or Everywhere. The default was Everywhere.
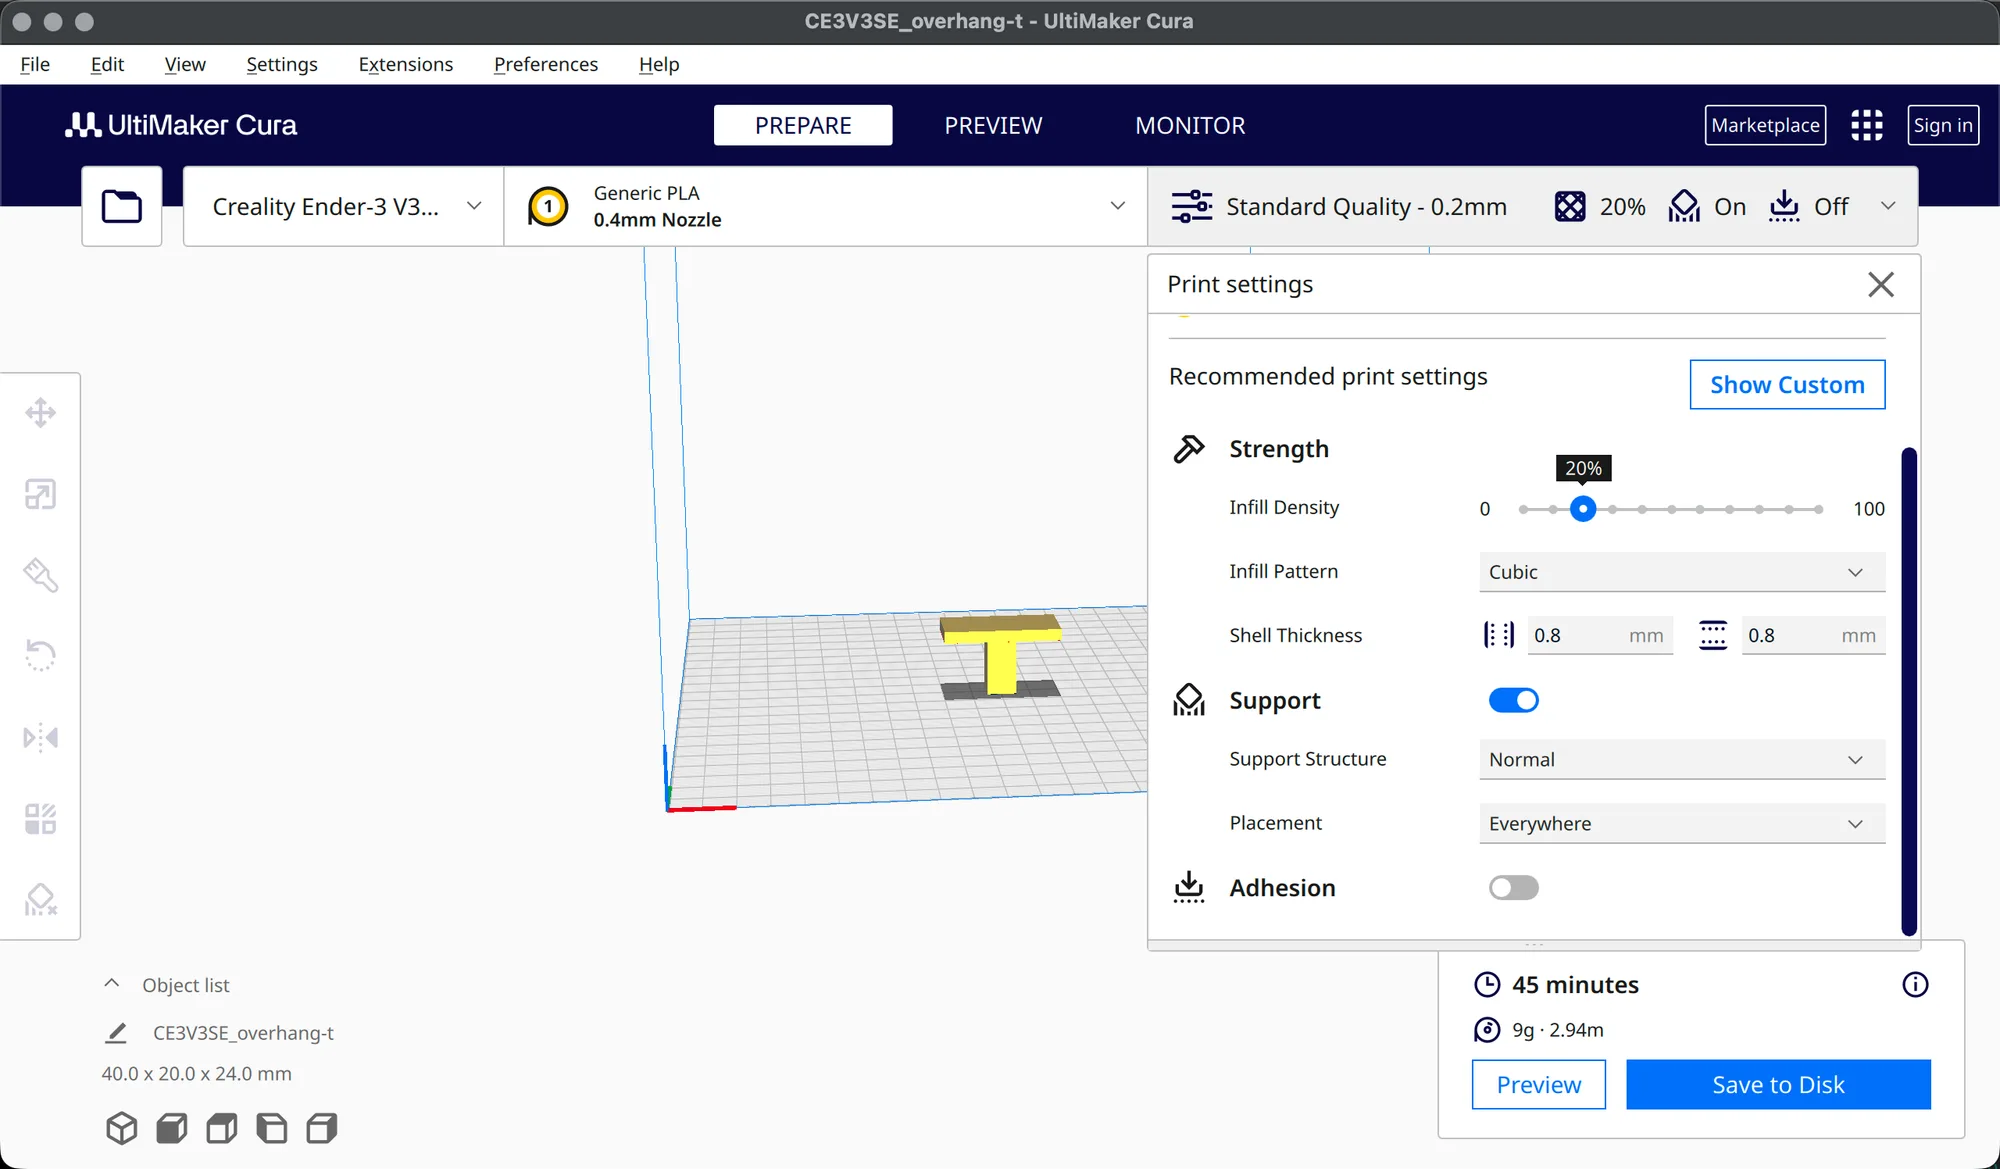
Adhesion was off too. Its tooltip says: "Enable printing a brim or raft. This will add a flat area around or under your object which is easy to cut off afterwards. Disabling it results in a skirt around object by default." Switching it on showed no extra drop-downs in this panel, so choosing between brim and raft is not possible here. That choice sits in the custom list. The theory is in supports explained and brim vs raft vs skirt. Long panels scroll, so use the mouse wheel inside the panel to reach Adhesion.
We found no Gradual infill control anywhere in the panel. If you need it, open the full list with Show Custom.
How does Cura show that you changed a recommended setting?
After we moved the infill slider, a yellow warning icon and a line appeared under Resolution: Recommended settings (for Standard Quality) were altered. Two icons sit at its right. Hovering them gave the tooltips Reset to defaults. and Compare and save. Clicking the reset icon put the slider back to 20% on our machine. The banner can linger a moment, and switching Adhesion or Support also triggers it. We did not use Compare and save, which is meant for keeping your own profile. We turn everything back to the profile values after each test.
How much do these settings change the slicer estimate?
We sliced the same part with the printer, PLA and nozzle unchanged, and read Cura's estimate in the bottom right. These are slicer figures only, with no print behind them, and the part is tiny, so differences are small. Unless stated, infill was 20%, Cubic, with Support and Adhesion off.
| Setting | Slicer time | Material |
|---|---|---|
| Super Quality 0.12mm | 48 minutes | 4 g, 1.30 m |
| Dynamic Quality 0.16mm | 31 minutes | 4 g, 1.47 m |
| Standard Quality 0.2mm | 29 minutes | 4 g, 1.18 m |
| Low Quality 0.28mm | 22 minutes | 4 g, 1.37 m |
| Standard 0.2mm, infill 40% | 30 minutes | 4 g, 1.43 m |
| Standard 0.2mm, Support on (Normal, Everywhere) | 45 minutes | 9 g, 2.94 m |
The time ordering follows layer height as you would expect. The length column does not follow it neatly, and Dynamic showed more filament length than Standard, which we cannot explain from the panel alone. The weight is rounded to whole grams. Doubling infill from 20% to 40% added only one minute on this part because most of it is walls, while switching Support on nearly doubled both time and material.
When you finish, return to Standard Quality 0.2mm, 20% and Support Off. Next in the course is Cura custom settings (cura-custom-settings), which is not published yet.
Next lesson: Cura Custom Settings: Show Custom, Search and Visibility.