The Orca Slicer calibration menu tests are built in models for temperature, flow, pressure advance, retraction and more. This lesson, tested in OrcaSlicer 2.4.2 on macOS, lists every entry, reads the fields in several dialogs, and shows what generating one test does to your plate. We did not print any of them.
Where is the Calibration menu in OrcaSlicer?
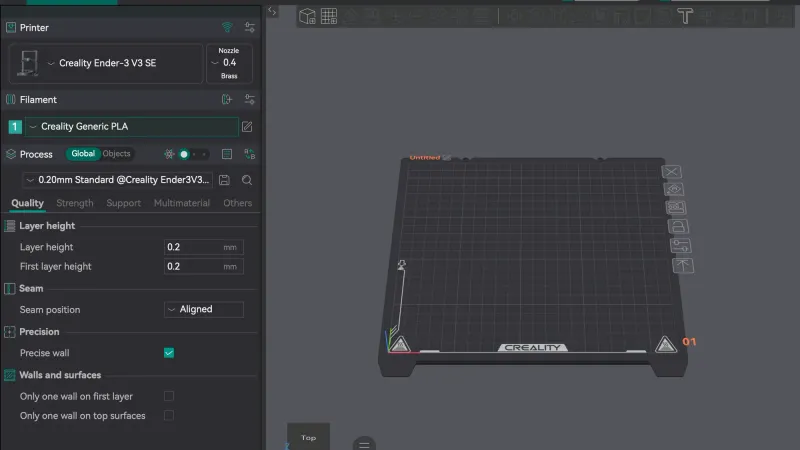
It is in the macOS menu bar at the top of the screen, not inside the OrcaSlicer window. The menu bar reads Apple, OrcaSlicer, File, Edit, View, Calibration, Window and Help, so Calibration sits between View and Window. We started on the Prepare tab in Simple mode with the Creality Ender-3 V3 SE, Creality Generic PLA and the 0.20mm Standard process preset. The overhang-t test part from our previous lesson on Preview was still on the plate.
The menu has nine entries in this build, in this order:
- Temperature
- Max flowrate
- Pressure advance
- Flow ratio
- Retraction
- Cornering
- Input Shaping, which has a sub menu with Input Shaping Frequency and Input Shaping Damping/zeta factor
- VFA
- Calibration Guide
Flow ratio has no sub menu here. Its choices live inside its dialog, covered below. We did not open Calibration Guide, so we cannot say what it shows. Every test dialog we opened also has a Wiki Guide link and an OK button, and we did not follow the links. For the bigger picture of why you calibrate and in what order, read our Orca Slicer calibration guide.
What does each calibration dialog ask for?
We opened every entry except Calibration Guide and read the fields. All of them follow the same idea: you give a range, and OrcaSlicer builds a model that sweeps through it. The values below are what each dialog showed on our setup, so yours may differ with another printer profile. They are the software defaults and not recommendations.
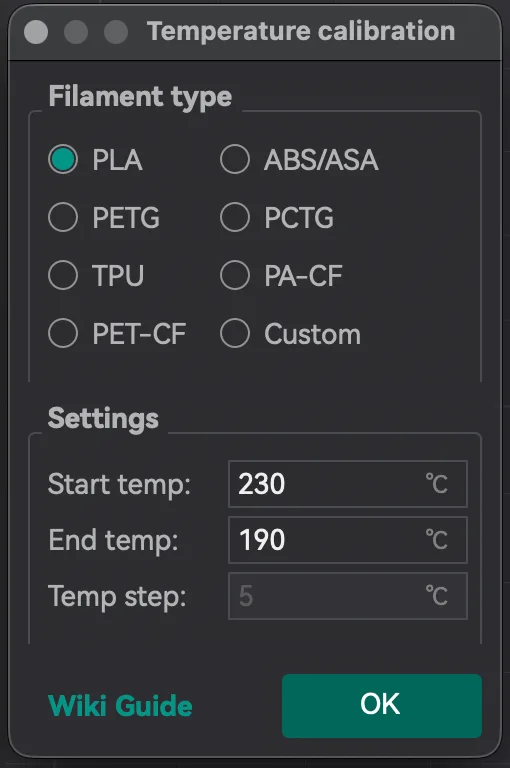
Temperature opens a dialog titled Temperature calibration. A Filament type group has eight radio buttons: PLA, ABS/ASA, PETG, PCTG, TPU, PA-CF, PET-CF and Custom. PLA was selected, with Start temp 230, End temp 190 and a Temp step of 5, which was greyed out. Choosing ABS/ASA changed the range to 270 and 230. When we tried Custom it showed 320 and 280. The step stayed greyed at 5 in each case we tried.
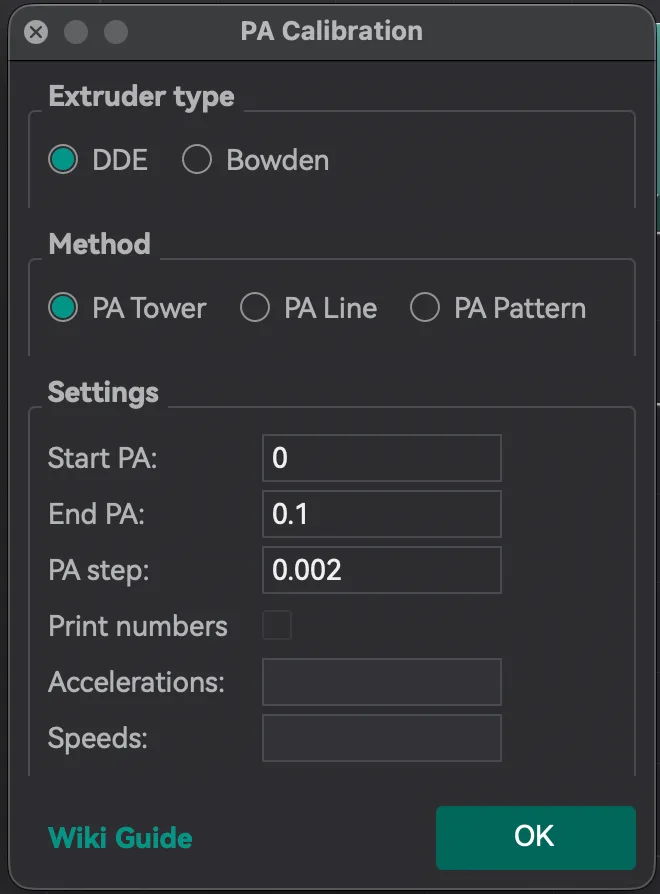
Pressure advance opens PA Calibration. It has an Extruder type choice (DDE or Bowden), a Method choice (PA Tower, PA Line or PA Pattern), and Settings. With DDE and PA Tower we read Start PA 0, End PA 0.1 and PA step 0.002. PA Pattern showed 0, 0.08 and 0.005 with Print numbers ticked, and PA Line went back to 0, 0.1 and 0.002 with Print numbers ticked. Switching to Bowden with PA Line changed the range to 0, 1 and 0.02. Accelerations and Speeds were blank. Our pressure advance explainer covers what the number means.
Flow ratio opens Flow Ratio Calibration, with a Calibration Test Type group: Pass 1 (Coarse), Pass 2 (Fine), YOLO (Recommended) and YOLO (Perfectionist). YOLO (Recommended) was selected. A Top Surface Pattern drop down read Archimedean Chords.
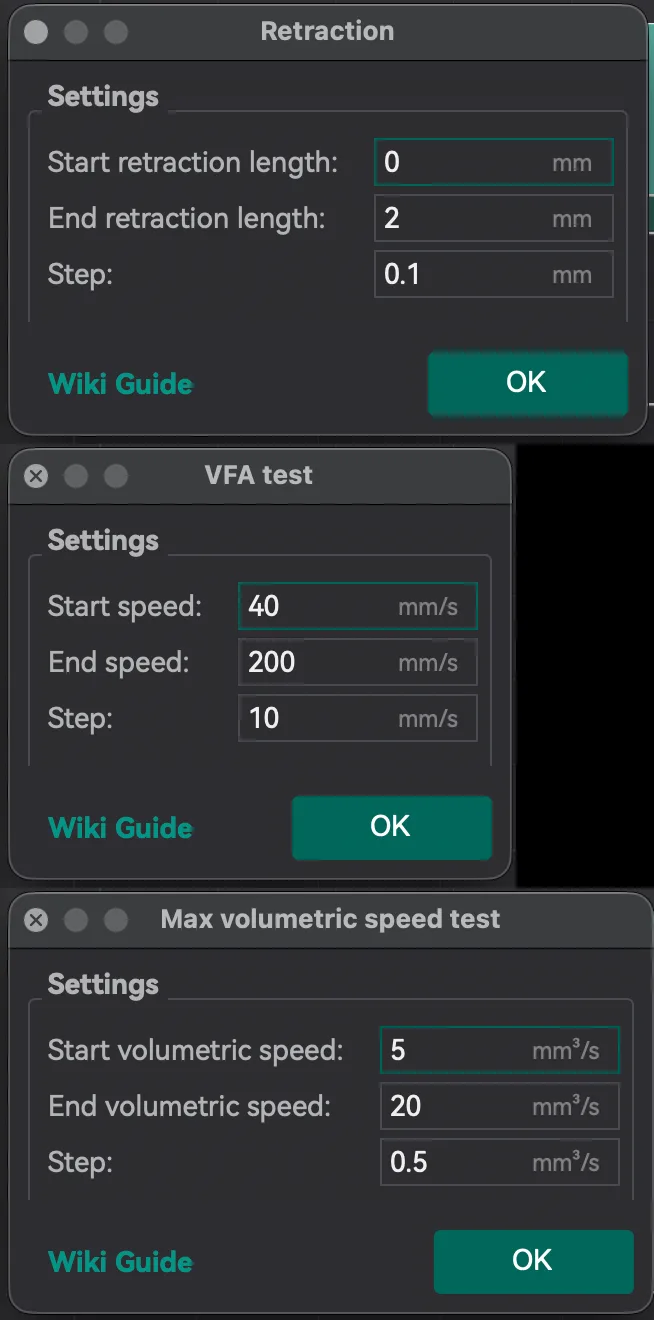
The simpler ones are one range each. Max flowrate opens a dialog titled Max volumetric speed test with Start 5, End 20 and Step 0.5, all in mm3/s. Retraction opens Retraction with Start retraction length 0 mm, End retraction length 2 mm and Step 0.1 mm. VFA opens VFA test with Start speed 40, End speed 200 and Step 10, all in mm/s. See retraction settings explained for what retraction length does.
Cornering opens Cornering test. Its Test model group offers Ringing Tower, Fast Tower and SCV-V2, with Start 0.000 and End 0.250 mm. A note says lower values give sharper corners but slower speeds, and another says Marlin 2 Junction Deviation was detected and that to test Classic Jerk you set Maximum Junction Deviation in Motion ability to 0.
Input Shaping Frequency opens Input shaping Frequency test with a Ringing Tower or Fast Tower model, an Input shaper type of ZV with the note "Marlin version => 2.1.2, Fixed-Time motion not yet implemented", X and Y Start and End of 15 and 110 Hz, and a Damp value of 0.150. A note recommends setting Damp to 0, which uses the printer's default or saved value. Input Shaping Damping/zeta factor opens an Input shaping Damp test with Frequency X and Y both 30 Hz and Damp Start and End of 0.000 and 0.400, with a note to use previously calculated frequencies. Our input shaping explainer covers the theory.
What happens when you click OK on a test?
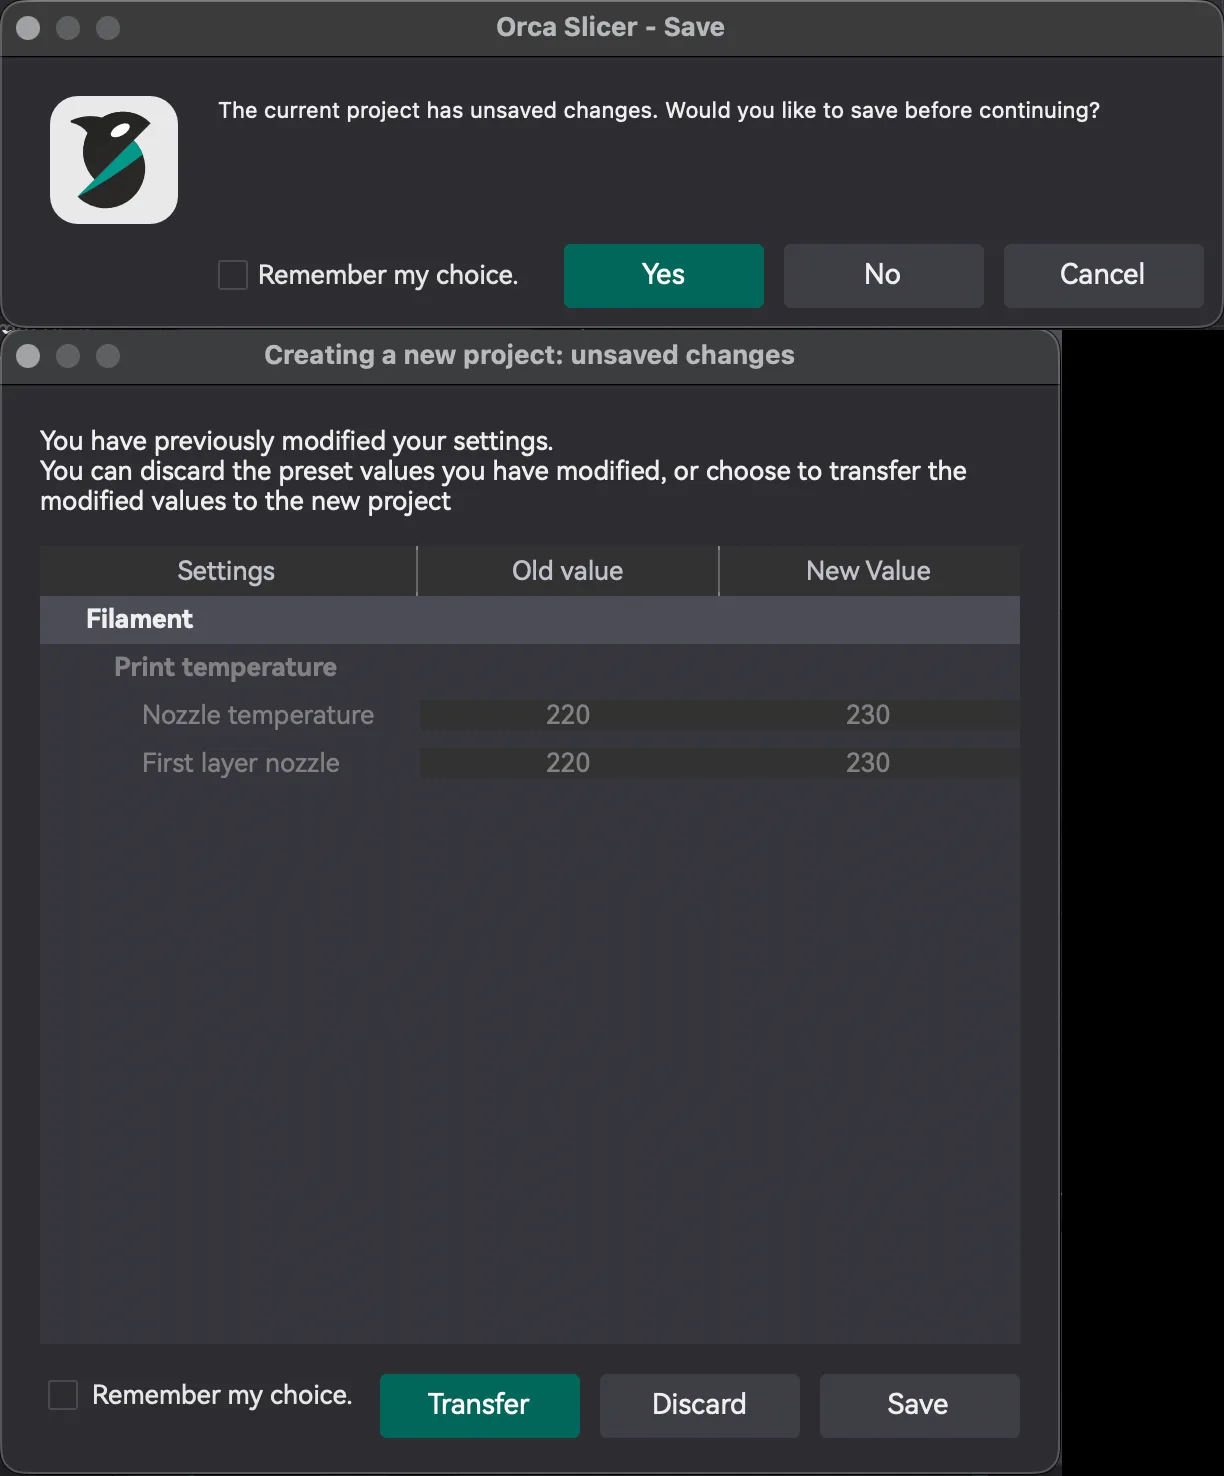
We used the Temperature entry. With PLA selected and the defaults untouched, we clicked OK. OrcaSlicer did not just add a model next to our part. It first asked a question: "The current project has unsaved changes. Would you like to save before continuing?" with Yes, No and Cancel buttons and a Remember my choice box. Our project was marked modified, so it asked. We clicked No, because we did not want to keep it.
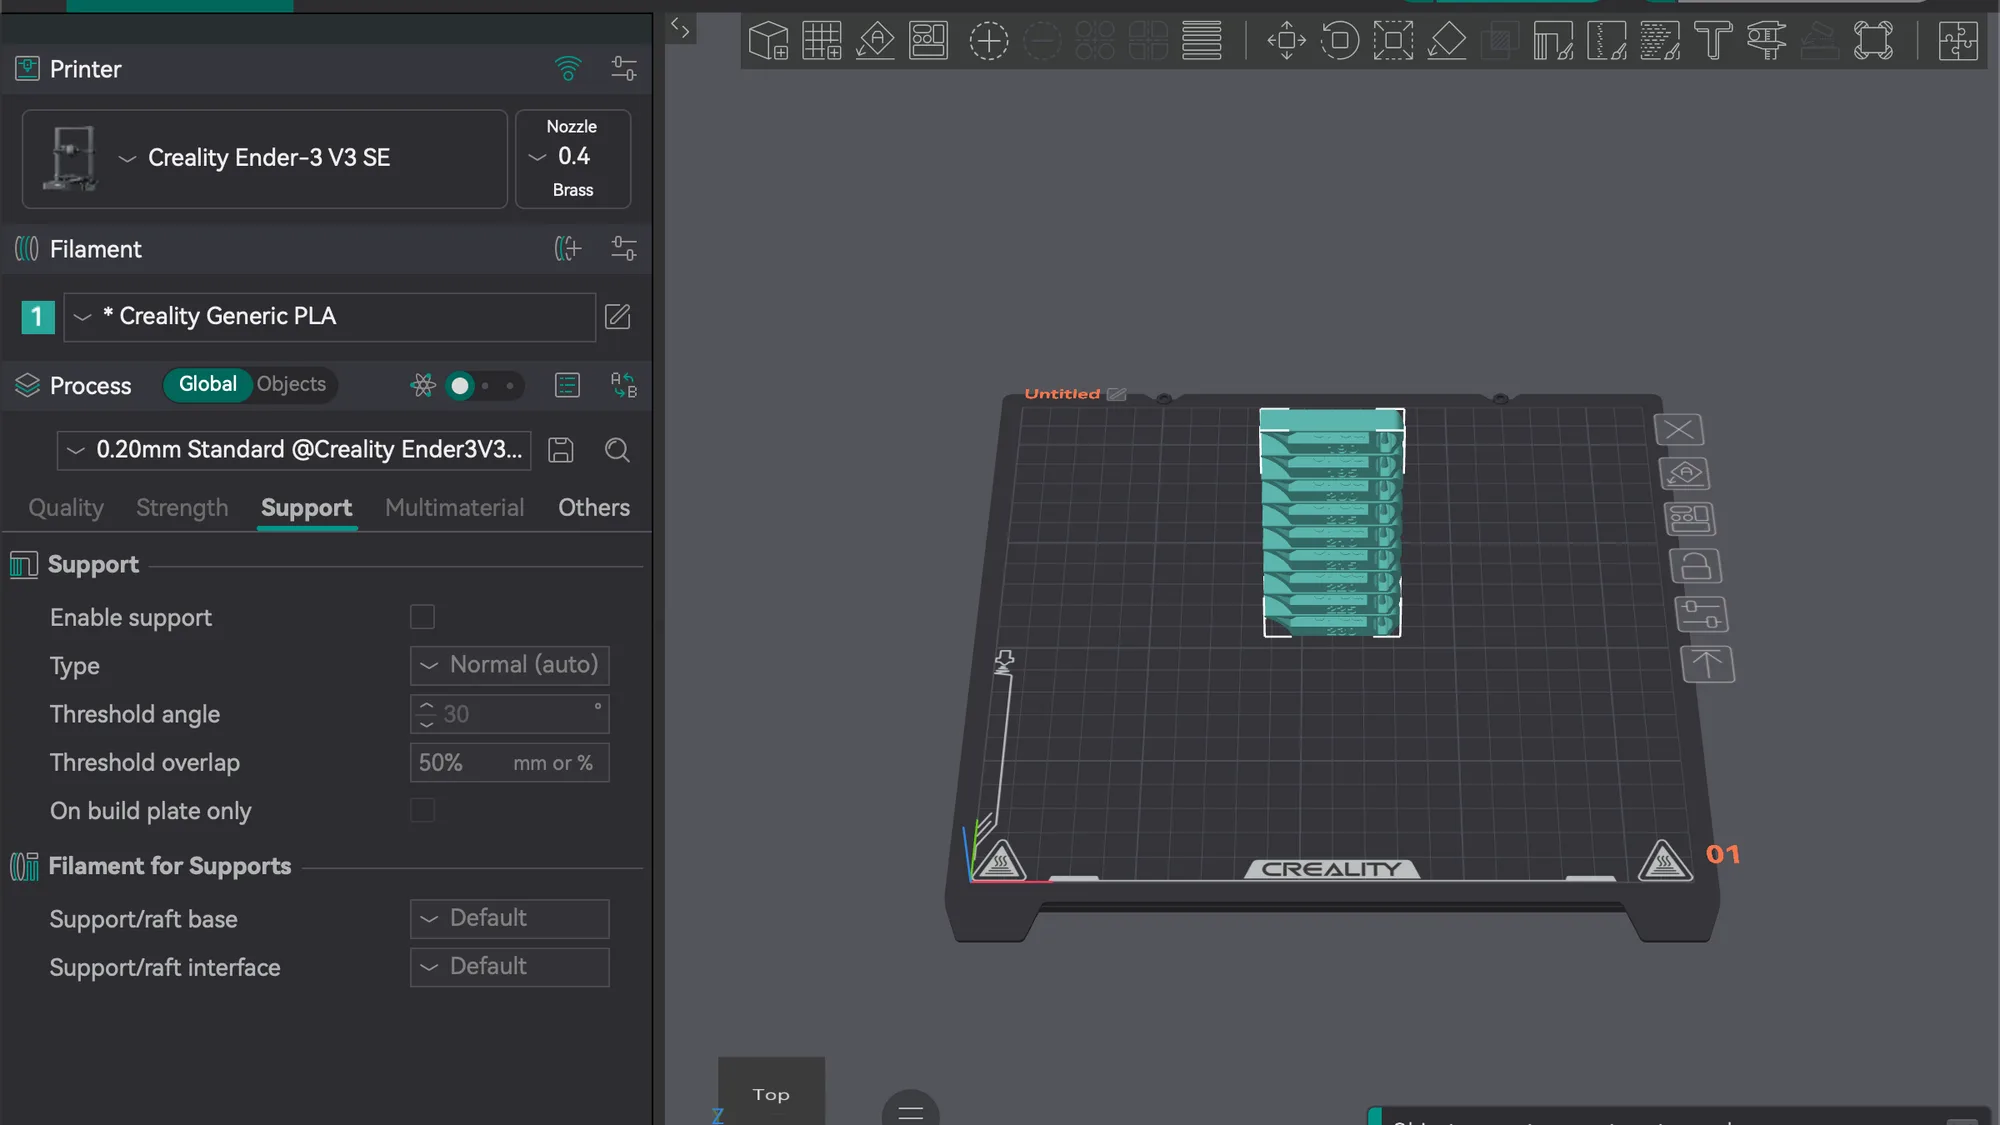
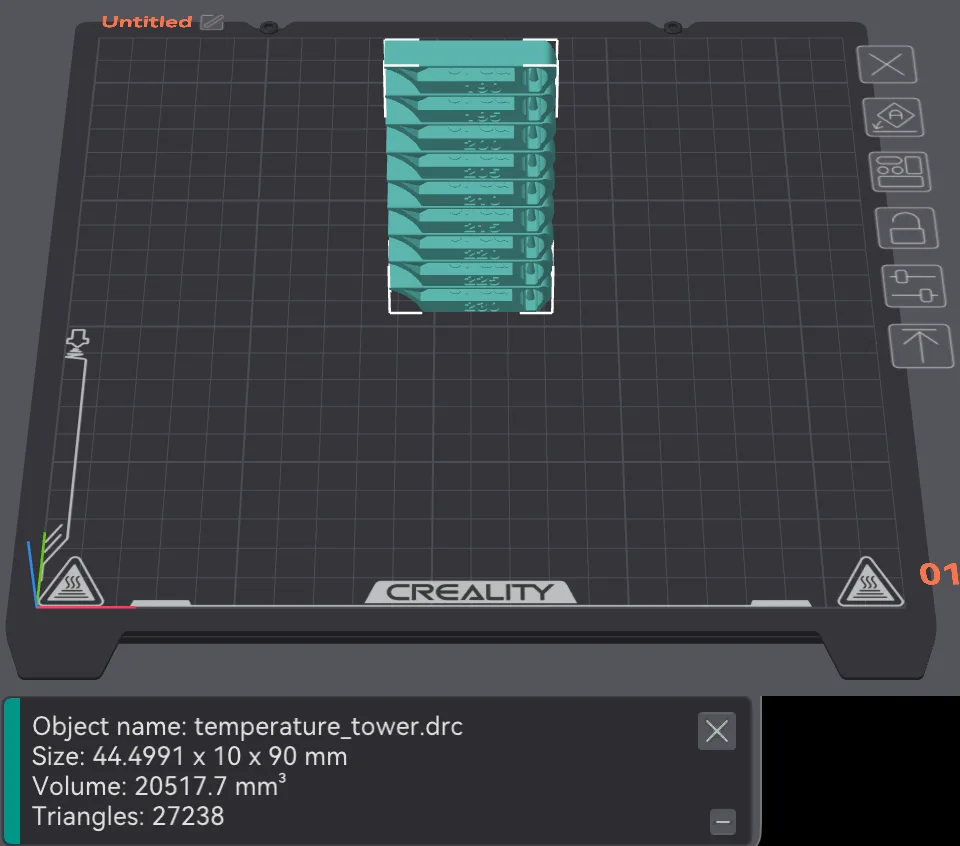
The window title then changed to *Nozzle temperature test. The plate no longer held overhang-t. It held one object, temperature_tower.drc, with size 44.4991 x 10 x 90 mm, volume 20517.7 mm3 and 27238 triangles. The tower is a stack of blocks, and the numbers embossed on them ran from 230 at the bottom to 190 near the top in our screenshot. That matches the 230 to 190 range in 5 degree steps, which is nine blocks. So in our test the calibration tool replaced the project rather than adding to it.
Does a calibration test change your settings?
It changed one thing we could see. The filament name in the sidebar gained an asterisk and read * Creality Generic PLA. The process preset name, 0.20mm Standard, did not change. When we opened the filament editor, Print temperature showed Nozzle First layer 230 and Other layers 230, both in orange with reset arrows. We did not record the preset's original value at that moment, but when we later started a new project OrcaSlicer listed the change for us: Nozzle temperature 220 to 230 and First layer nozzle 220 to 230.
That second prompt is worth knowing about. Pressing Cmd+N for a new project opened the same Save question, and after we chose No a dialog titled Creating a new project: unsaved changes appeared. It said we had modified preset values and offered Transfer, Discard and Save. We clicked Discard so the 230 did not carry over. If you generate a tower and then want to slice normal parts, check the filament temperatures first, because they may be left at the test values.
All of this is about what the software generates. These tests only mean something once printed and measured, and we did not print. The next lesson, orca-slicer-save-and-export, covers saving projects and exporting G-code.
Next lesson: Orca Slicer Export Gcode: Save Projects and Files.