3D Printer First Layer Problems: Causes and Fixes
Most failed prints are decided in the first two minutes. Here is how to read what the first layer is telling you, the order to fix things in, and the test that shows when it is right.
By Sepehr Sabbagh-pour · Published · Updated · 6 min read
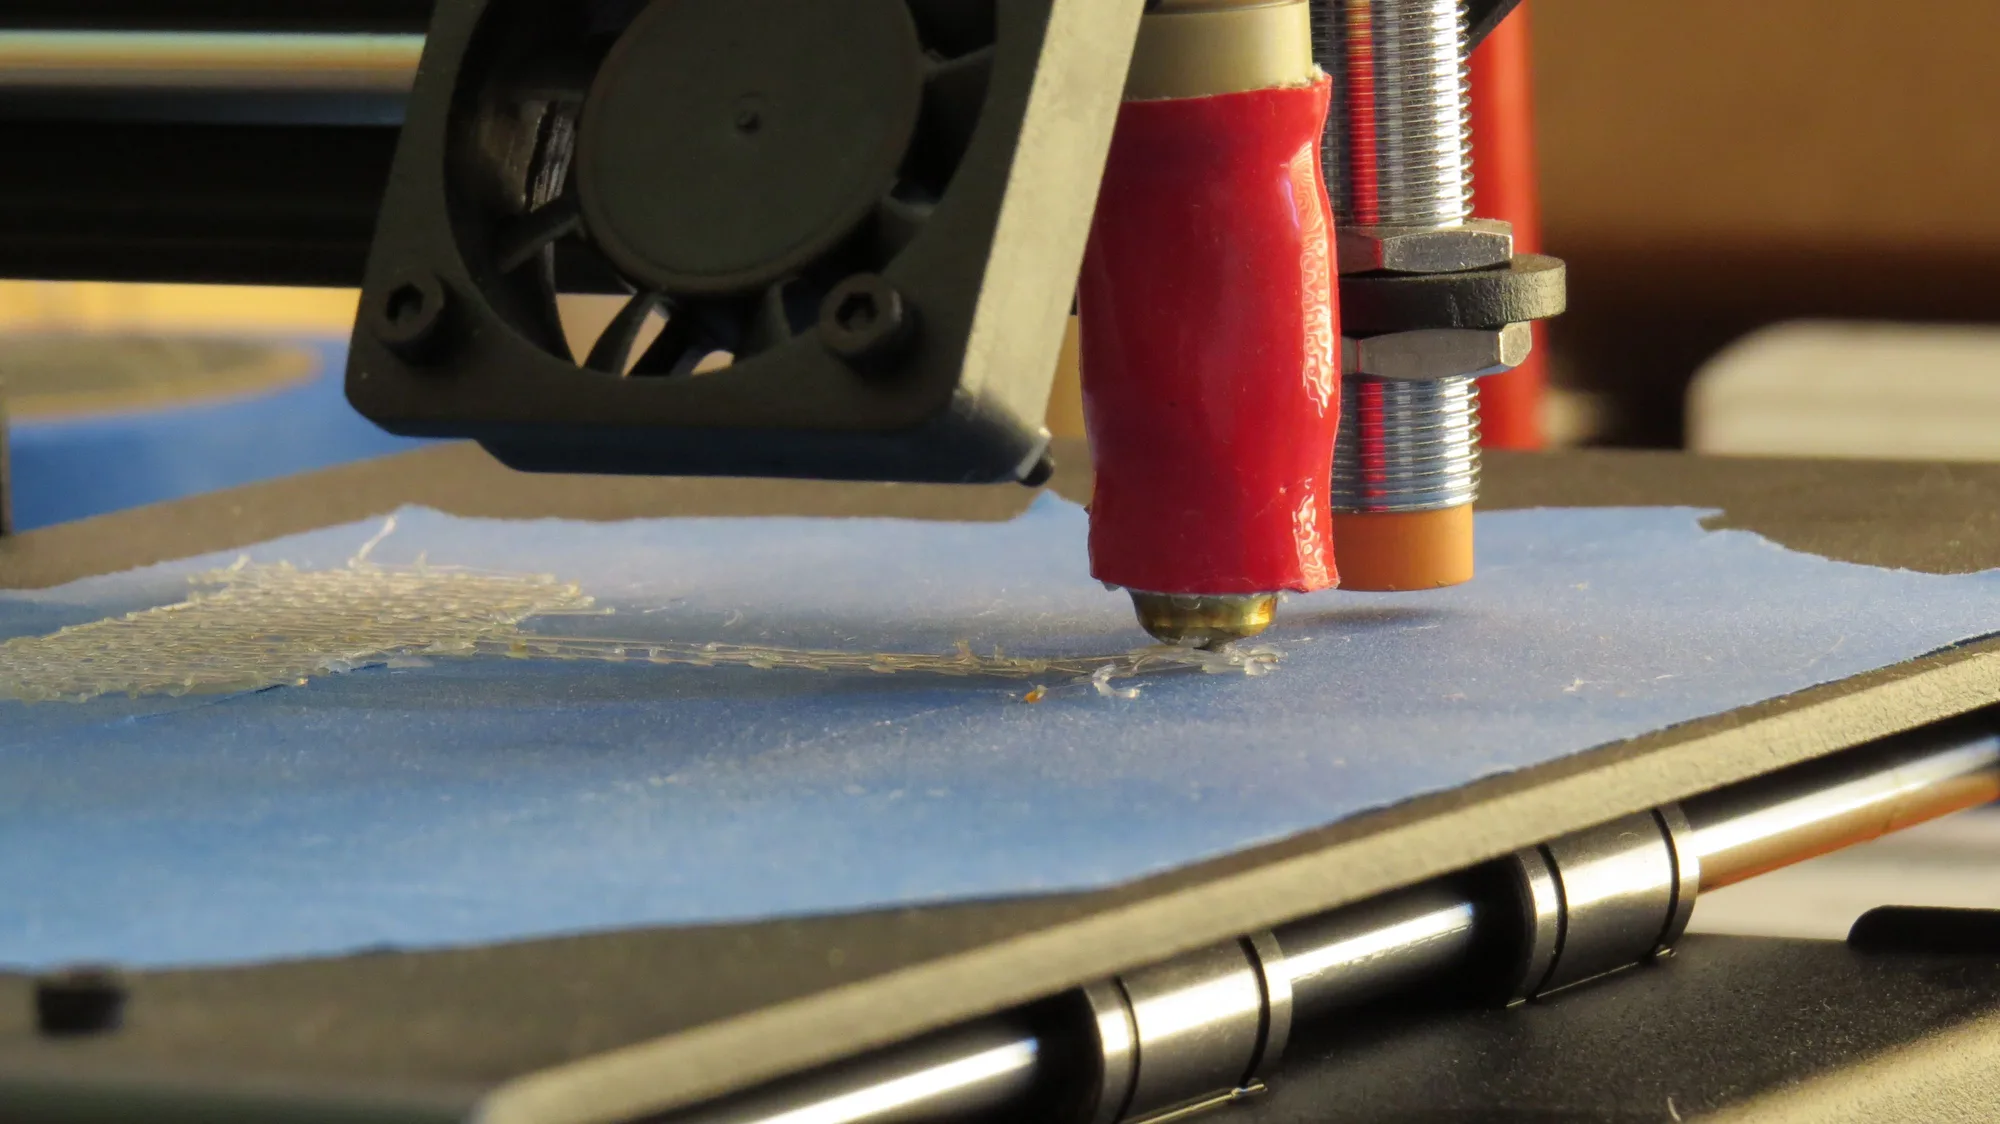
3D printer first layer problems come from a few causes: a dirty plate, a nozzle too close or too far from the bed, uneven leveling, the wrong temperature or speed, and wet filament. Check them in that order, and judge each change with a one-layer test print.
What does a bad first layer look like?
The pattern of the first layer points to the cause, so read it before you change anything. Look at the layer from above and from the side, across the whole bed, not only at one corner.
| What you see | Likely cause | Try first | Source |
|---|---|---|---|
| Gaps between lines, thin or wavy strands | Nozzle too high | Lower the Z offset slightly | Prusa, Bambu Lab |
| Ridges between lines, smeared or translucent plastic, curling edges | Nozzle too low | Raise the Z offset slightly | Prusa, Bambu Lab |
| Smooth in some areas, rough or incomplete in others | Uneven bed or leveling not run | Run automatic bed leveling with a clean nozzle | Bambu Lab |
| Curling, dragging and poor adhesion in patches | Dirty or oily plate | Wash the plate | Bambu Lab |
| Rough or bubbly surface, stringing | Wet filament | Dry the spool | Prusa, Bambu Lab |
| Thick, uneven lines and blobs | Over-extrusion or a loose hotend part | Check flow and hotend screws | Bambu Lab |
| No plastic for the first layer or two | Nozzle too close, or a partial clog | Raise the Z offset, check the nozzle | Prusa |
How do you test a first layer?
Print a flat, single-layer test so you can judge the whole bed at once. Bambu Lab's wiki suggests a cube scaled to fit the bed and made 0.2 mm thick, so the printer goes over the first layer only once. A good result is smooth, even lines with no gaps and no overlapping or squished filament, corners and edges that stay flat, and plastic that sticks across the entire bed.
Prusa's first layer calibration prints a zig-zag test and tells you to look at the square at the end of the line. A correct adjustment shows an even surface with no gaps between lines and no ridges. Prusa also says to check visually when you adjust the height, not by a set value, because the right number differs between printers and sheets.
1. Clean the build plate
A dirty plate is the cheapest cause to rule out. Prusa says 90% or higher isopropyl alcohol (IPA) is the best option for cleaning its sheets, that dish soap and warm water work when IPA does not remove residue, and that you should dry the sheet well afterwards. It warns against lower-percentage or cosmetic alcohol, and says acetone is only for smooth PEI about once a month and never for textured or satin sheets. Bambu Lab recommends washing the plate with warm water and detergent and avoiding touching the surface with bare hands. See 3D printer build plates for sheet types.
2. Check the nozzle and run bed leveling
Make sure the nozzle is clean and the hotend is tight, then level the bed. Bambu Lab says even a small blockage can disrupt flow, and that running its automatic calibration adjusts bed leveling, vibration compensation and nozzle height. Prusa lists a partial or full clog, an uneven or bent sheet and debris under the sheet among the causes of first layer trouble. Keep the bed leveling option switched on when you start a print, as Bambu Lab strongly recommends.
The detailed steps are in how to level a 3D printer bed and auto bed leveling explained. If the nozzle is partly blocked, follow how to clean a 3D printer nozzle.
3. Set the Z offset by eye
Z offset is the setting that most often decides the first layer. Prusa describes the goal as plastic that sticks to the bed and looks slightly flattened, not squished, and says the value depends on your sheet because each type has a different thickness, so each needs its own calibration. It warns against compensating for poor adhesion by lowering the offset to squish the layer, because a nozzle set too low can damage the steel sheet.
Bambu Lab's example of a G-code offset moves in 0.01 mm steps, and it calls that a temporary fix that can create new local defects, so run bed leveling first. Do not copy a number from someone else. If the lines look squashed, see how to fix a nozzle that is too close to the bed.
4. Match the plate type and temperatures
Tell the slicer which plate you are using, and start from the recommended temperatures. Bambu Lab says the same material prints at different bed temperatures on different plates, so the wrong plate type can leave the bed too cool. On a textured PEI plate the printer also lowers the nozzle by 0.04 mm after leveling, so choosing another plate type leaves the nozzle too high. Prusa says to use the recommended nozzle and bed temperatures and, for a material that does not adhere, raise the bed by 5 to 10 °C.
Recommended temperatures vary: Prusa lists a 60 °C bed for PLA and 85 to 90 °C for PETG, while Bambu Lab's beginner guide lists 35 to 55 °C for PLA. Use the range on your spool and your slicer's preset.
5. Slow down the first layer
A slower first layer gives the plastic time to bond. Prusa suggests about 75% speed for the first three layers, then back to normal. Bambu Lab gives an example of 30 mm/s for the outer wall and 60 mm/s for infill. Prusa's profiles use a 0.20 mm first layer height, and it warns that changing the first layer height will most likely mean recalibrating the first layer, so leave it alone unless you have a reason.
6. Rule out wet filament
Dry filament before you blame the printer if the first layer is rough or bubbly. Bambu Lab says moisture in the filament can cause uneven extrusion because the absorbed water turns to steam inside the hotend. Follow how to dry filament and keep spools sealed afterwards.
7. Add a brim or glue stick only if you still need one
Add adhesion aids last, once the plate, height and temperature are right. Prusa says a brim increases first layer contact area, and that a basic PVA glue stick is optional for PLA but recommended for PETG, nylon, PC, ABS, ASA and flexible materials. PETG is an exception on smooth PEI: Prusa says it can bond too strongly there and recommends a separating agent such as glue stick. Bambu Lab recommends its glue for non-PLA materials on a smooth PEI plate. See brim vs raft vs skirt.
When is a first layer good enough?
When the lines are even, flat and bonded, with no gaps or ridges. Bambu Lab says minor unevenness usually does not affect the final part, and that small flaws on a mostly flat layer will not noticeably change the result as long as adhesion and layer bonding hold. Serious problems, such as a nozzle scraping the bed or lines too sparse to stick, can ruin a print, so fix those first and stop polishing the rest.
What if the first layer looks fine but the print comes off later?
That points to warping or weak adhesion, not the first layer itself. Prusa says warping comes from a sudden temperature difference between the melting plastic and the air around the print, that ABS, ASA and PC Blend are the most prone, and that an open window or an air conditioning unit nearby makes it worse. Cleaning the bed with 90% IPA, adding a brim and slowing down all help. See why 3D prints do not stick to the bed and how to fix warping. If the bottom edge flares outward instead, read how to fix elephant's foot.
The one-layer test. Print a single flat layer across the bed after every change. Change one thing, print, compare, repeat. This guide is compiled from maker documentation and has not been checked on a test printer, so treat every number as a starting point.
Frequently asked questions
What should I clean the build plate with?
It depends on the sheet, so check your maker's guidance. Prusa says 90% or higher isopropyl alcohol is the best option for its sheets and warns against lower percentages or cosmetic alcohol, which may leave oils. It says dish soap and warm water, not hot, work when IPA does not remove residue, with the sheet dried well afterwards. Acetone is only for smooth PEI, about once a month, and never for textured or satin sheets. Bambu Lab recommends washing the plate with warm water and detergent and avoiding touching the surface with bare hands afterwards. Keep fingers off the printing surface once it is clean, because skin oil spoils adhesion.
How high should the nozzle sit above the bed, and how can I tell if it is wrong?
There is no universal number, because it depends on the printer, sheet and nozzle. Prusa says a single layer is about 0.2 mm and to check visually when adjusting the height rather than by a set value. A correct adjustment shows an even surface with no gaps between lines and no ridges. Gaps between the lines mean the nozzle is too high. Ridges between lines, edges that curl up, or plastic spread so thin it looks translucent mean the nozzle is too low, which Prusa warns can damage the steel sheet. Adjust in small steps while a one-layer test prints, and repeat the test after changing sheets.
Why does my first layer look fine but the print comes off later?
Borderline adhesion can hold at first and fail as the part cools and shrinks. Prusa says warping comes from a sudden temperature difference between the melting plastic and the surrounding air, that materials such as ABS, ASA and PC Blend are most prone, and that an open window or an air conditioning unit near the printer increases the chance of warps. Clean the plate with 90% IPA, check that the plate type in the slicer matches the sheet, add a brim and consider a slower print speed. Prusa also suggests a thin layer of glue stick on a cold sheet to help adhesion. Keep drafts away from the printer.
Do I always need a brim?
No. A brim is an aid, not a requirement. Prusa says a brim increases the first layer contact area and recommends enabling it before you reach for adhesives, so it helps where a part has little contact with the plate or tends to lift, such as warp-prone ABS, ASA or PC Blend, at the cost of a little clean-up. If a part already sticks well on a clean sheet, you can leave it off. A PVA glue stick is optional for PLA and recommended by Prusa for PETG, nylon, PC, ABS, ASA and flexible materials, with PETG on smooth PEI the exception where it works as a release agent. Add each aid only when the plate, height and temperature are already right.
Sources
- First layer issues, Prusa Knowledge Base
- First Layer Calibration (i3), Prusa Knowledge Base
- Warping, Prusa Knowledge Base
- Layers and perimeters, Prusa Knowledge Base
- PLA material guide, Prusa Knowledge Base
- PETG material guide, Prusa Knowledge Base
- Identify and Fix First Layer Issues With a Simple Test Print, Bambu Lab Wiki
- First Layer Not Sticking: Causes and Solutions, Bambu Lab Wiki
- First Layer Print Quality Improvement Guide, Bambu Lab Wiki
- Filament guide for beginners, Bambu Lab Wiki

Founder and editor
Software engineer since 2009 and Head of Engineering by day, a maker who has owned several 3D printers, writing practical guides to 3D printers, filament and running costs, with every article saying what was and was not tested.
Drafted with AI assistance, then edited and reviewed by Sepehr before it goes live. How we use AI.
Keep reading
 AI illustration
3D Printer Problems and Fixes: A Troubleshooting Guide
A symptom-first guide to common 3D printer problems: what causes them and what to try first, based on manufacturer…
 AI illustration
Layer Height Explained: Speed vs Detail
Layer height sets how thick each printed layer is. It trades speed against vertical detail, and it is limited by your nozzle…
 AI illustration
How to Fix Z Banding and Layer Lines
Z banding is a repeating pattern of horizontal ridges. This research-based guide separates it from look-alike layer lines and…